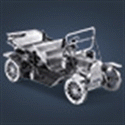
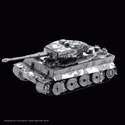
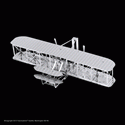
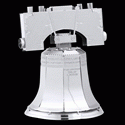
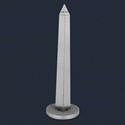
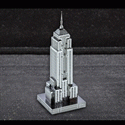
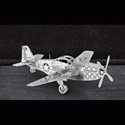
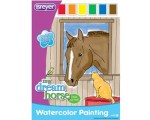
We’ve just received our first shipment of these cool 3D Metal Model Kits. They’re a cross between a 3D Puzzle and a Sculpture kit. There are a lot of different styles to choose from. Click here to see our collection!


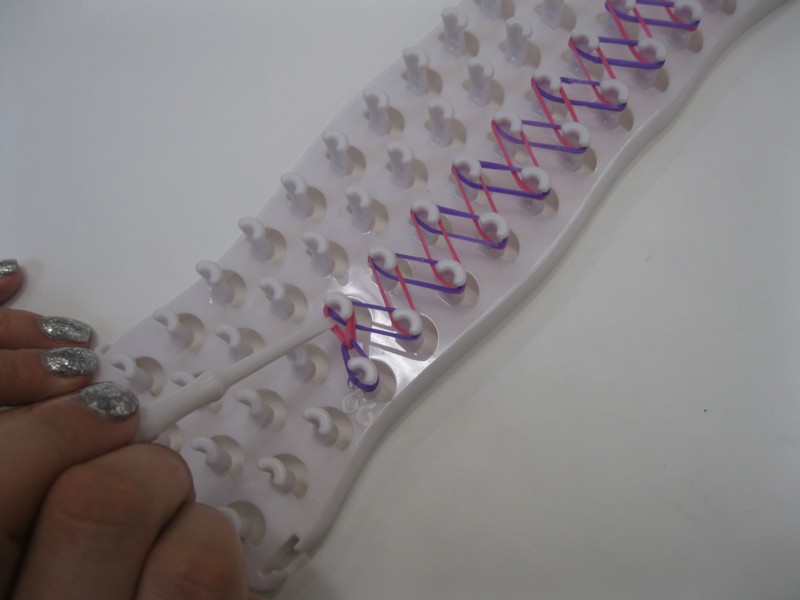
We’ve all been bitten by the rubber band bracelet bug here at Dan’s! I’ve found a few different variations on the single bracelet pattern I’d like to share with you!
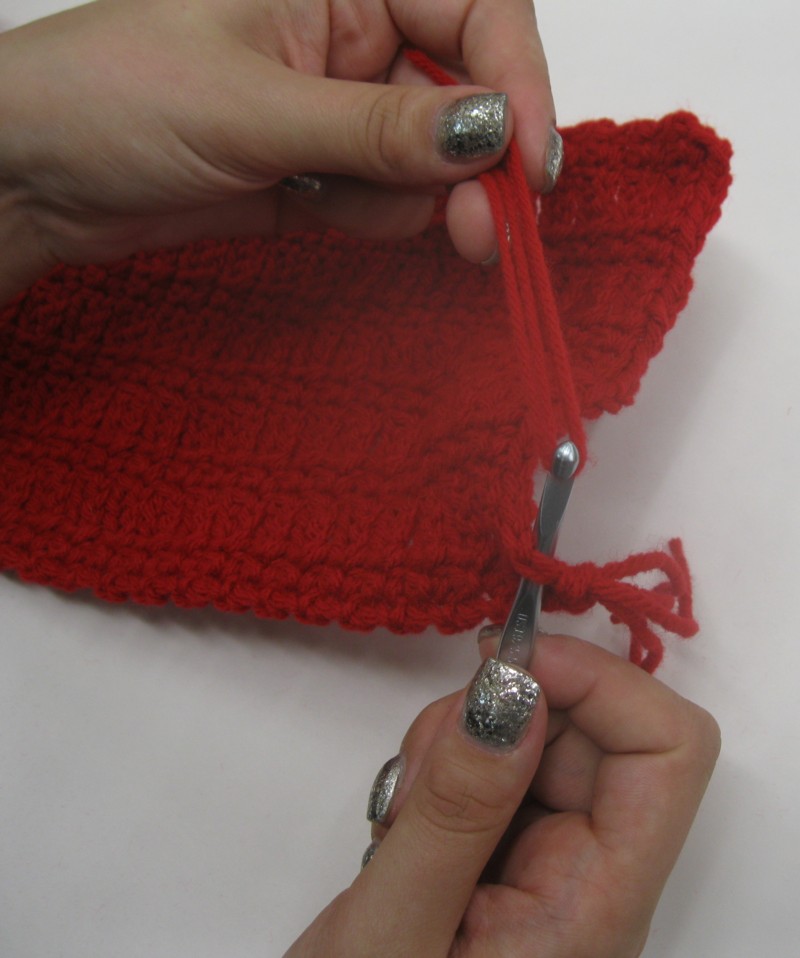
A Different Way to Finish Off a Single:
The usual directions for making a single result in one long loop next to the clip. I really don’t like that long loop – I’d rather the loop be doubled, as it matches the rest of the loops. Here’s how to do that on the loom:
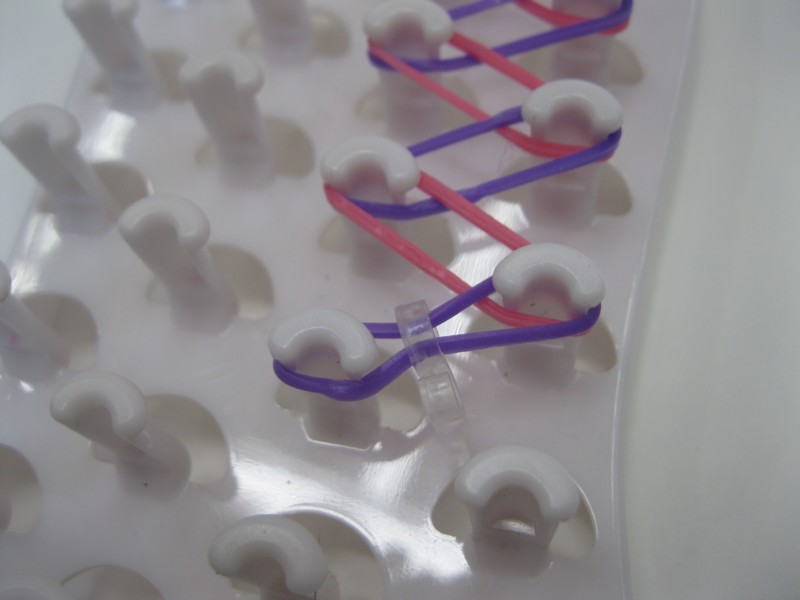
1. After loading the loom, attach the clip to the last band.

2. Hold the clip. Use the hook to pick up the free half of the last loop, and put it on the next peg.

3. While still holding the clip, pick up the next loop with the hook and put on the next peg.
4. Let go of the hook, and continue with the single pattern as usual.

5. Remove from loom and attach the free side of the hook to the free side of the bracelet.
Single Bracelet with Yarn Inclusion
You Need:
- Rubber band loom and hook
- Worsted-weight yarn
- Rubber bands
- Clear tape

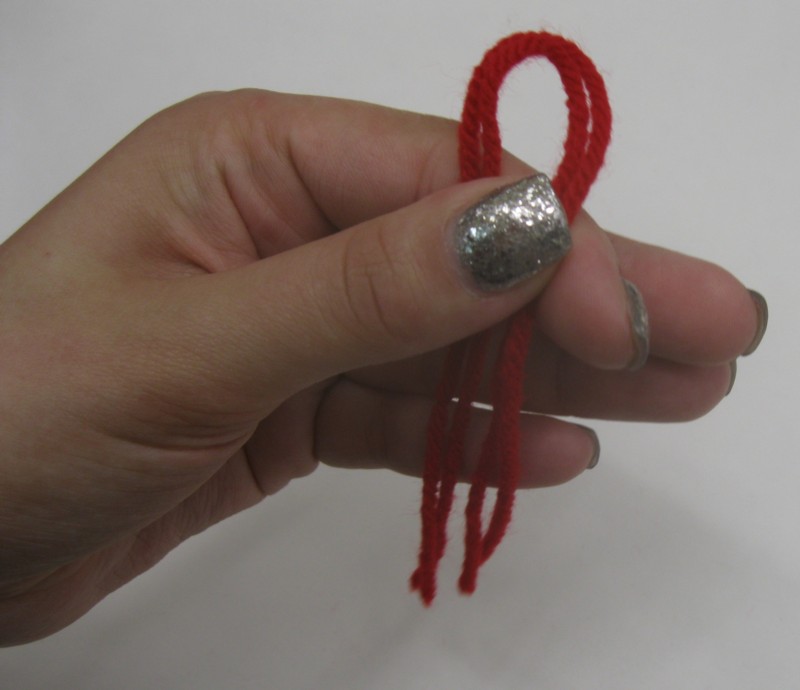
1. Cut three strands of yarn 18″ long

2. Knot the end and braid the whole length.
3. Knot the end and trim.
This braid is 14″, about twice my wrist measurement of 7.5″. If you have smaller wrists, you may wish to make the braid slightly shorter. It should still be big enough to tie around your wrist.

4. Load the loom as usual for a single.

5. Center the braid over the loom.
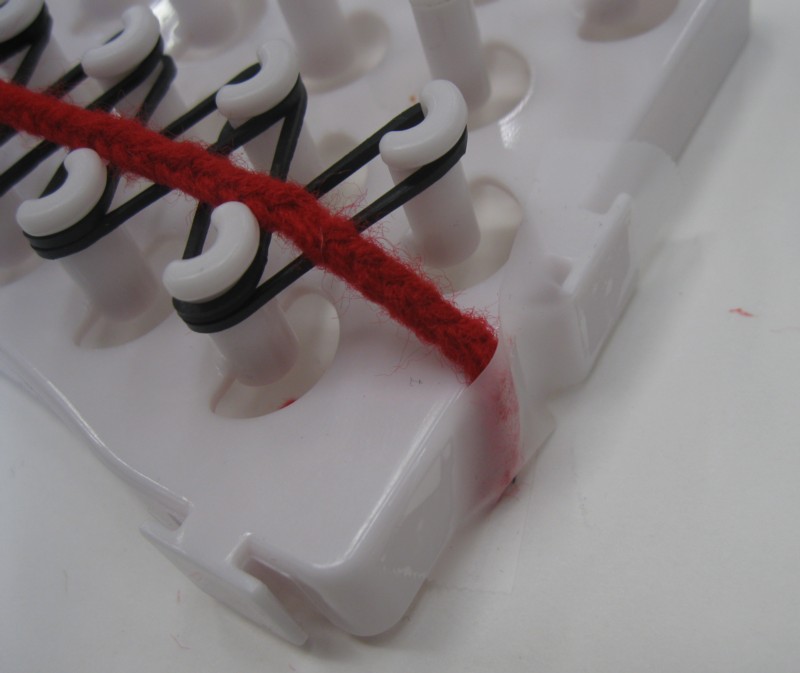
Tape the ends down.

6. Continue with the single pattern, enclosing the yarn in the bracelet as you work.

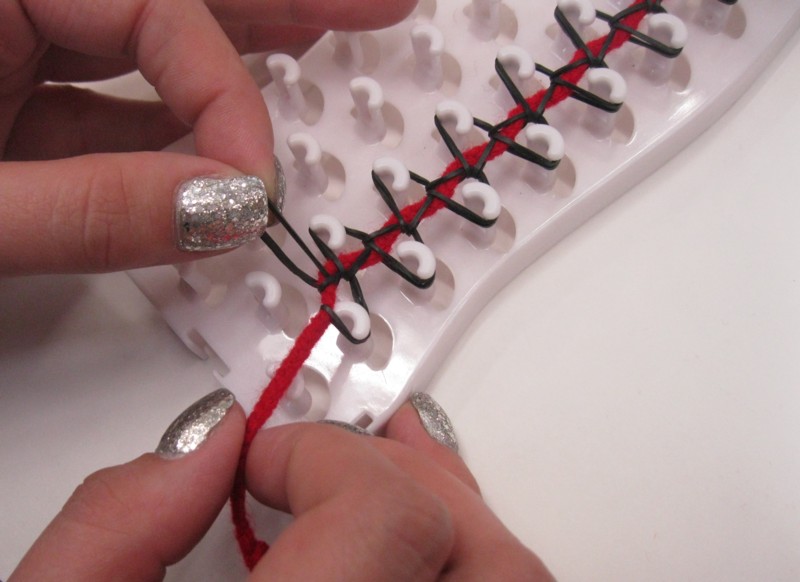
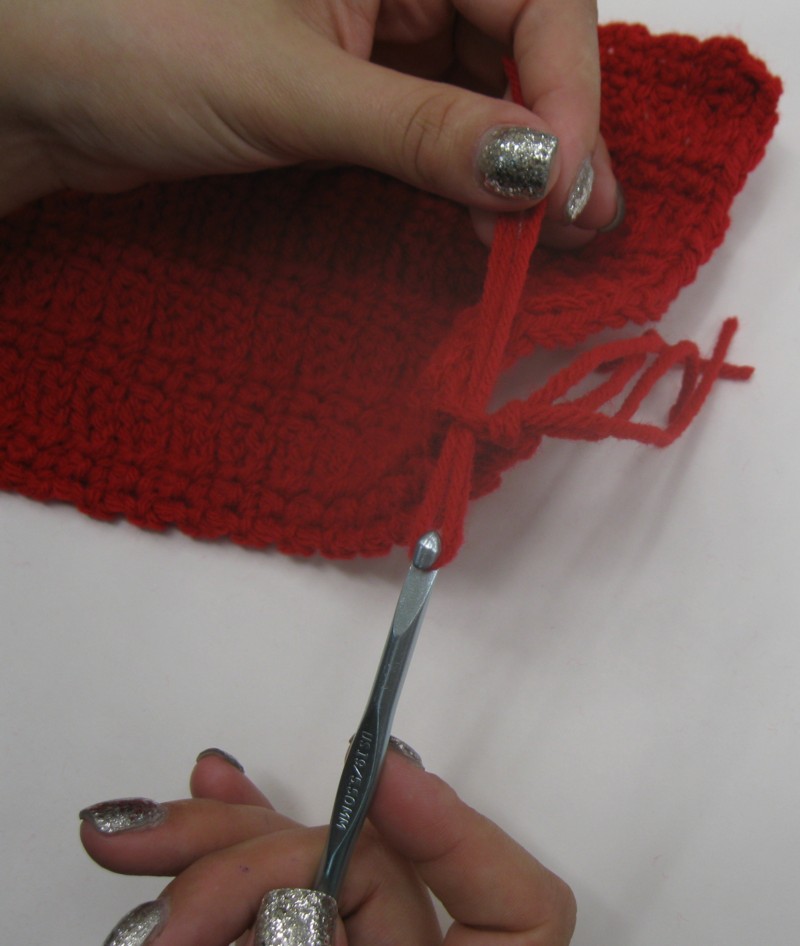
7. Remove the tape from the yarn end. Take the first loop off the peg; it’ll be long.
8. Pull the braided yarn end through the rubber band. Twist the rubber band and pull the yarn end through a second time.

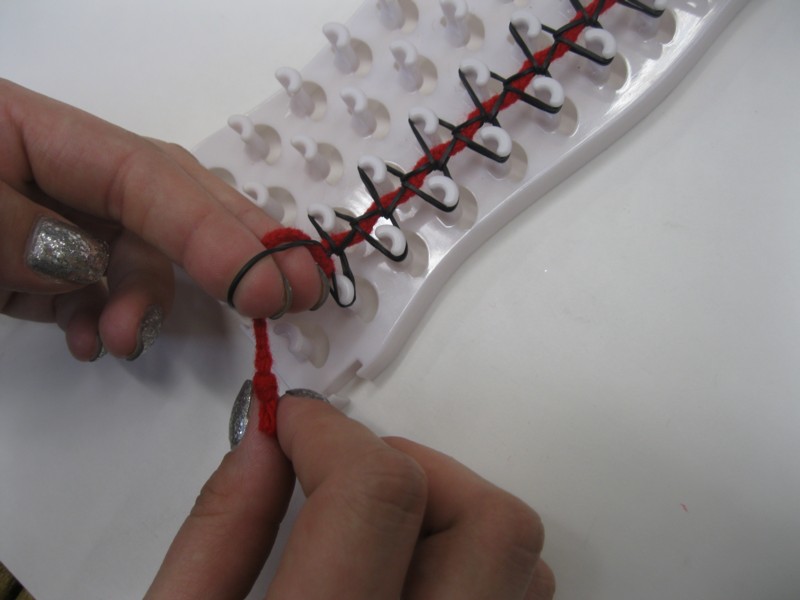
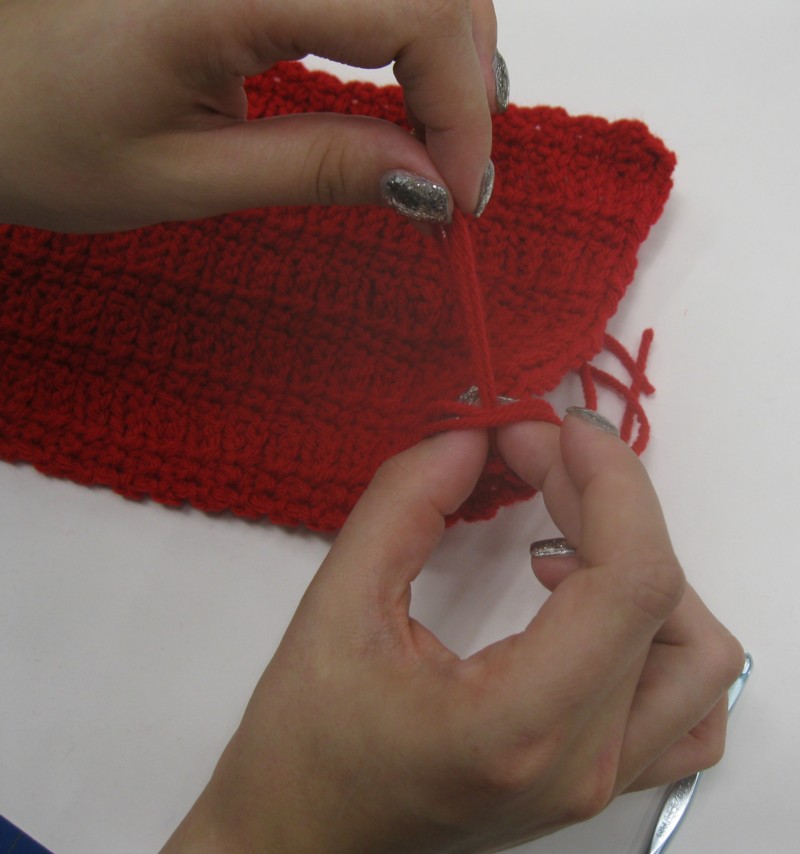
9. Pull the bracelet off the loom. Pinch the last loop together.
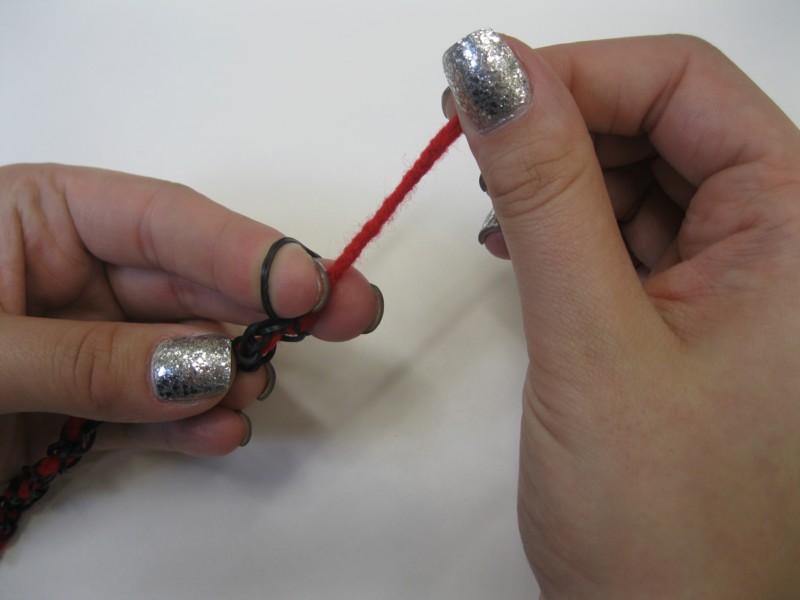
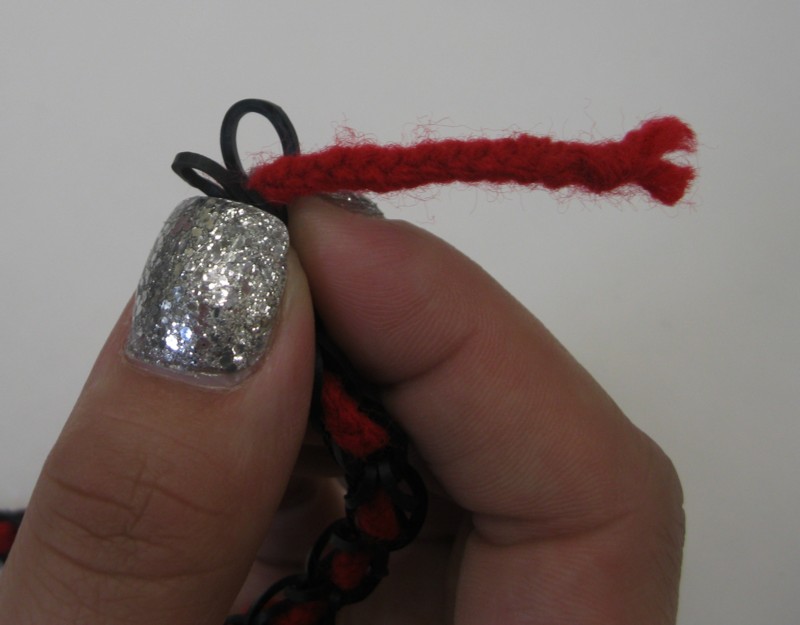
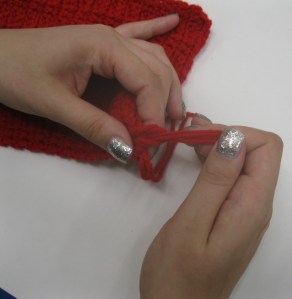
Pull yarn end through the last loop.
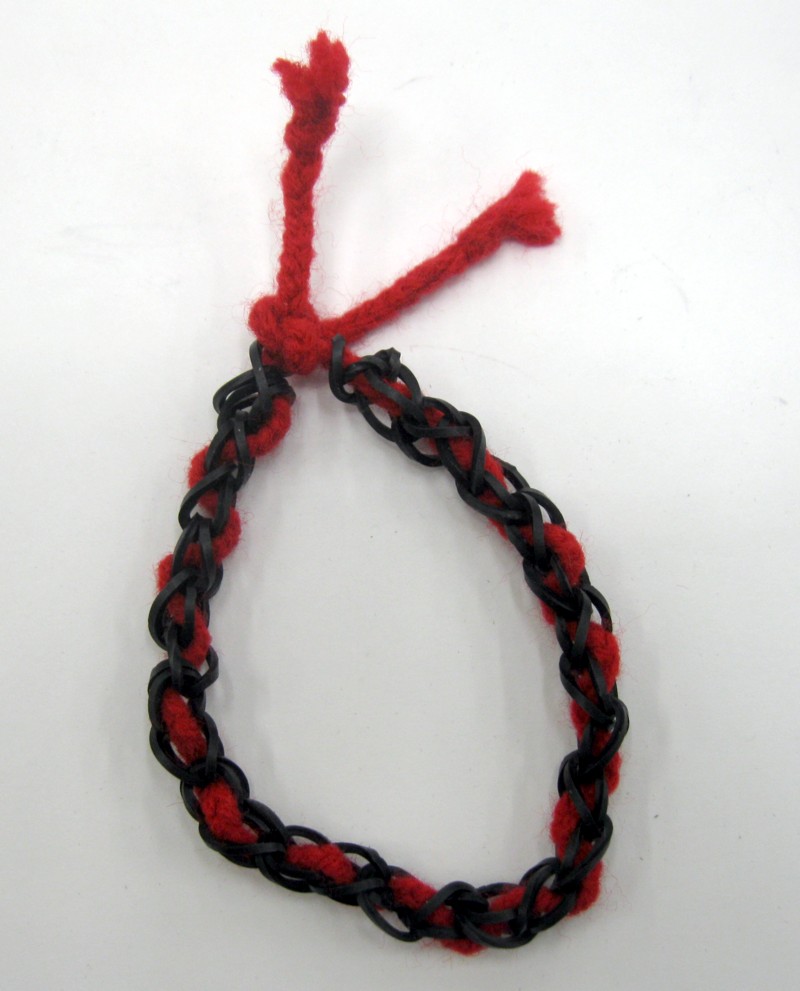
Finished!
Single Rubber Band Pattern with Buttons

You Need:
- Rubber band loom and hook
- Rubber Bands (I used 25)
- Buttons with a shank (I used 5)
- Clip

1. To insert the band, pinch in half and push through the shank. You may wish at this point to prepare all the buttons like this before starting.
2. Place two rubber bands on the loom. The third rubber band will be one with a button on it. Push the buttons down between the pegs as you go.
Load the loom, alternating four plain rubber bands with one rubber band with a button on it. Be sure to point the tops of all of the buttons towards the closest edge of the loom (the right edge, if your loom is loaded as pictured). Otherwise, the buttons could end up flipped in opposite directions, like this:


Load the loom and end with three plain rubber bands. Continue making like a regular single.

Finished!
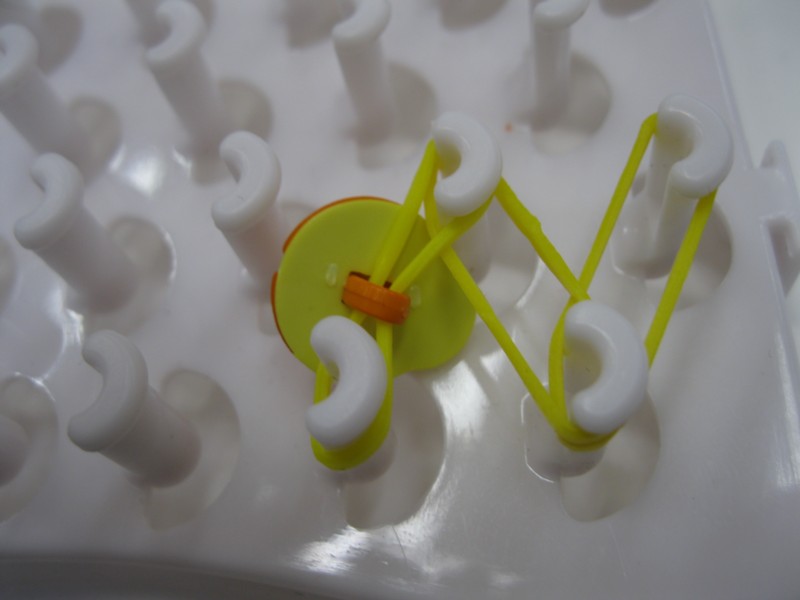
You can also make a ring using this same method.

Seven or nine bands should be enough for most rings. An odd number works best, as you can put the button on the center band. In this picture, I had to push the button to the side to accommodate the size.
Make up the ring as you would a regular single bracelet.

Finished!
Thanks to Rebecca for again being my wonderful hand model. Don’t miss a single riveting tutorial! Bookmark our tutorial page and check back on Tuesdays for new ones.
Is there a tutorial you want to see? Leave a comment!
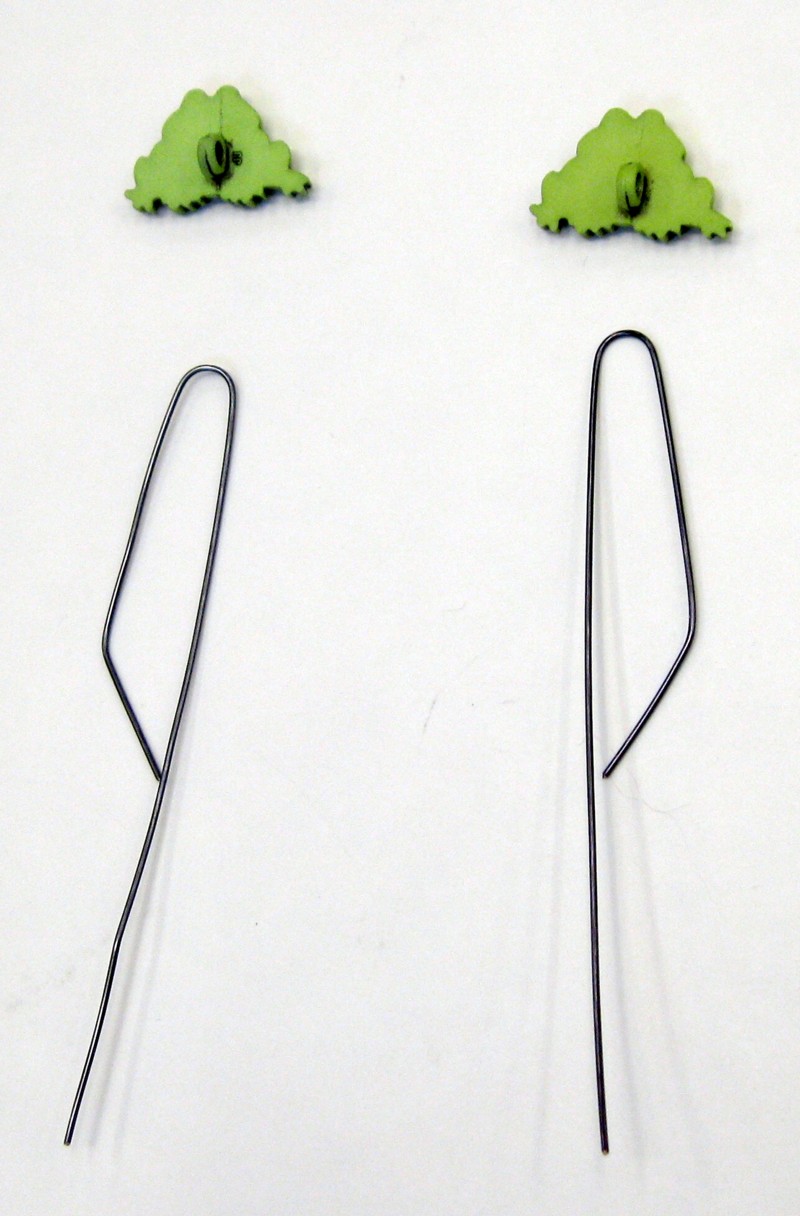
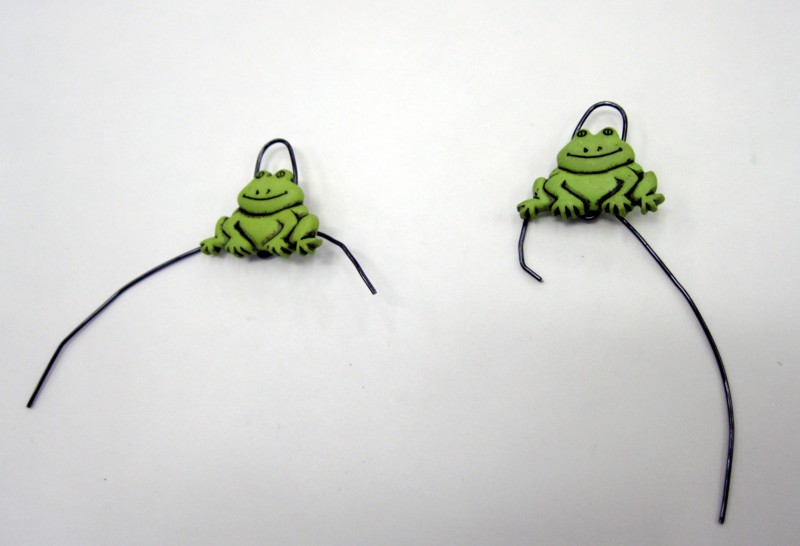
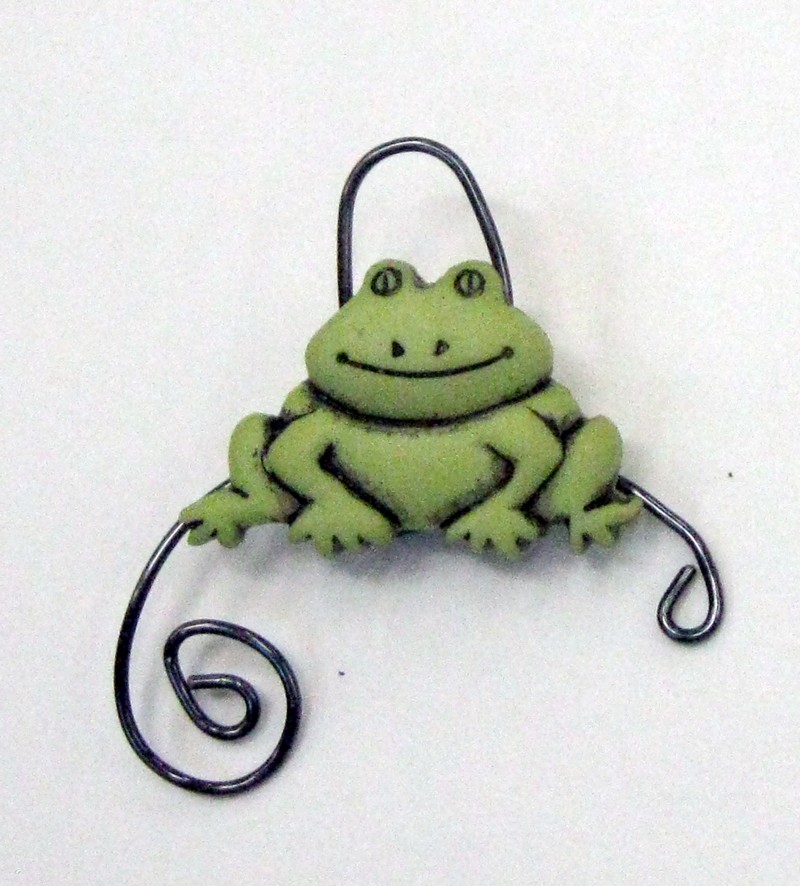
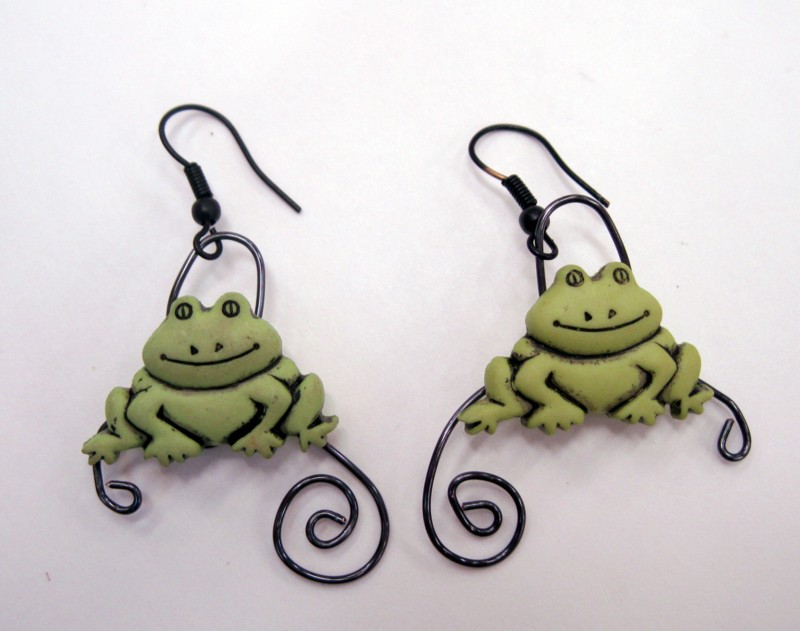
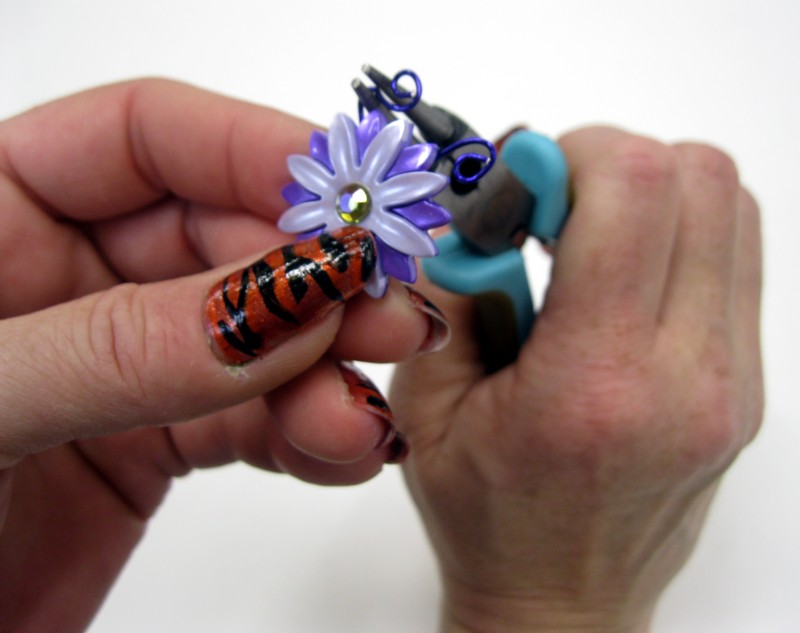
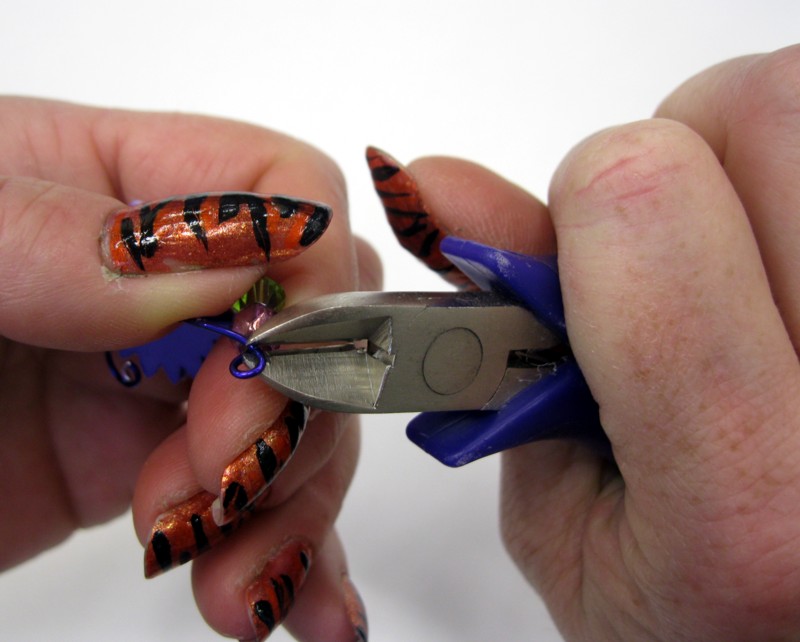
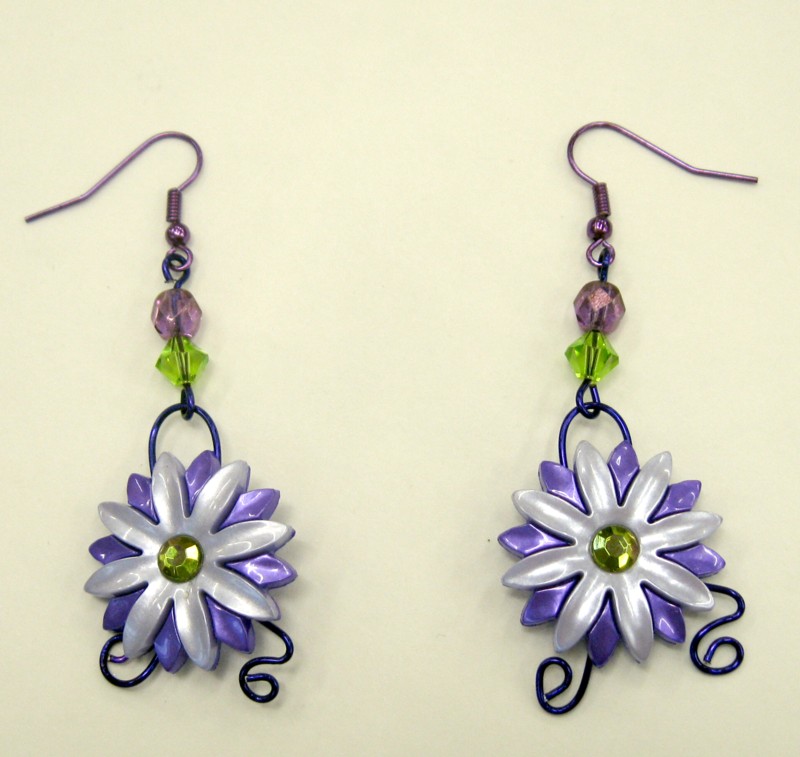
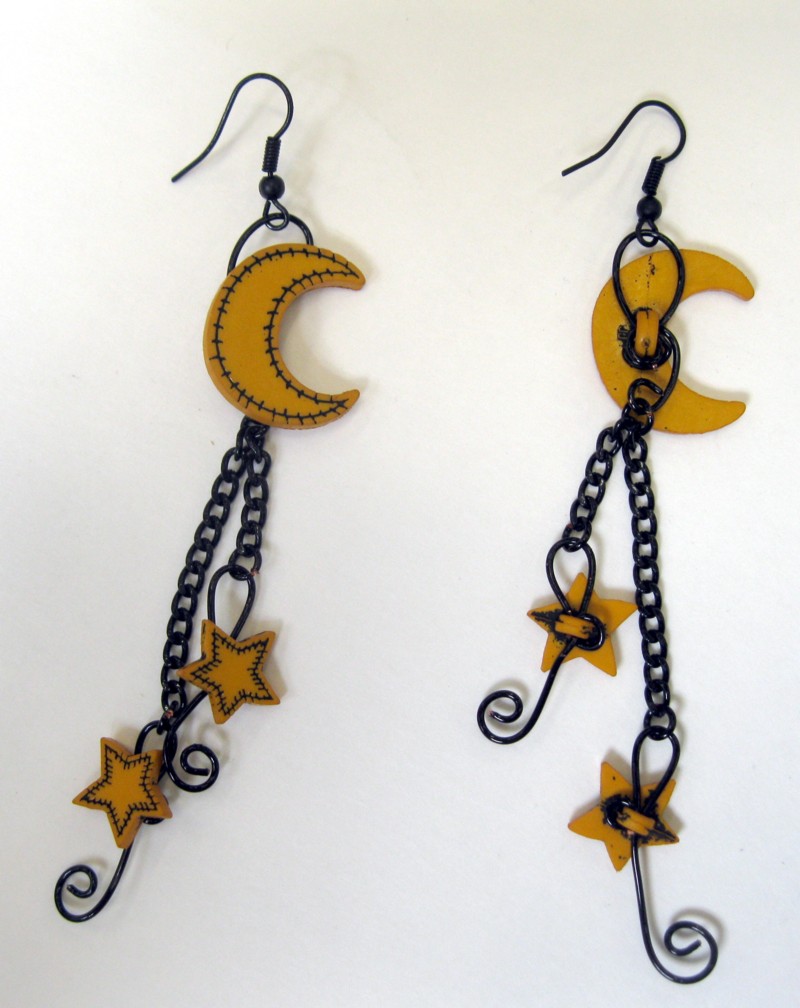
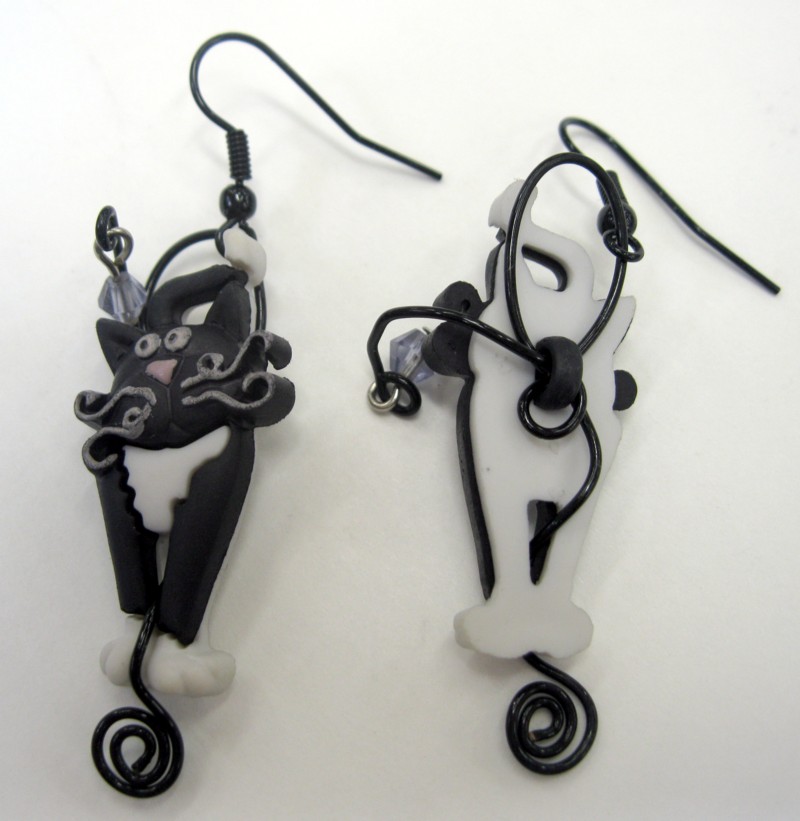
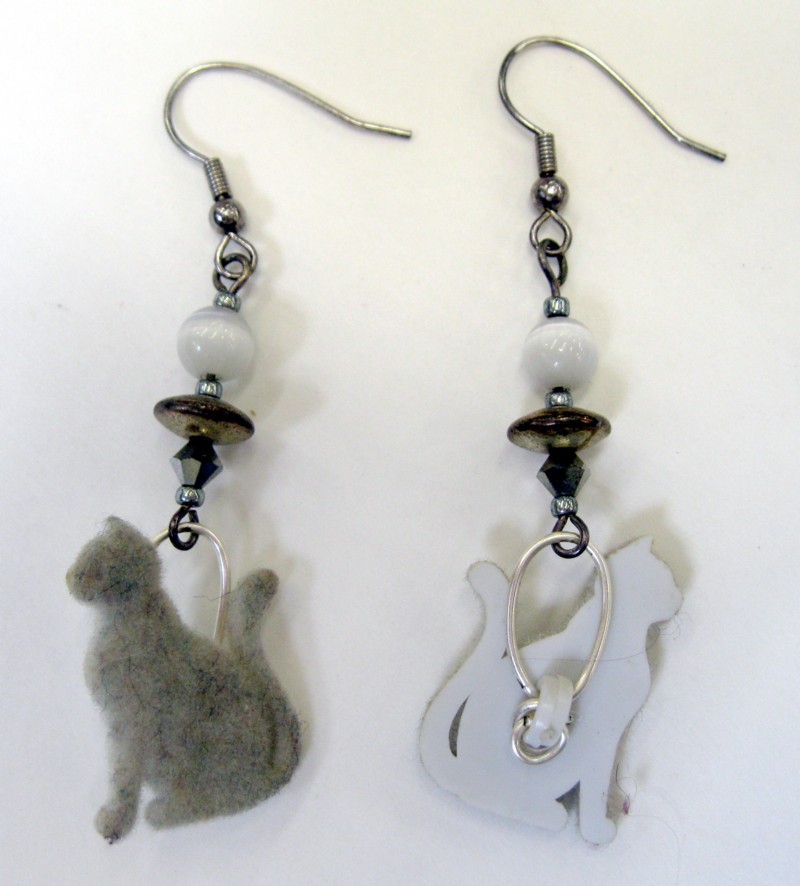
We have a special treat for this Tutorial Tuesday – Lisa is sharing her method for making awesome earrings with decorative shank buttons and 20 gauge wire! In this tutorial, Lisa shows us three different ways to make button earrings – The first way is with a button with a horizontal shank; it’s probably the easiest. The second way is with a button with a vertical shank; it’s still pretty easy, but there are a few extra steps in the middle. Lastly, Lisa shows us how to add beads and fancy wire loops.
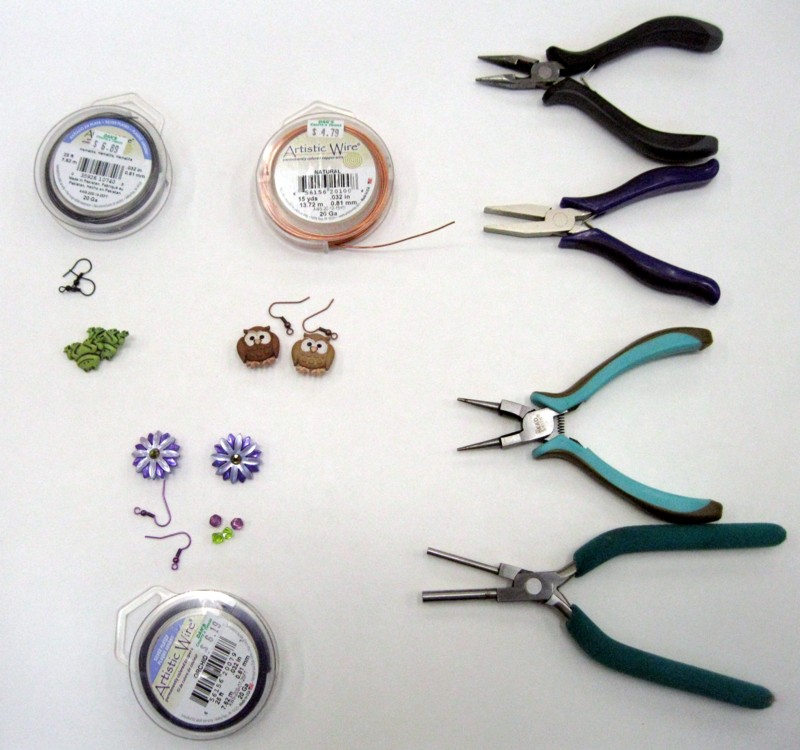
You Need:
- Two decorative shank buttons
- 20 gauge jewelry wire
- Earring findings
- Beads (optional)
- A ruler
- A Sharpie marker
- Round-nose pliers
- Chain-nose pliers
- Flat pliers
- Wire cutters (if none of your other pliers have cutters)
- Bail-making pliers (optional)
How to make earrings out of buttons with a horizontal shank:
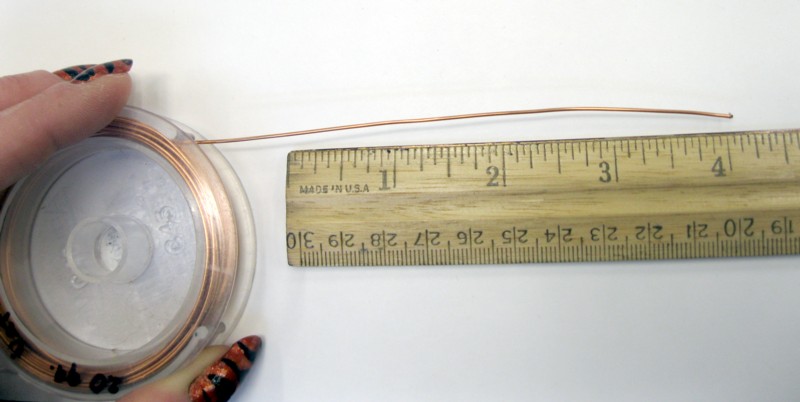
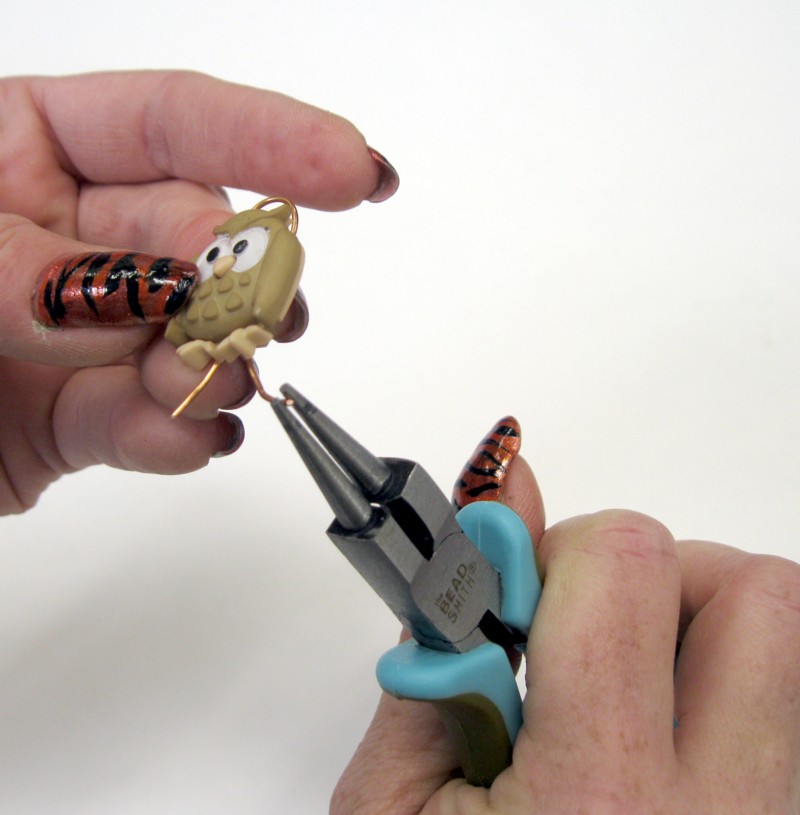
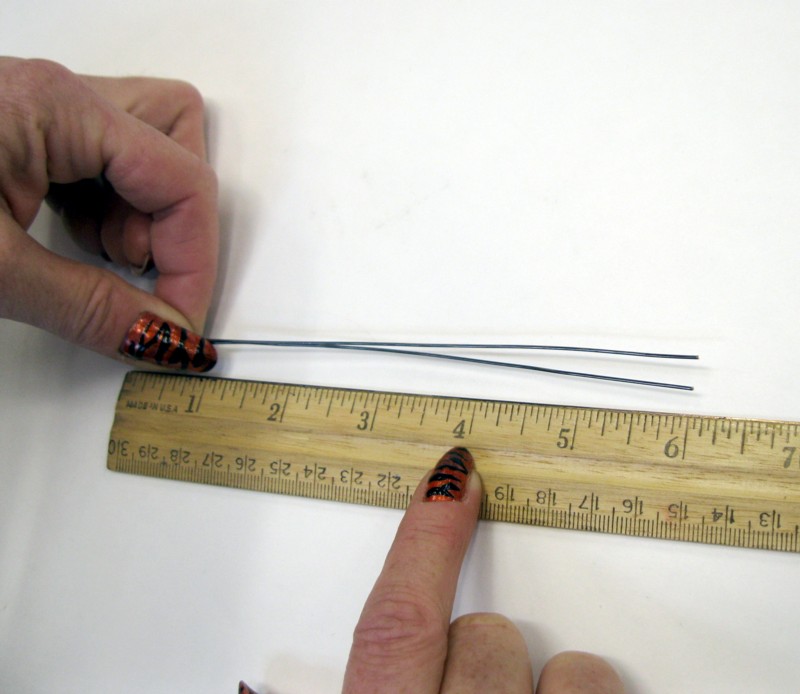
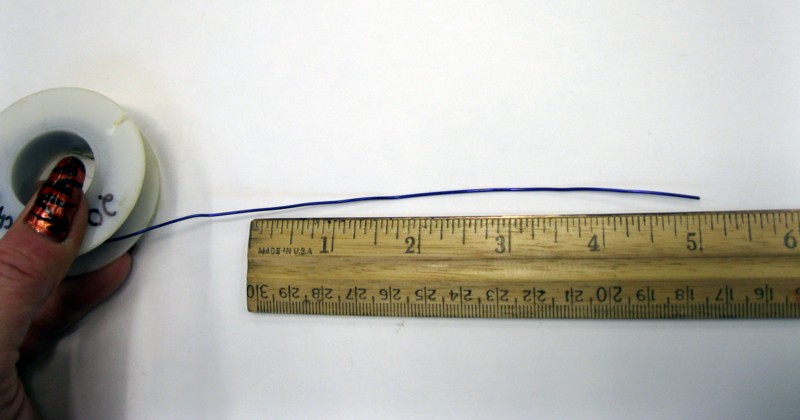
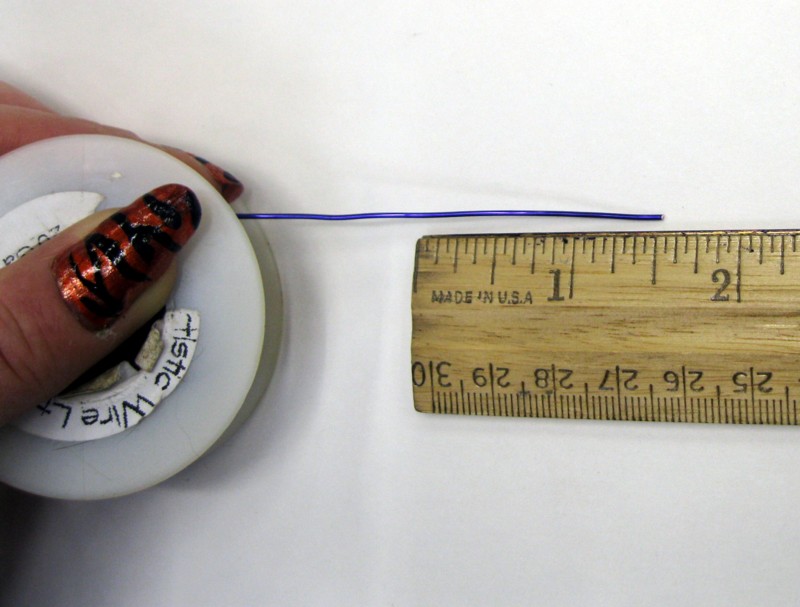
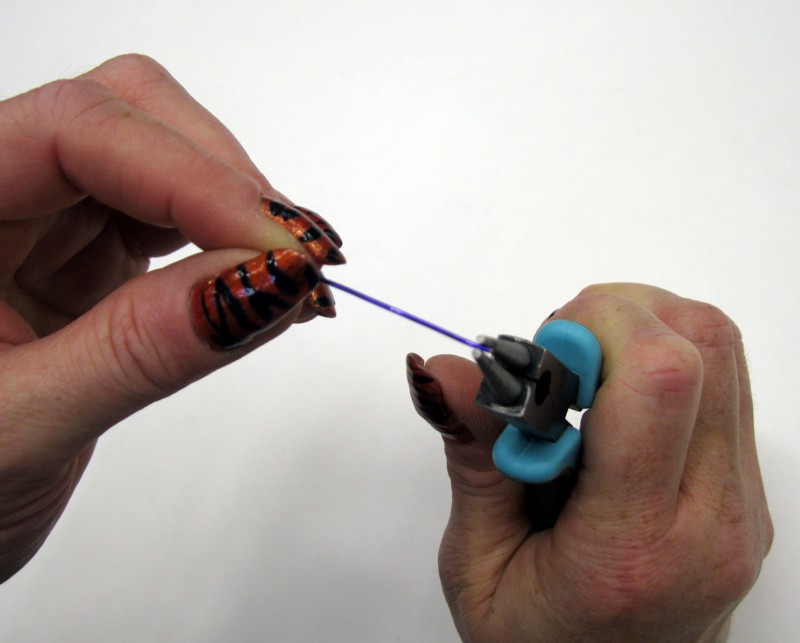
1. Measure two 4″ pieces of your 20 gauge wire. Straighten the wires by running them between your fingers a few times.
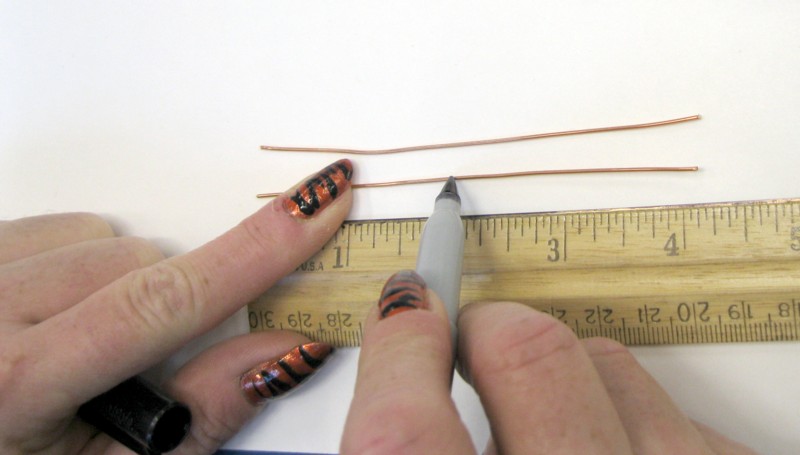
You will be using either the round-nose pliers or the bail-making pliers for the next step. If you are using round-nose pliers, lightly mark the halfway point of each length of wire. If you are using bail-making pliers, consult step 2 in the next section.
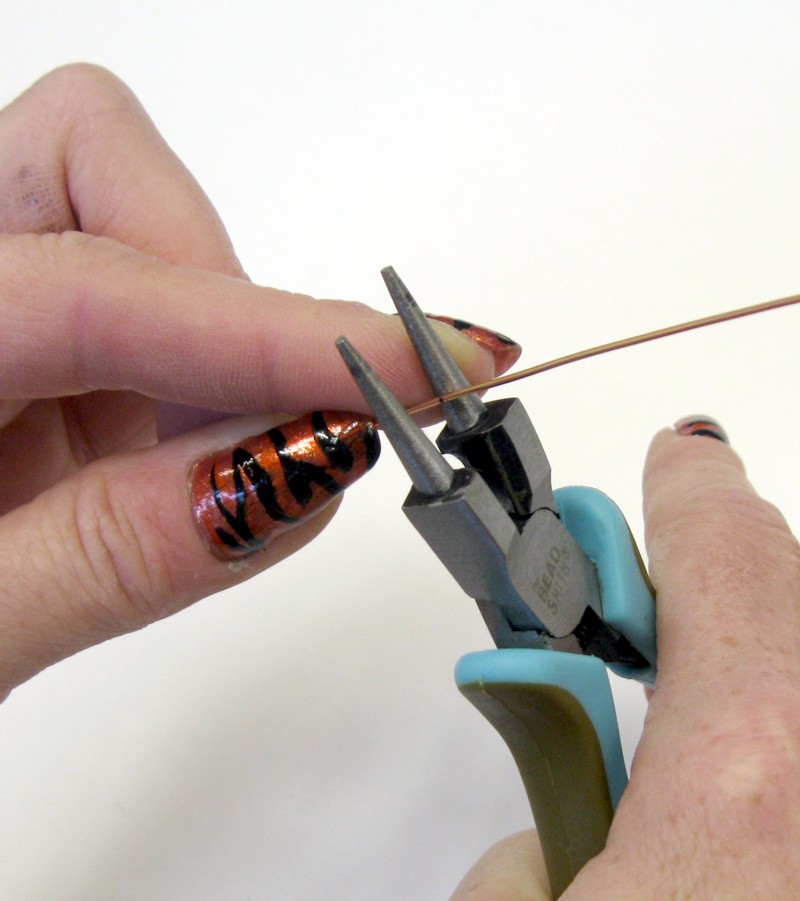
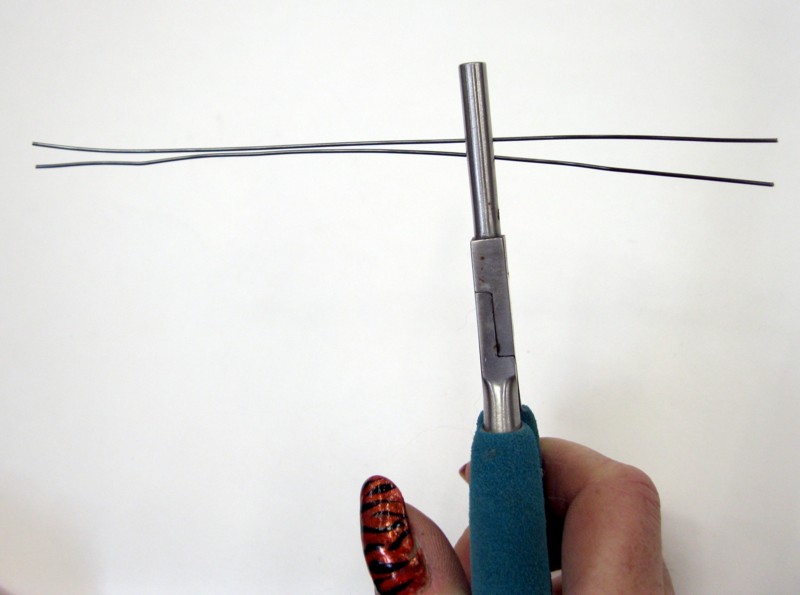
2. Grasp the wire on the marked point with the round-nose pliers.
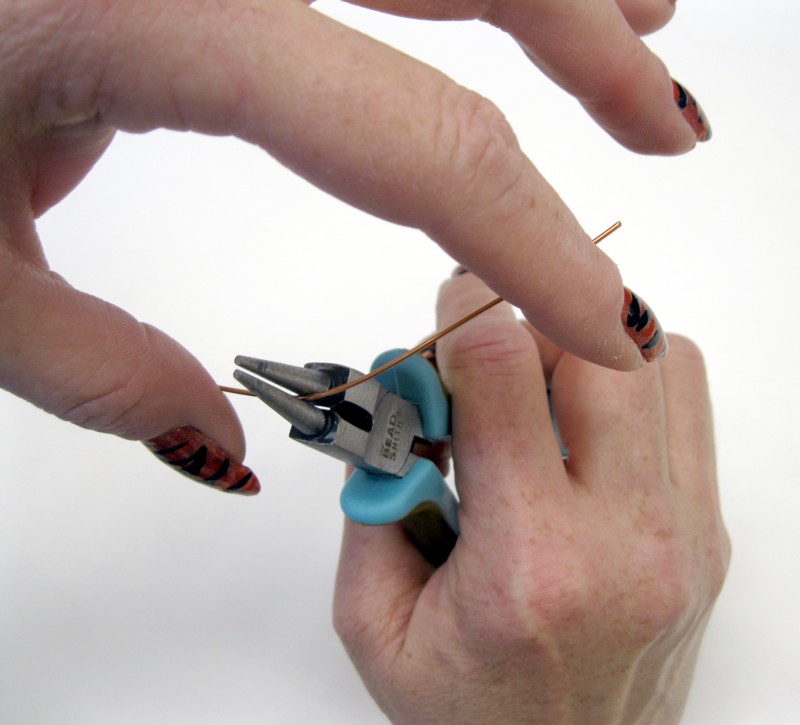
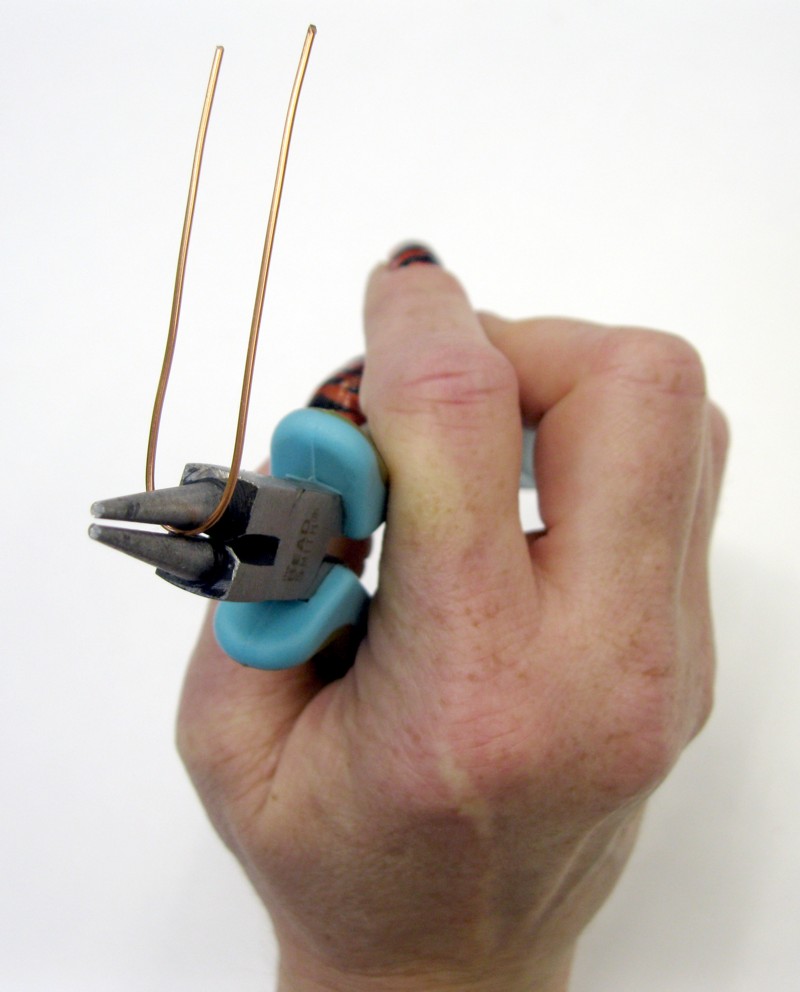
Push the ends of the wire back until they are about parallel to each other.
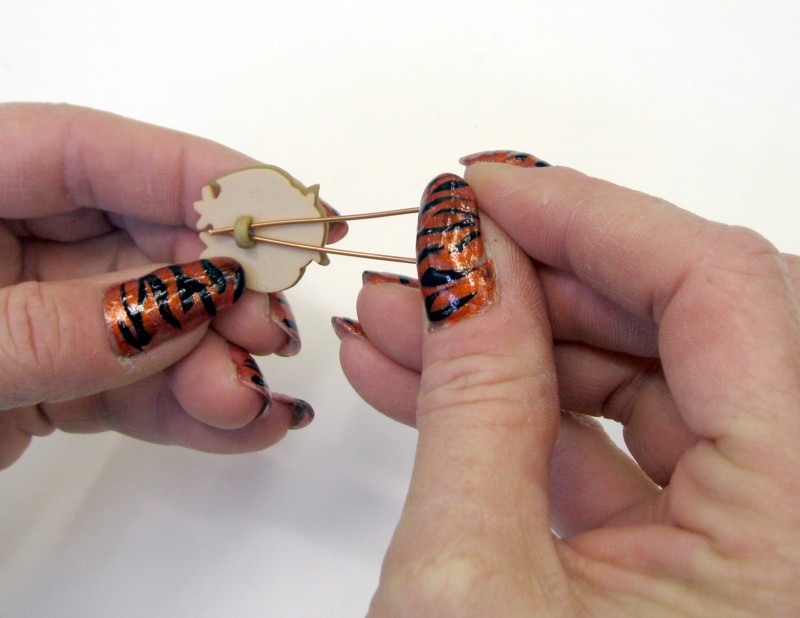
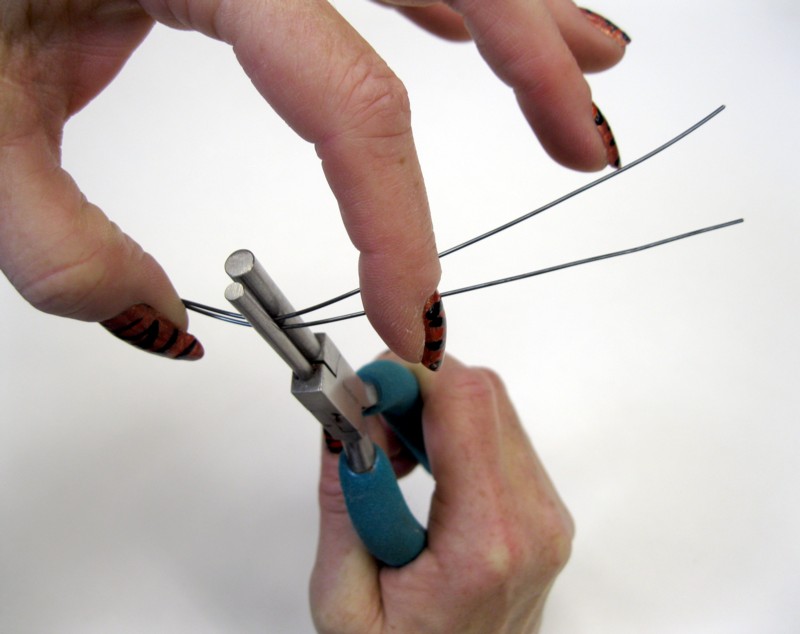
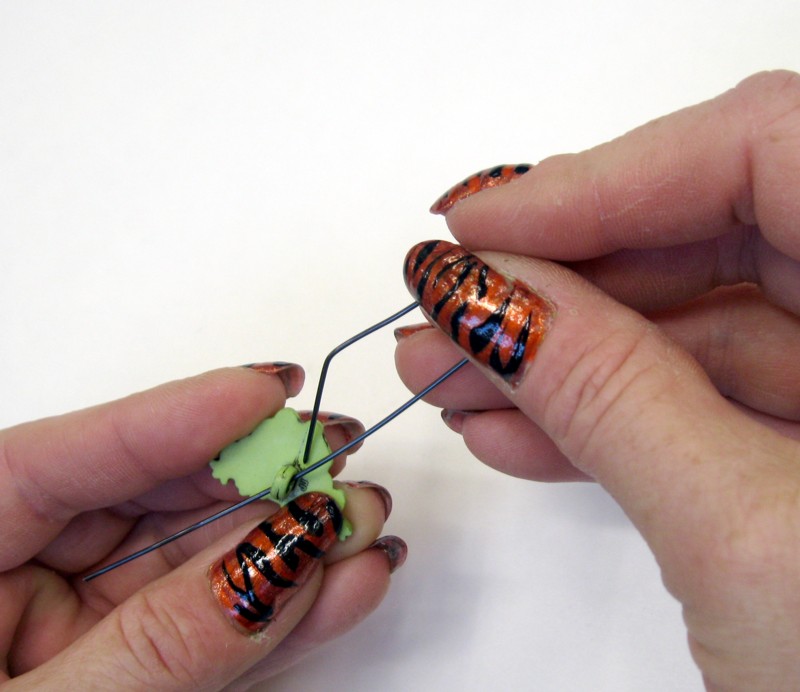
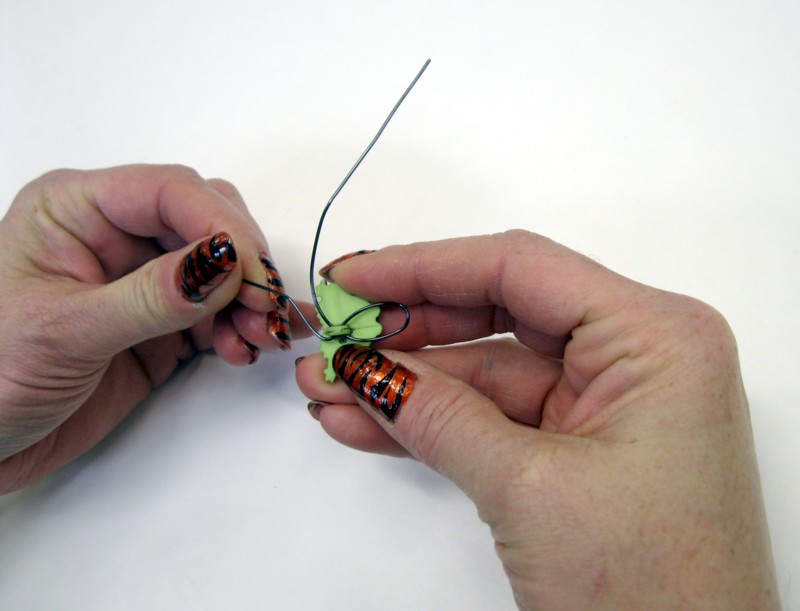
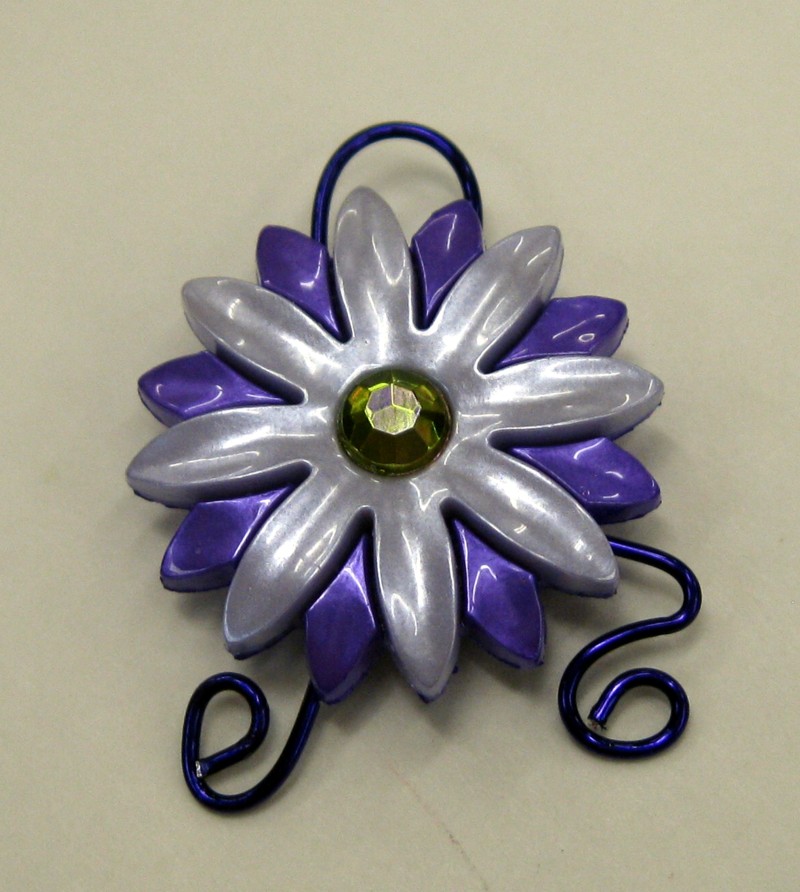
3. Push the two ends of the wire through the button shank. The ends should cross each other as pictured.

4. Take one end and push it up. Repeat on other side.
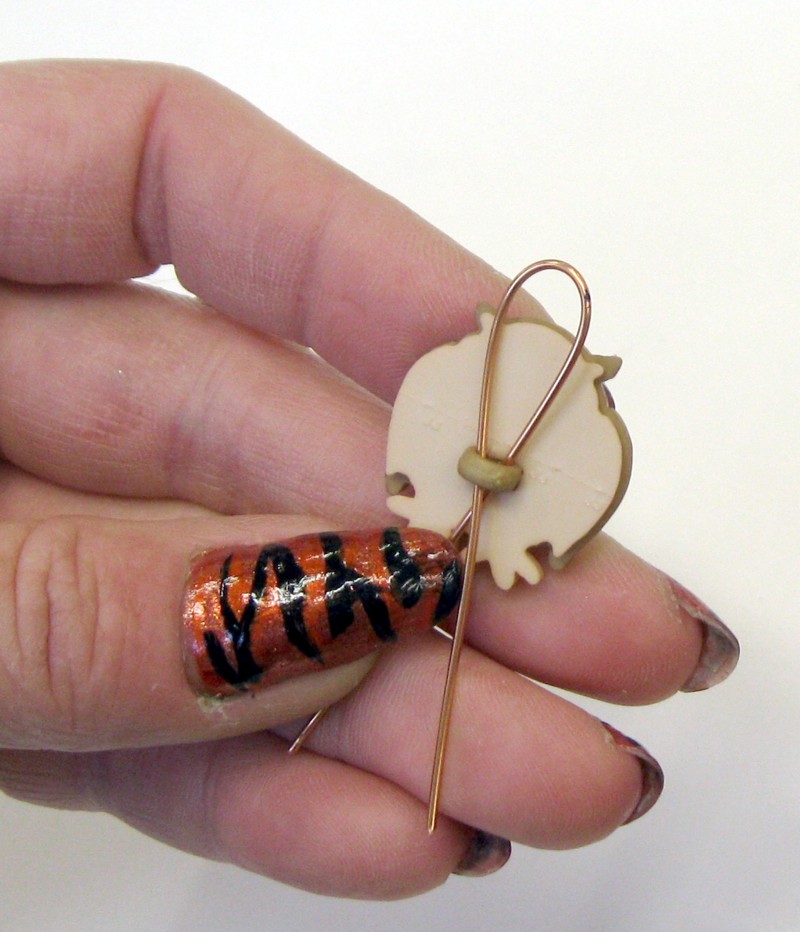
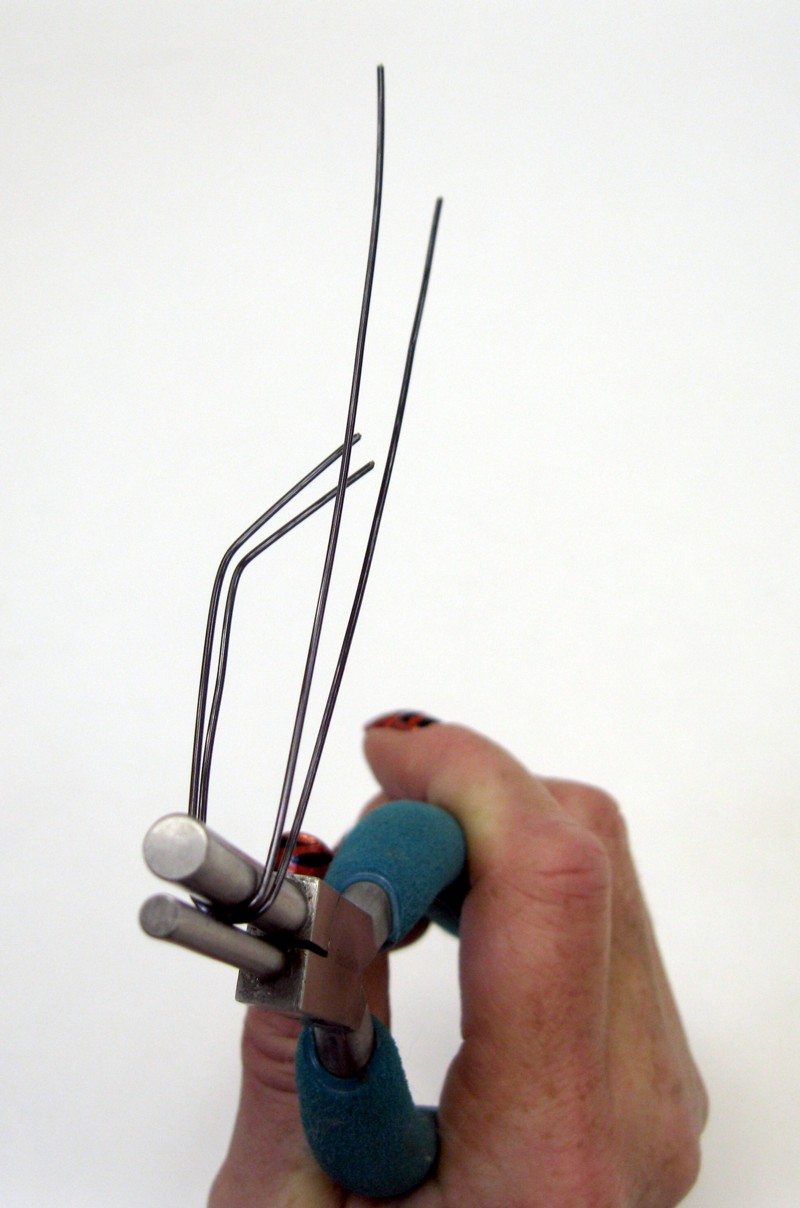
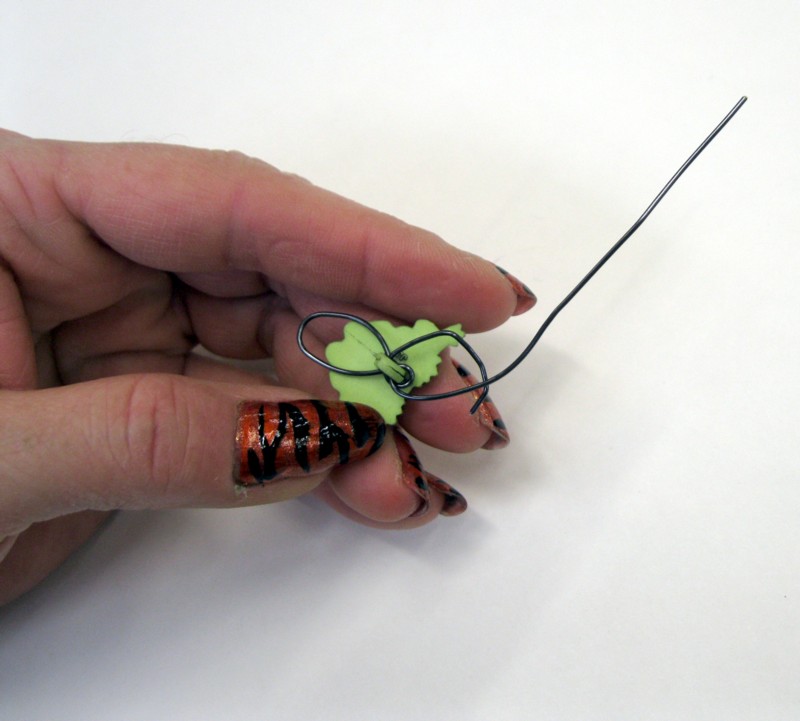
5. With your chain-nose pliers, grasp one end and tuck it into the shank.
Grasp the end of the wire, and continue pulling through. You have formed a loop around one side of the shank.

Repeat on the other side.

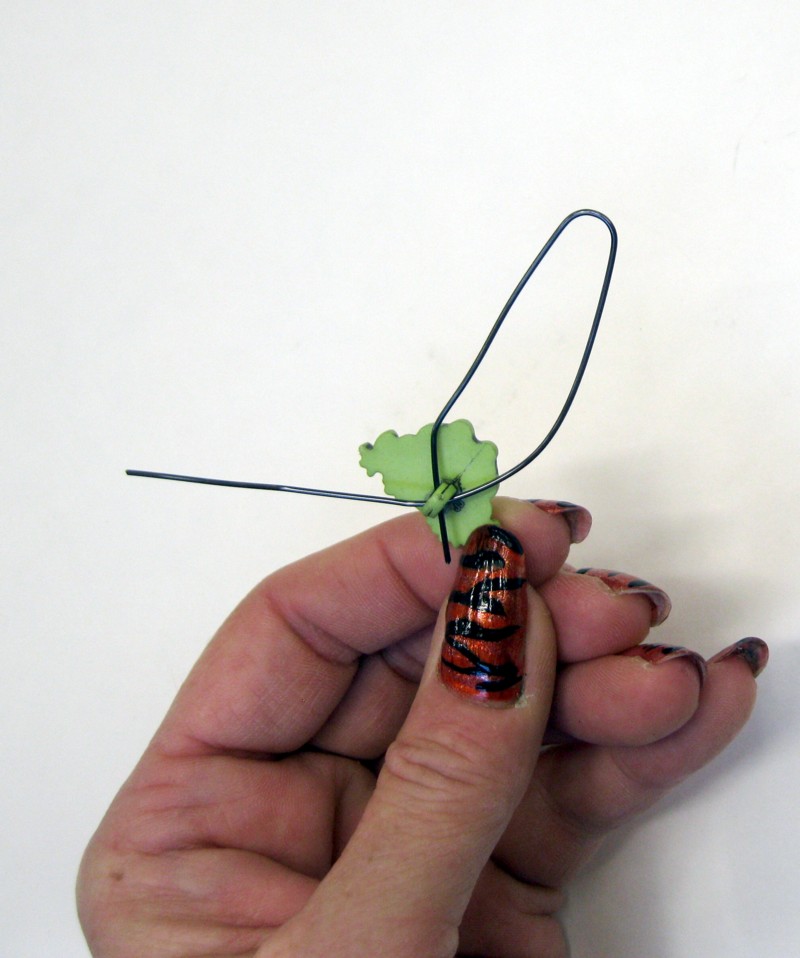
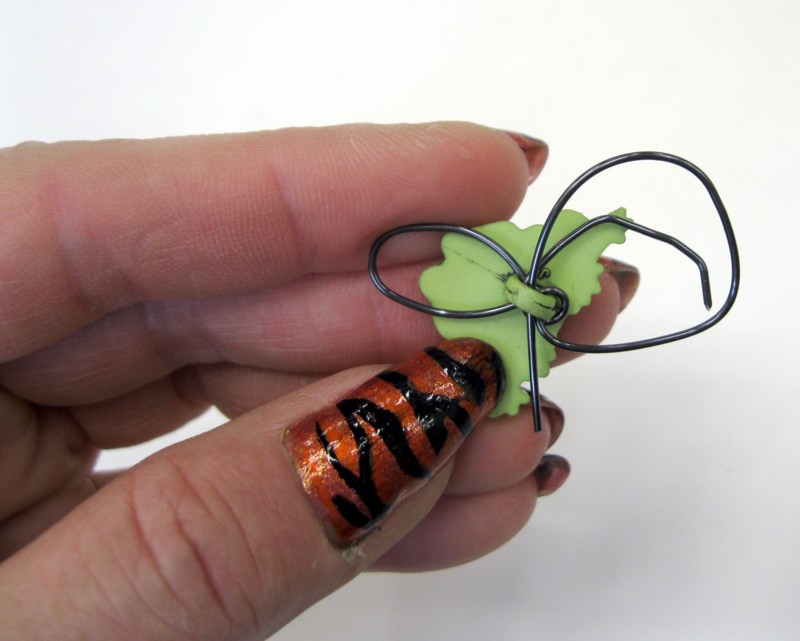
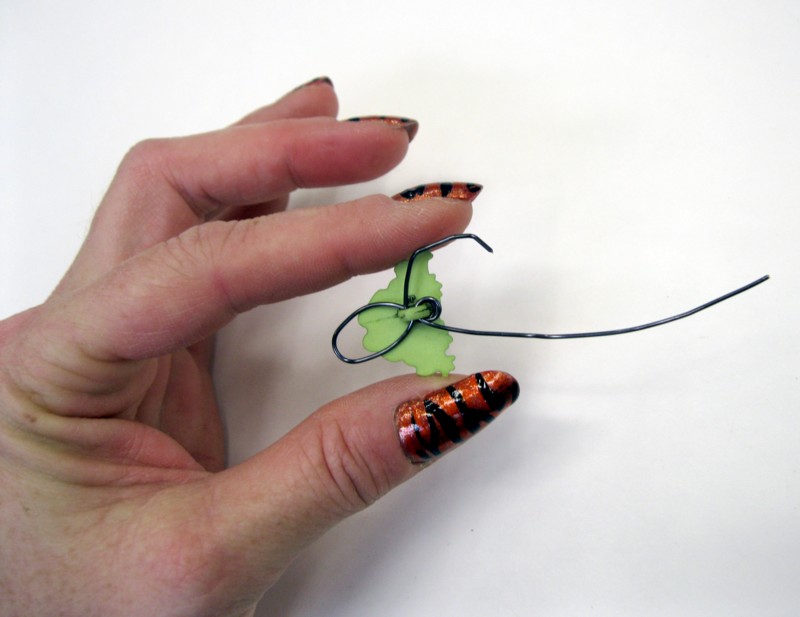
6. With your round-nose pliers, turn a loop at the end of one of the wires.
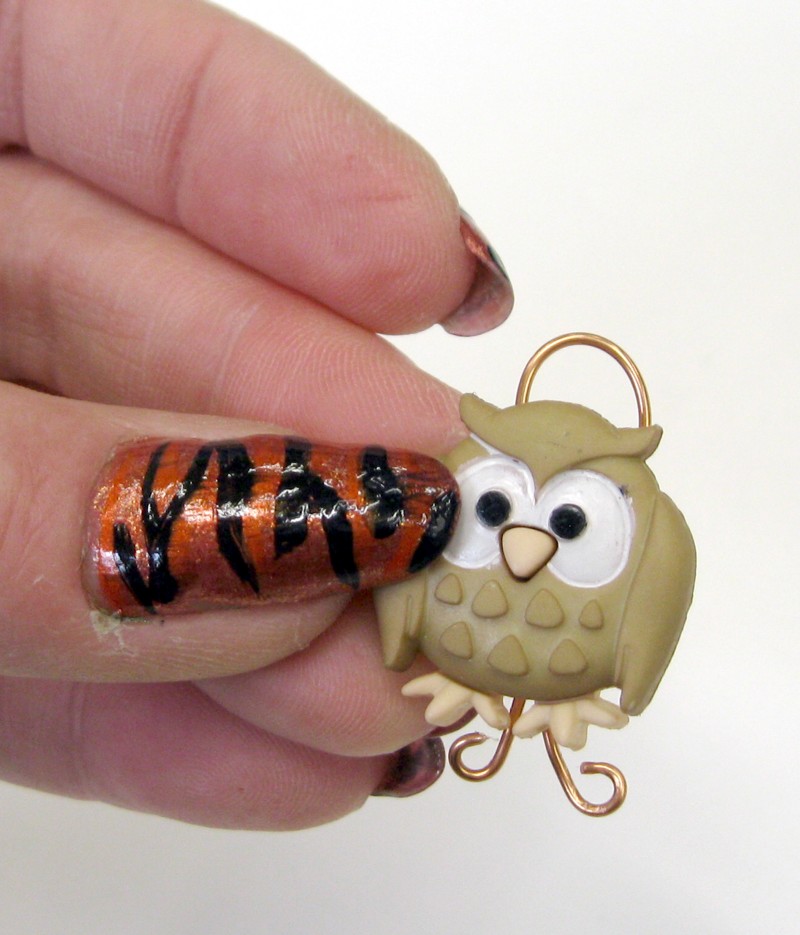
Repeat on the other side.


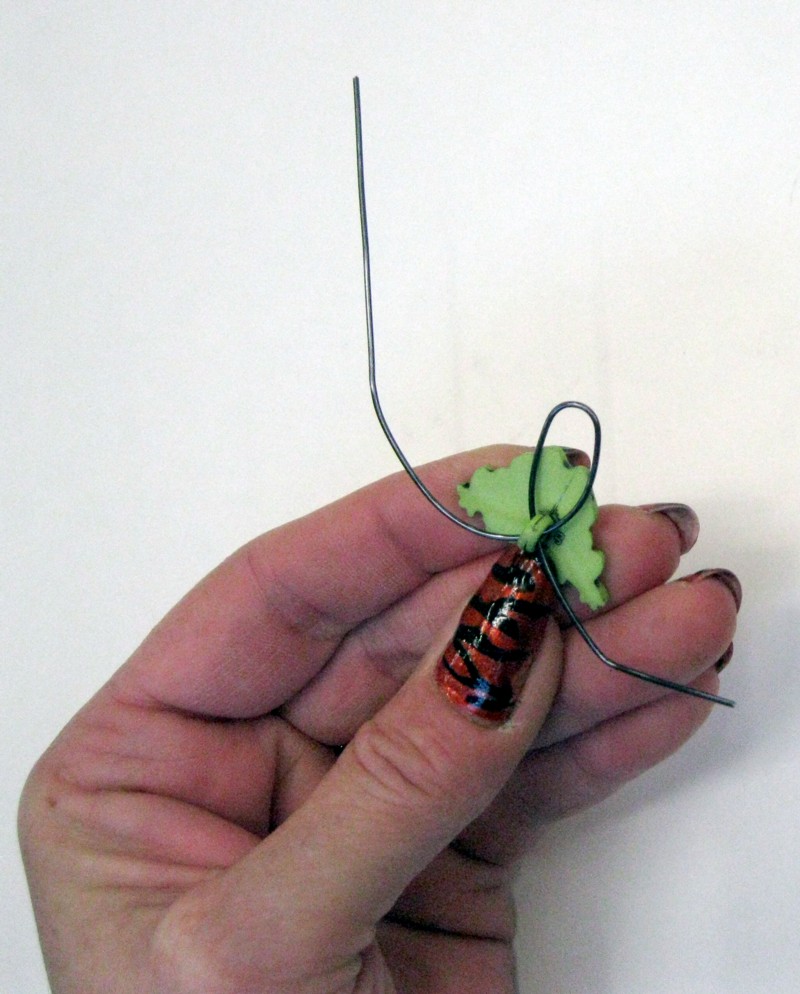
7. With your chain-nose pliers, open the loop on the earring finding. Attach it to the large wire loop and close the loop on the earring finding.
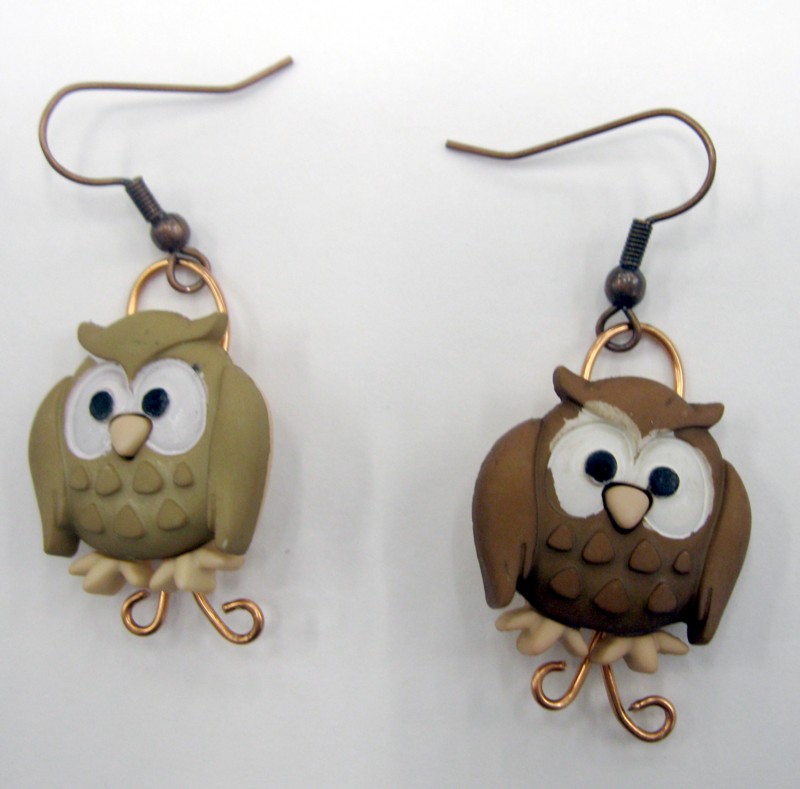
Finished!
How to make earrings out of buttons with a vertical shank:
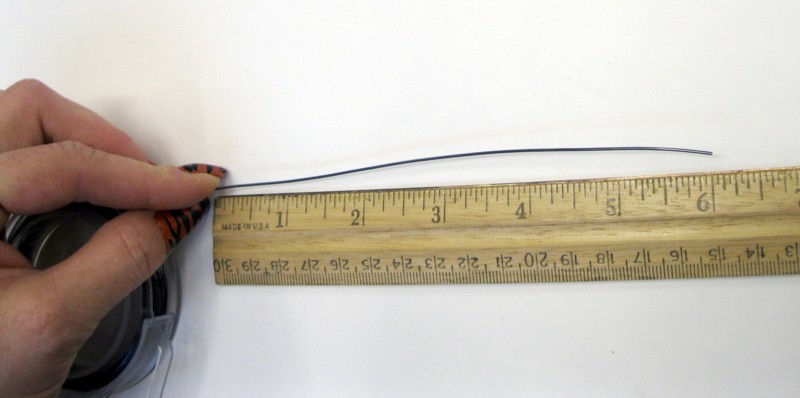
1. Cut two 6-inch lengths of wire and straighten them between your fingers.
2. If you are using round-nose pliers, follow step 2 of the previous set of directions for marking and bending the wire at 4″.
If you are using bail-making pliers, hold both pieces of wire at 4 inches.

Bend until both ends are parallel.

3. Pinch the shorter end between your thumb and forefinger and bend at approximately a 45-degree angle.
Since the earrings will be mirror images of each other, lay the pieces out as pictured so you can keep them straight before doing the next few steps.
4. Insert the long end of the wire into the shank.
Insert the short end into the shank.
5. Grab the loop and push down. The ends will naturally curl up as you push down.

6. Cross the two wire ends under the bottom of the shank by pushing the bottom wire up and the top wire down (so they are pointing 180-degrees from where they were).

7. Holding the short end with the chain-nose pliers, bring it up and insert into the shank.
Pull the short end all the way through. It is important to hold the top loop when you pull the end tight.
8. Insert the long end into the shank (it might be a tight fit).
Pull all the way through. Remember to hold the top loop when you pull the end tight.

9. Turn a loop in the short end with the round-nose pliers.

10. Turn a loop at in the long end with the round-nose pliers.
11. Grasp the loop on the long wire with the flat pliers and roll into a coil.
12. Open the loop on the earring finding with the chain-nose pliers and attach to the top of the wire loop. Close the loop on the earring finding.
Finished!
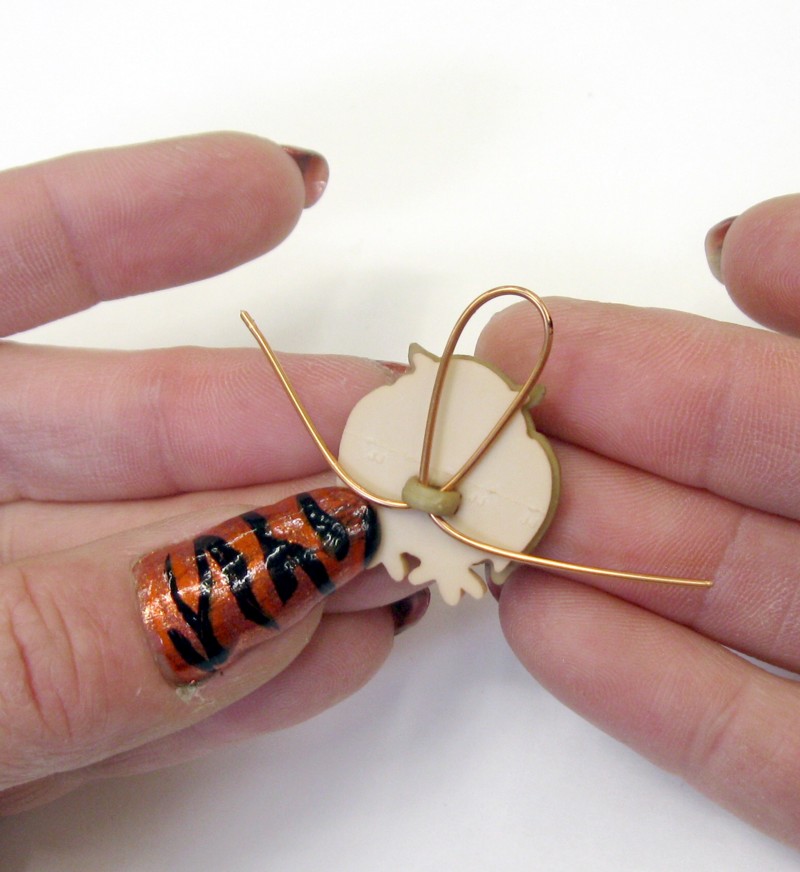
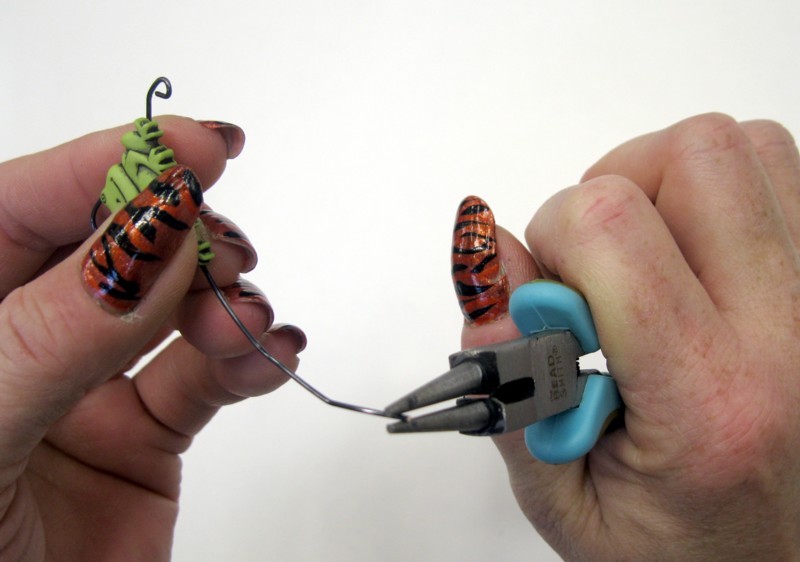
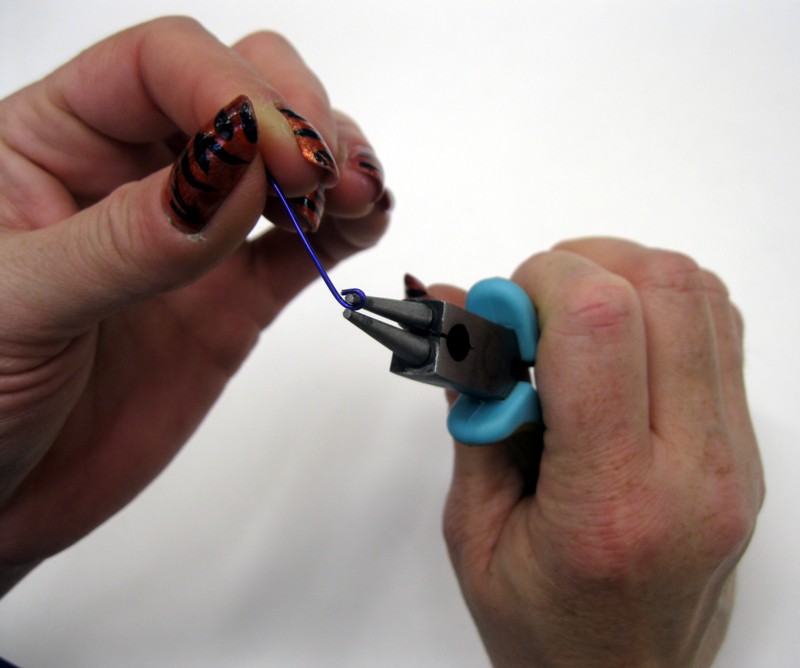
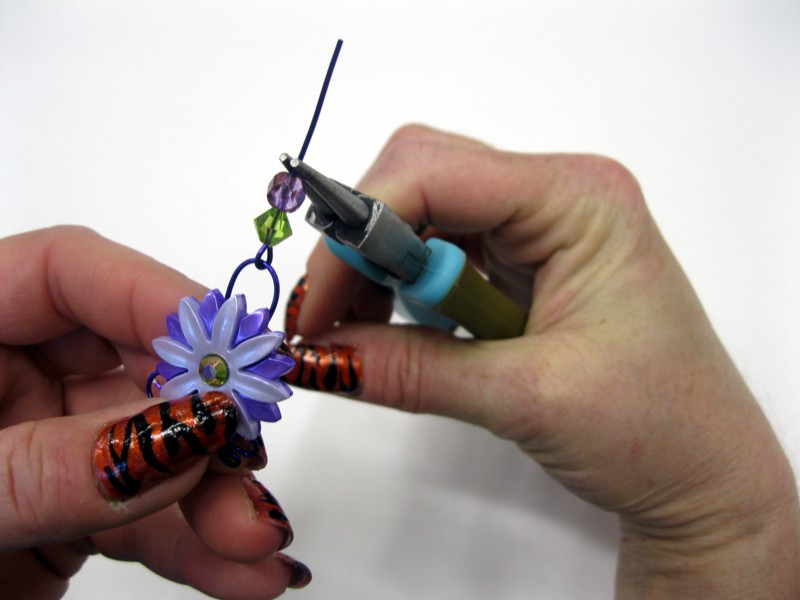
Making button earrings with beads and fancy loops:
1. Cut two 5-inch lengths of wire and straighten with your fingers.


2. Bend both pieces in half.


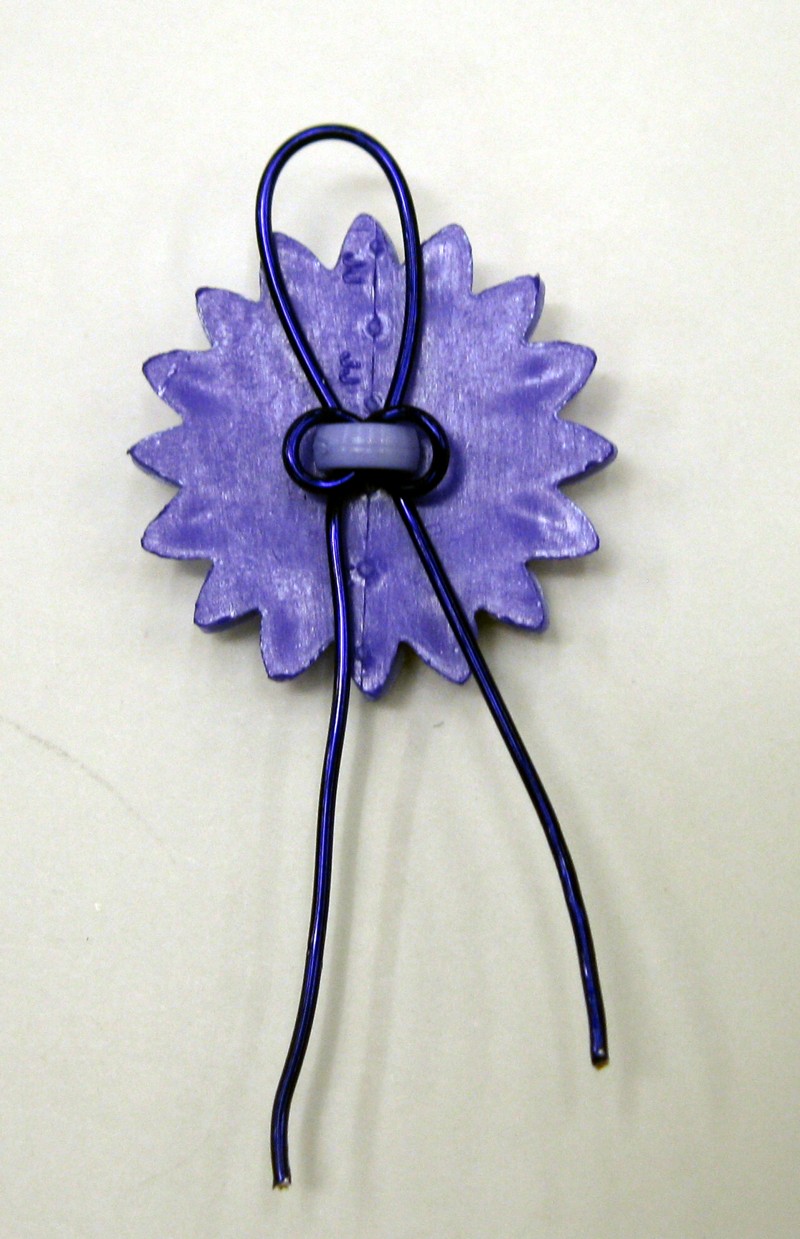
3. Push the two ends of the wire through the button shank. The ends should cross each other as pictured.
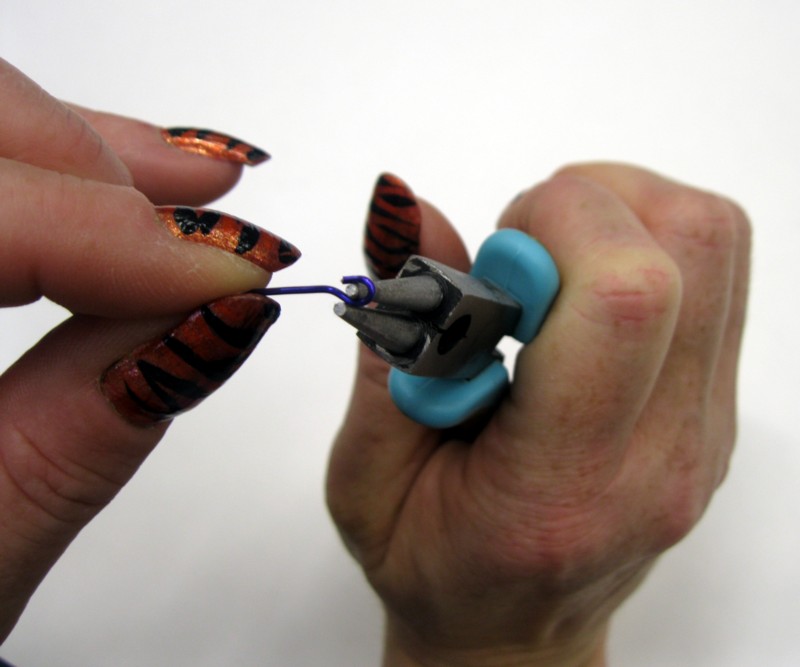
4. Push both wire ends up.
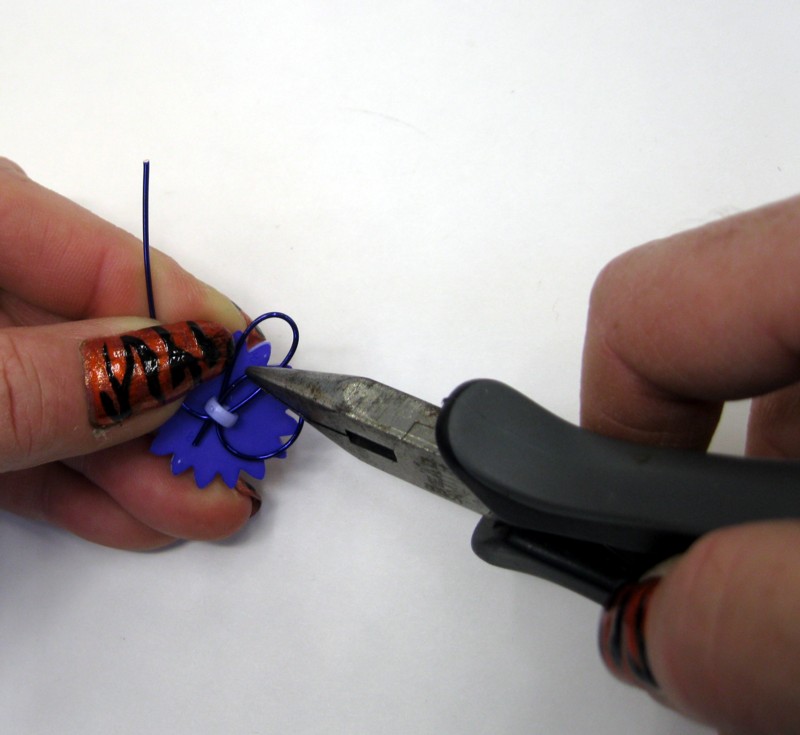
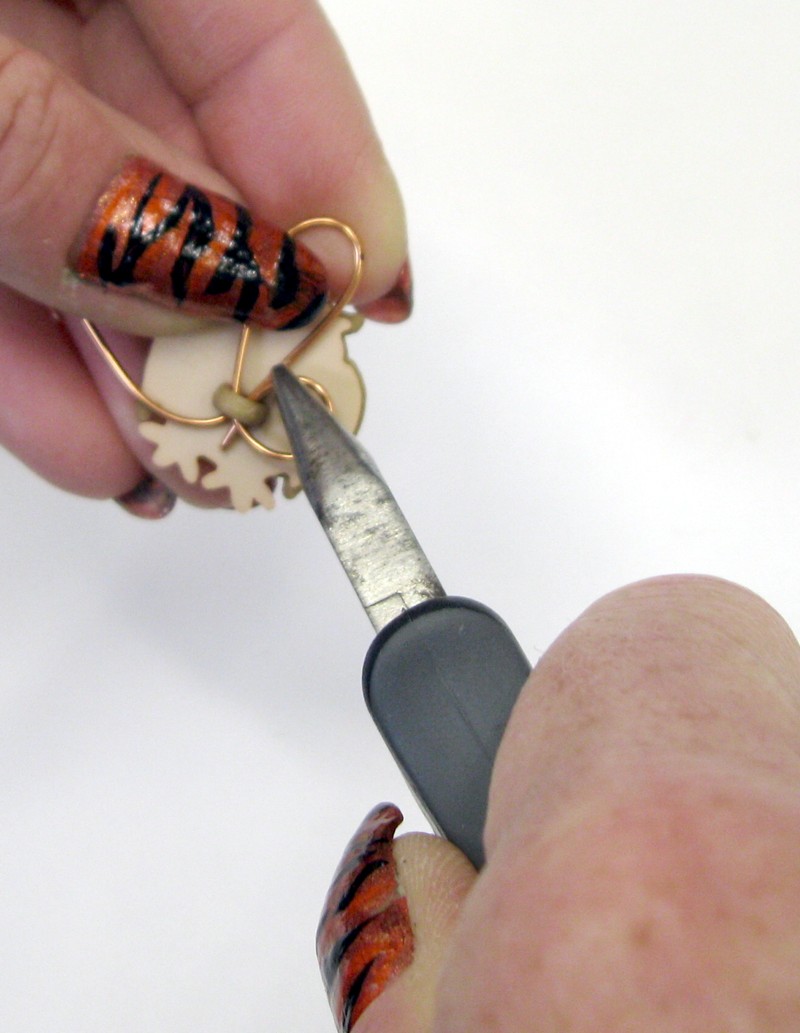
5. Hold the end of the wire and insert through the top of the shank. Pull tight. Repeat on other side.
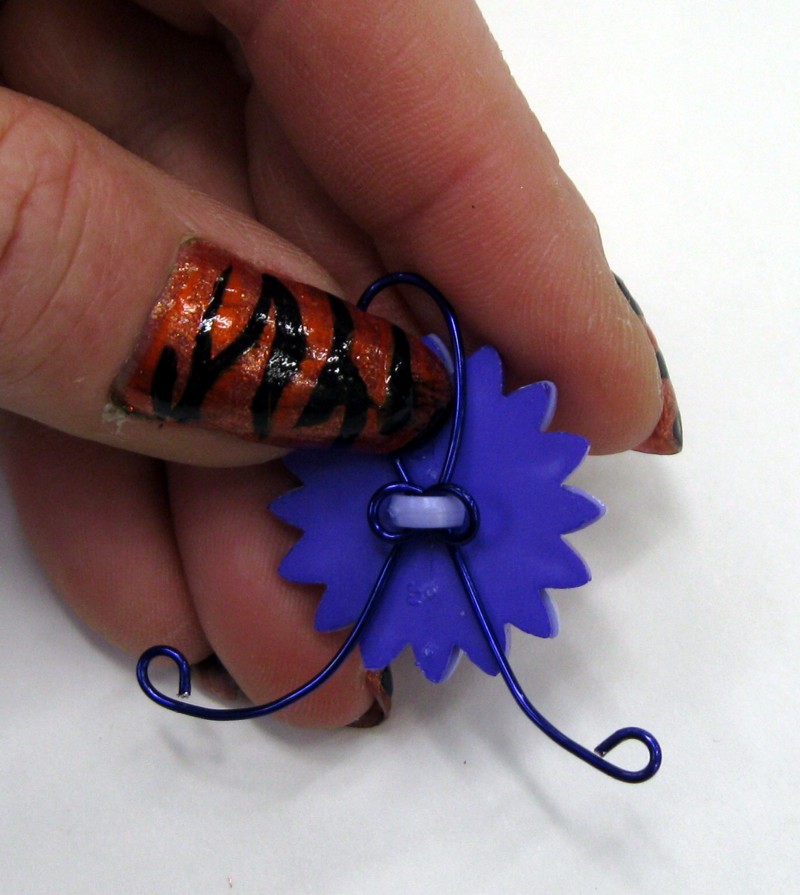
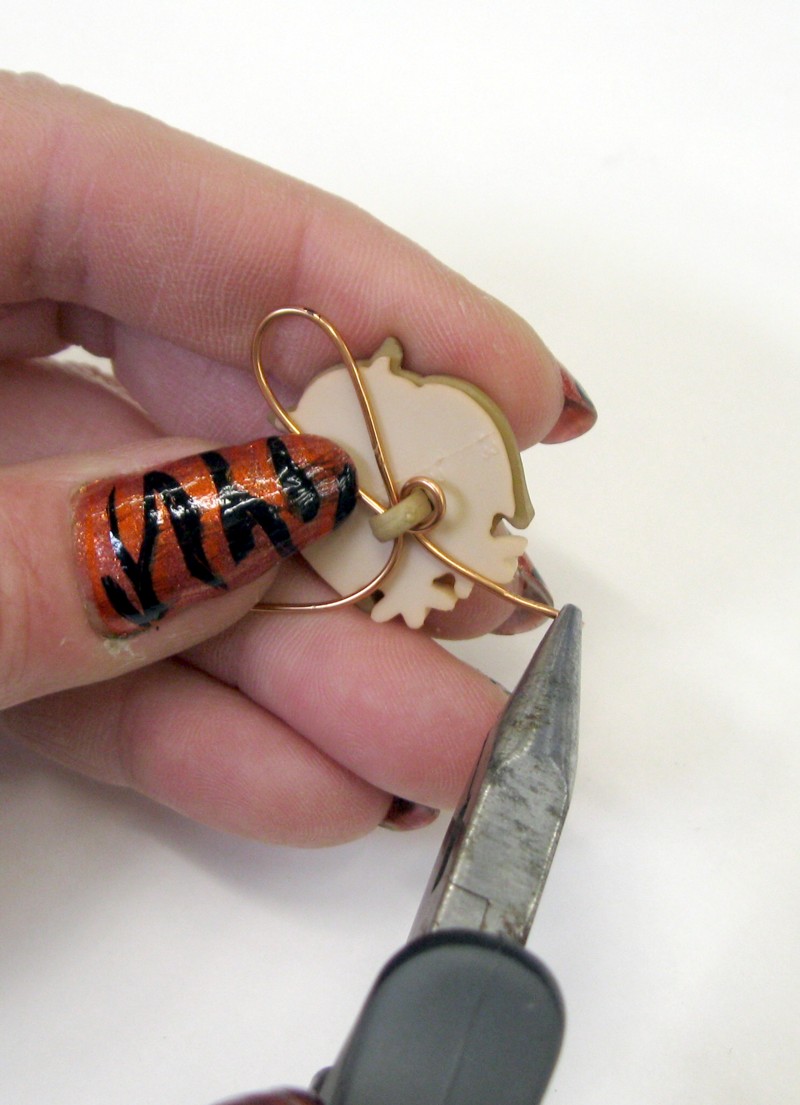
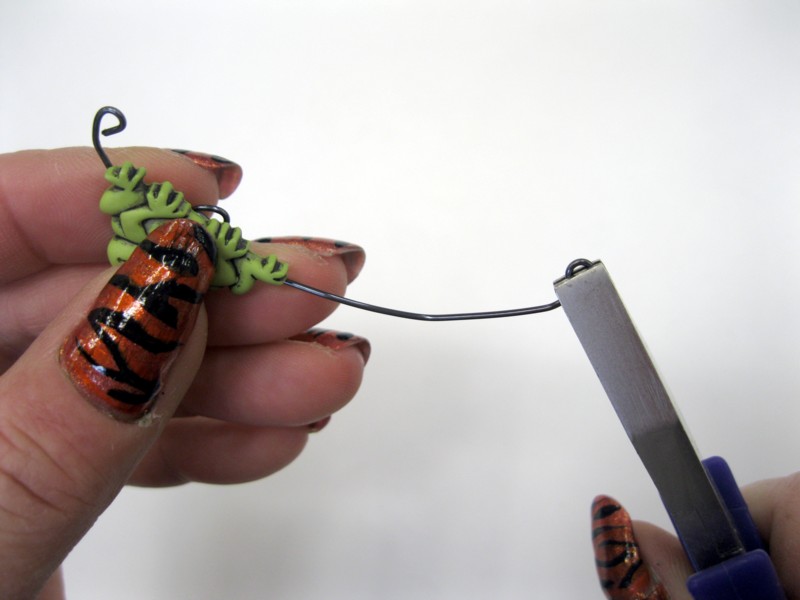
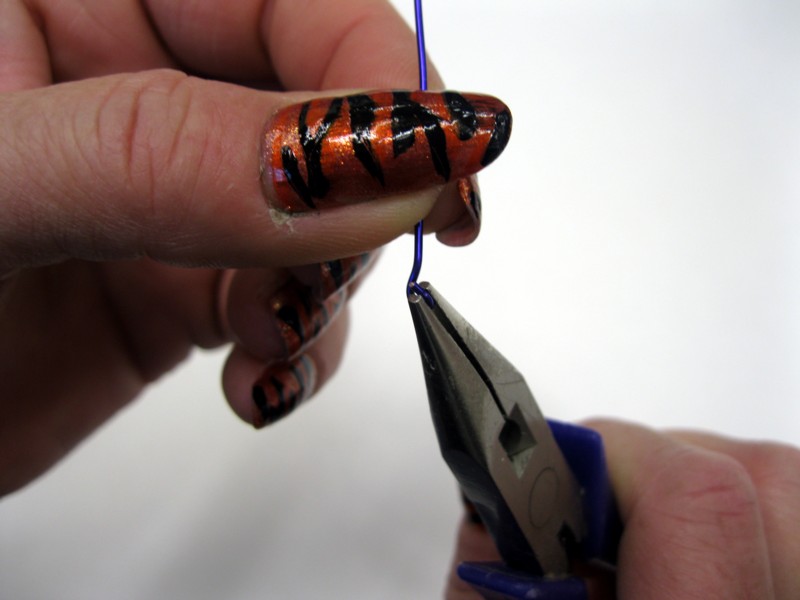
6. Turn a loop at the end of each side with the round-nose pliers.
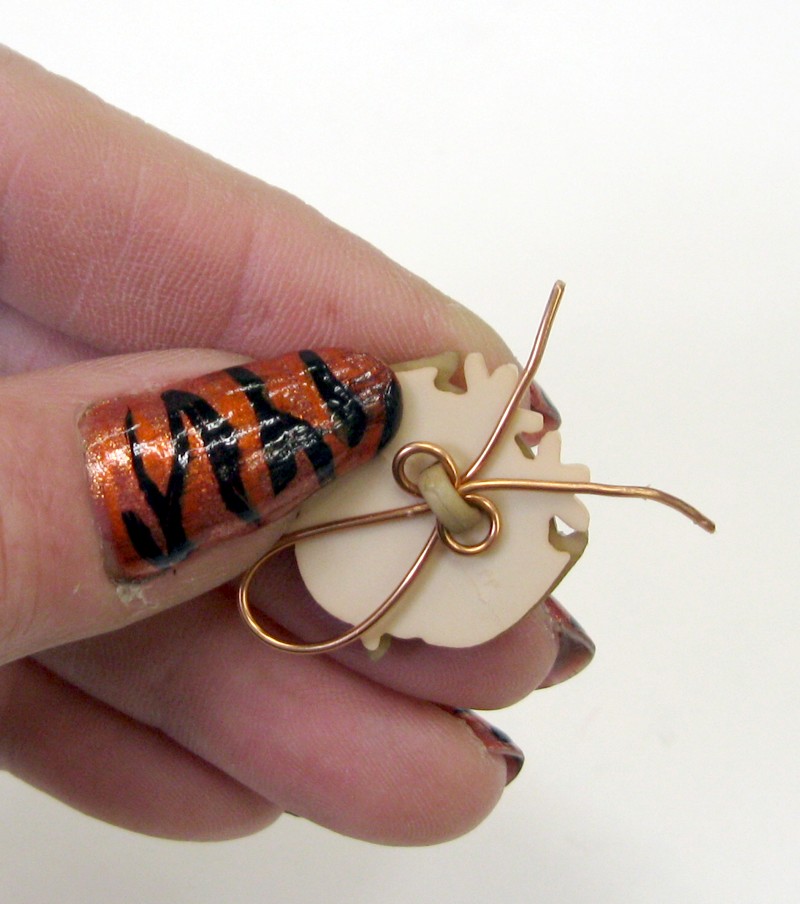
Add an extra half-turn to each loop.

Add a few extra bends in the one side.
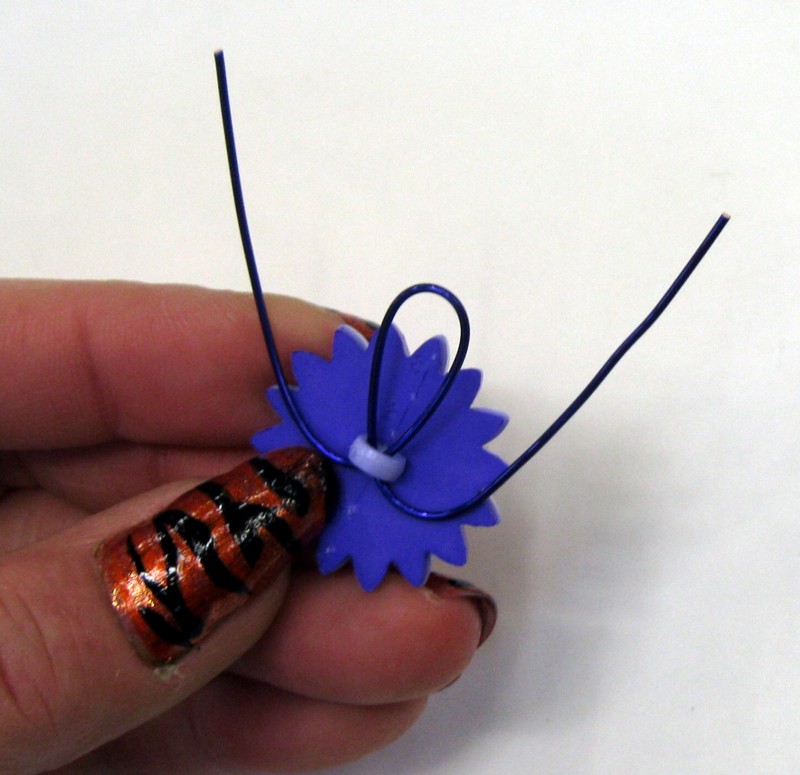
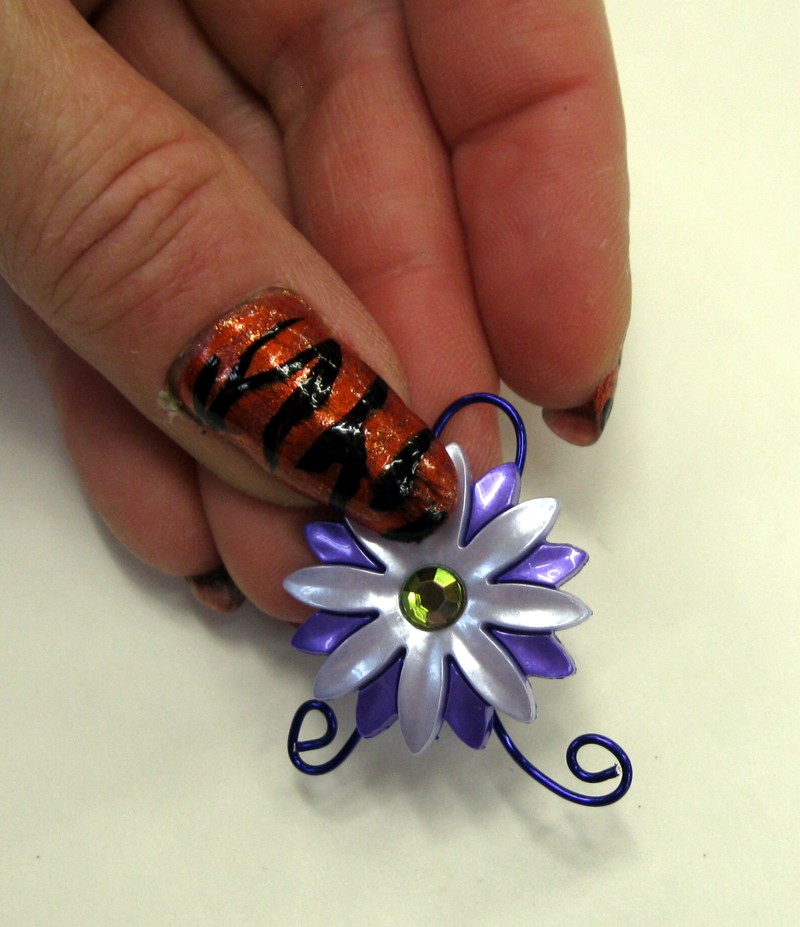
7. Cut a piece of wire approximately 1.5″ long.
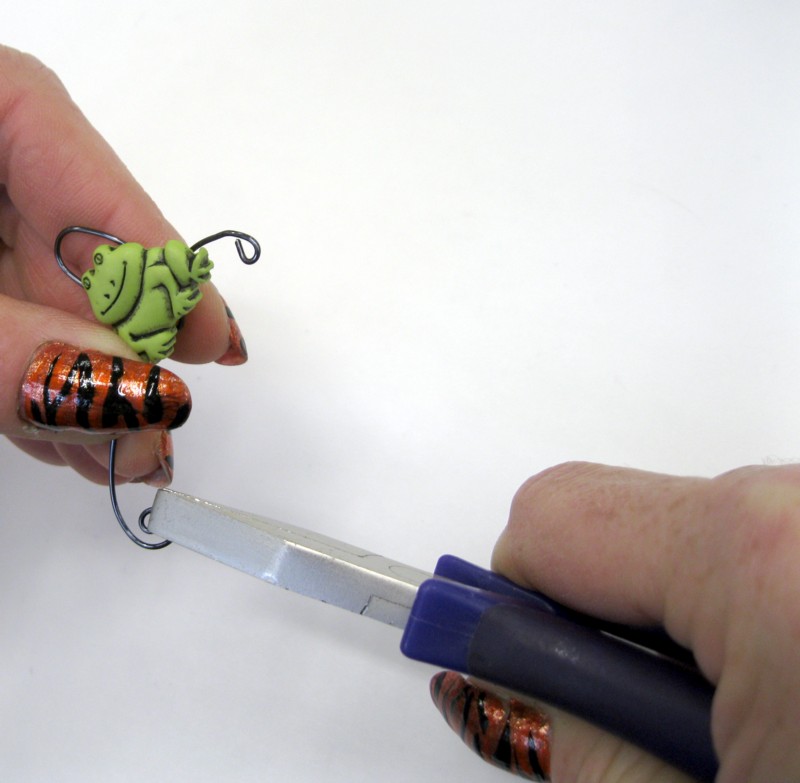
8. Turn a loop in one end with the round-nose pliers.
Put a bend at the top of the loop.
9. Open the loop with the chain-nose pliers.
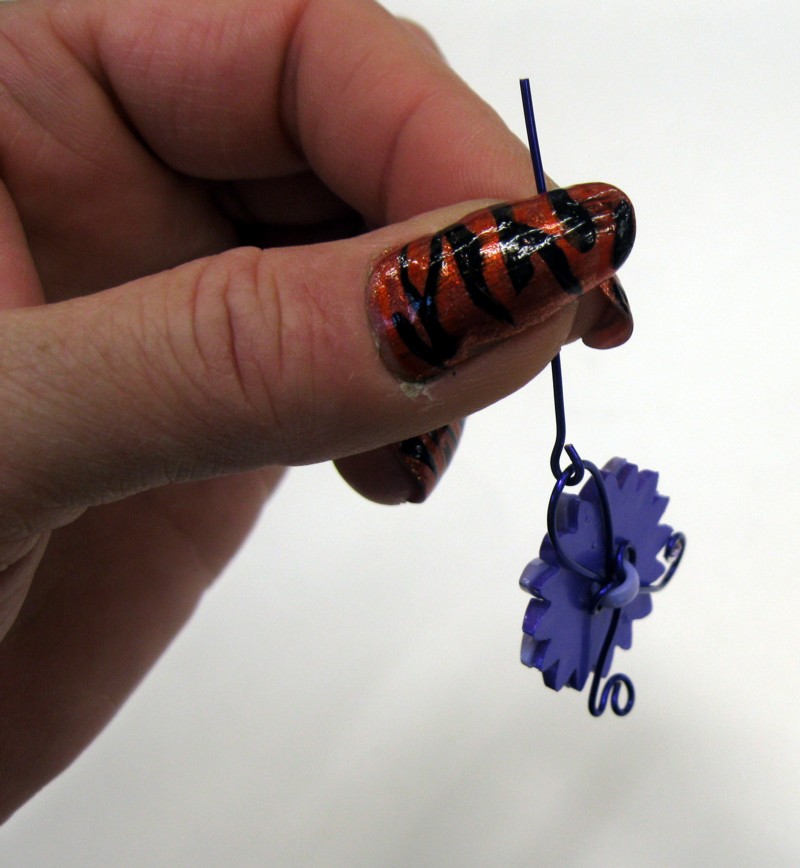
Attach the button charm and close the loop.

10. Add beads.
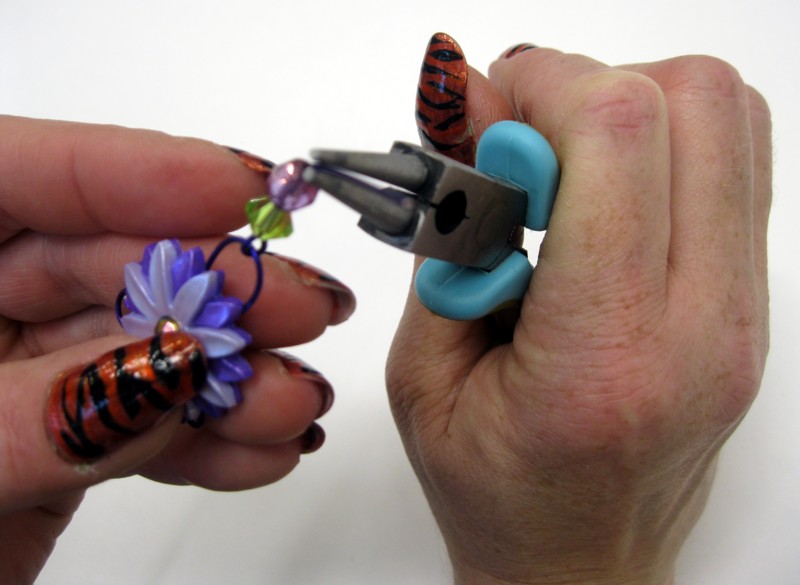
11. Make a 90-degree bend with the round-nose pliers.
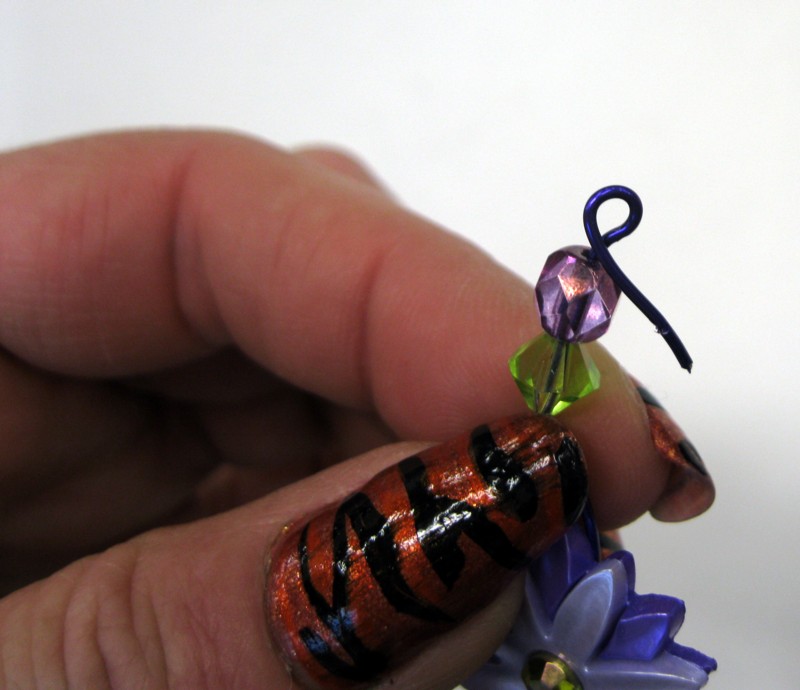
12. Turn a loop. (there may be some excess, depending on the size of your beads)
13. Cut off the excess, if any.
Open the loop on an earring finding and attach to the completed loop.
Finished!
Variations:

Don’t miss a single riveting tutorial! Bookmark our tutorial page and check back on Tuesdays for new ones.
Is there a tutorial you want to see? Leave a comment!
Dan’s will be open Thursday, October 31st from 10am until 5pm. Please have a safe and sweet Halloween!

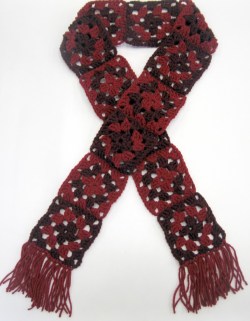
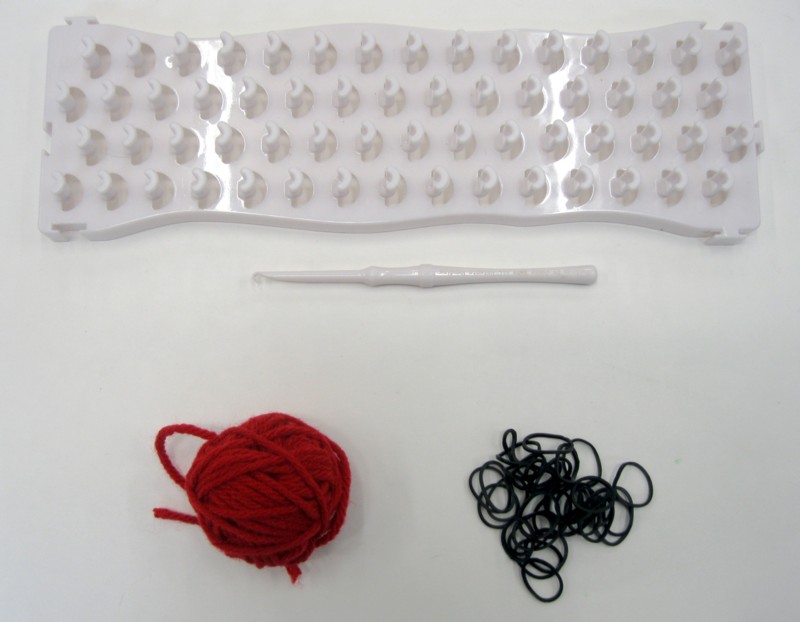
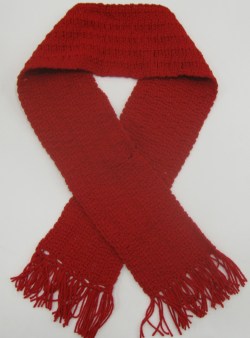
Happy Tuesday! I’ve got a fun tutorial for you today! Last week, I mentioned that Dan’s is a collection site for Trillium Health’s Red Scarf Project. I figured I’d give you guys one more easy crochet pattern before the scarf pick-up – The last day to drop off scarves at Dan’s Crafts & Things is November 14th.
This week, we’re making a granny square scarf in two shades of red. If you’re a bit rusty on your chains and double crochets, brush up here.
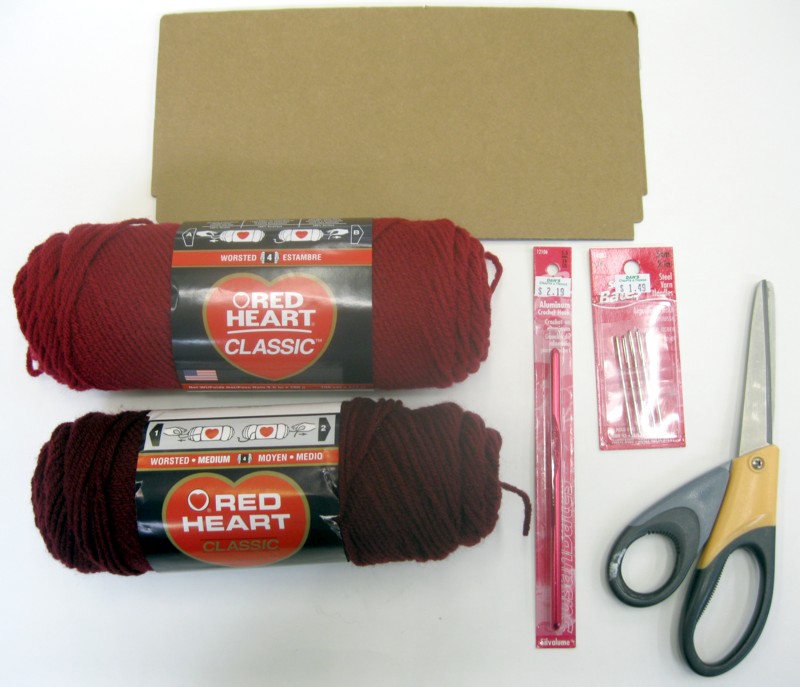
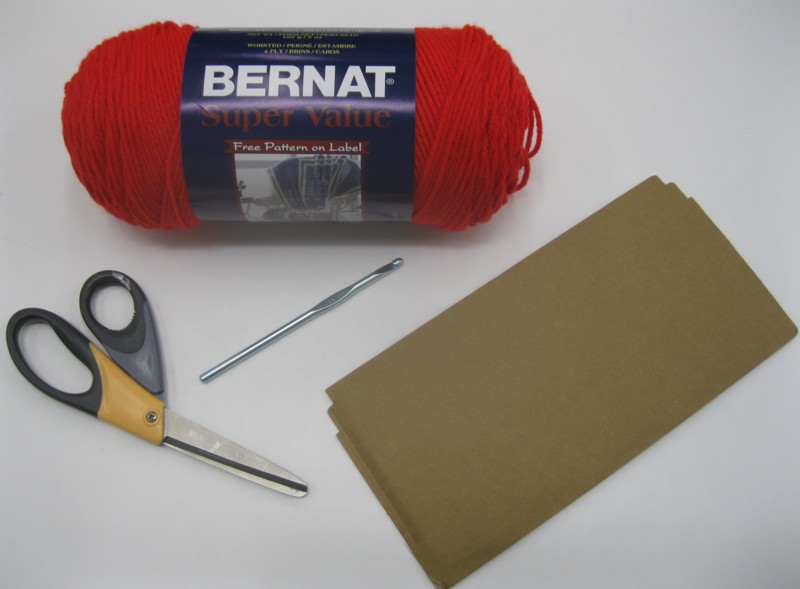
Materials:
- Red Heart Classic (3.5oz / 190 yards) – 1 skein each in Cardinal and Claret
- A size I-9 crochet hook
- A yarn needle
- Scissors
- A long piece of cardboard for making fringe (the one pictured is 5″ wide)
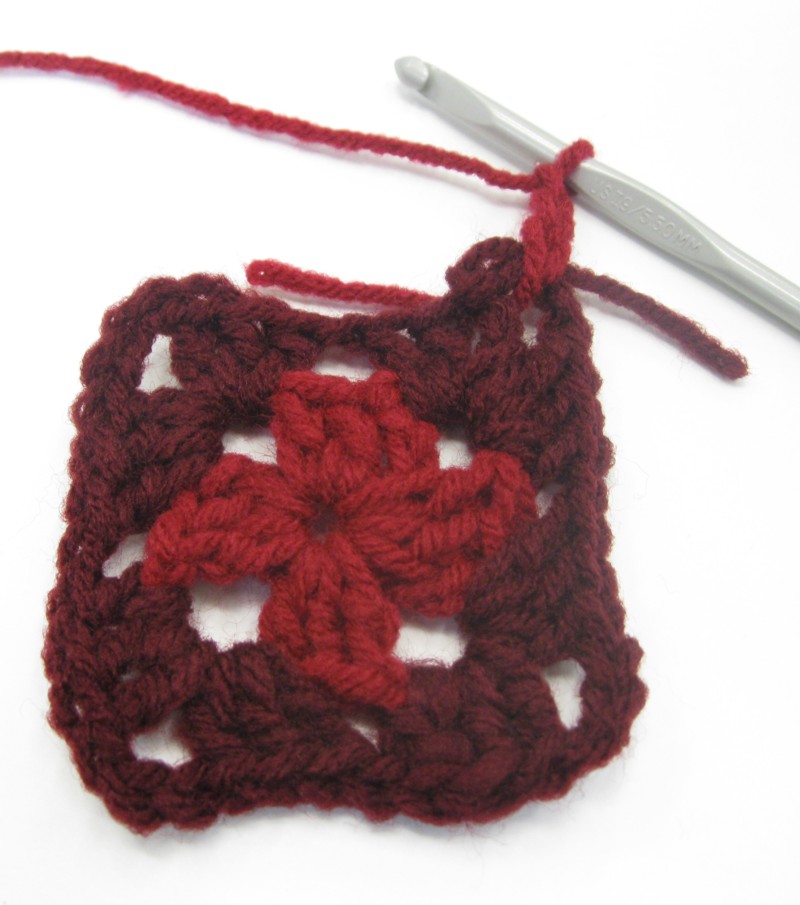
First, we’ll start with how to make a granny square:

Chain 4.
I’m starting with Cardinal, but you can start with either color. The scarf requires squares of both colors.

Slip stitch in the fourth chain from hook to join.

Round 1: Chain 3.

Make 2 double crochets into the middle of the circle, then chain 3.
Note – If you crochet over your yarn ends whenever you start or join a new color, you will eliminate the need to weave ends in later.
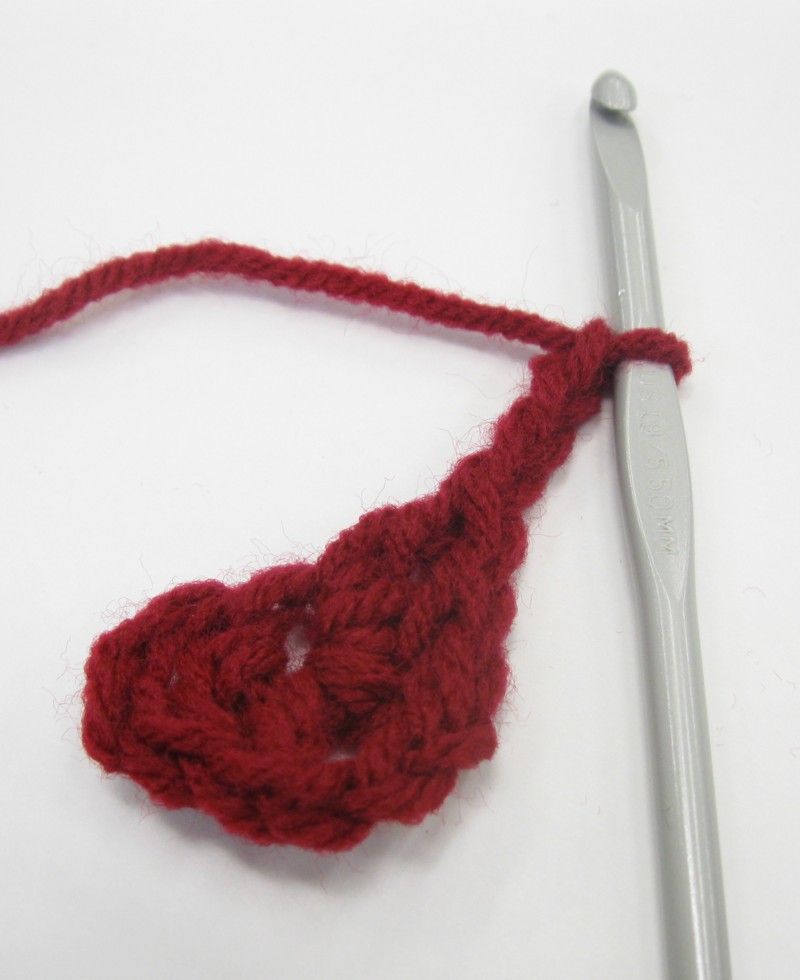
Make 3 double crochets into the center of the circle and chain 3.
Repeat the last step two more times. Slip stitch into the top of the chain at the beginning of the round. Cut the yarn and pull through the loop to end off.
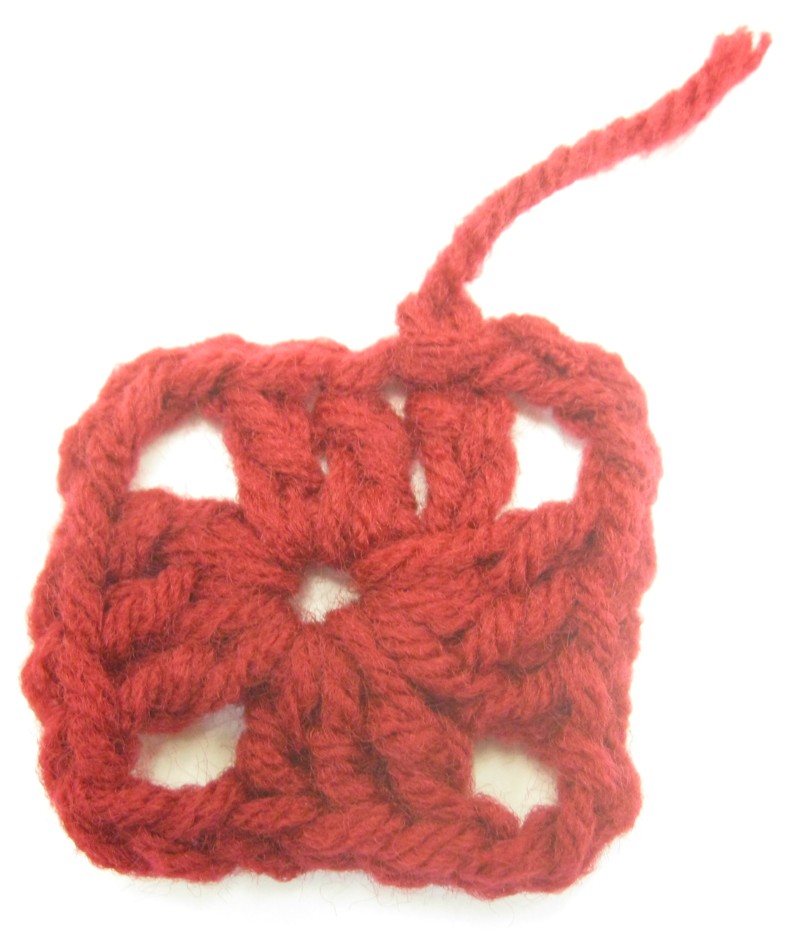
Round 2: Join with your second color in the corner and chain 3.

Make two double crochets in the corner, to the left of the chain, and then chain 1.

In the next corner, make three double crochets, chain three, and make three more double crochets. Chain one.

Repeat the last step in each of the next two corners.

Make three double crochets in the first corner and chain 3.

Slip stitch in the top of the first chain and finish off.
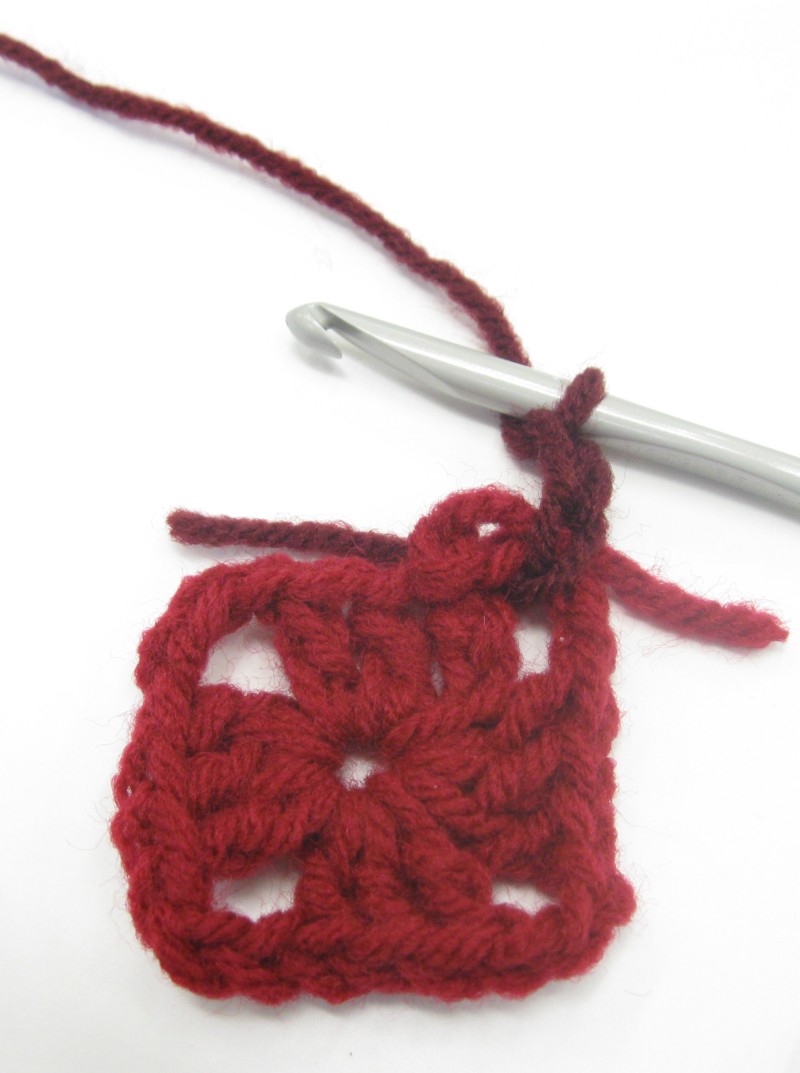
Round 3: Take your first color again and join in the corner. Chain 3.

Make two double crochets to the left of the chain, and chain 1.

Make 3 double crochets in the next space and chain 1.
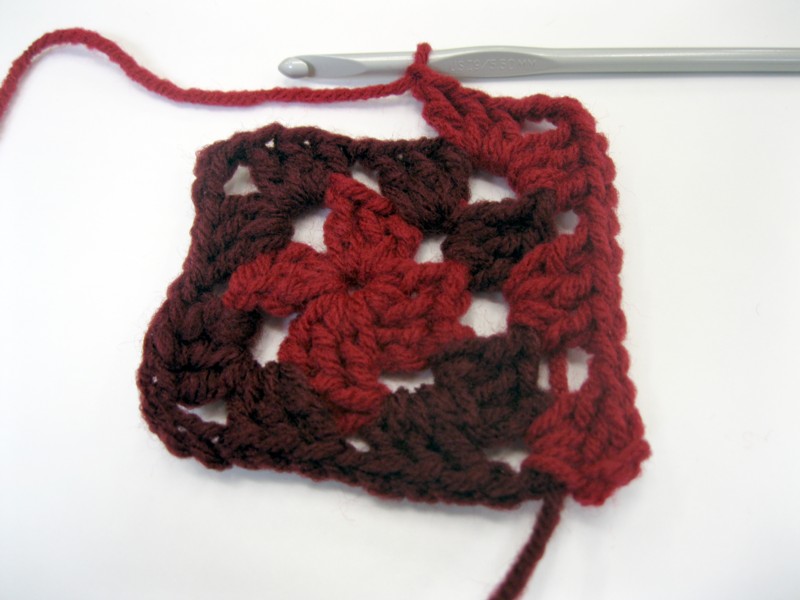
In the next corner, make three double crochets, chain three, and make three more double crochets. Chain one.

Repeat these last two steps on the next two sides and corners. In the last space, make three double crochets and chain one.

In the first corner, make three double crochets and chain 3.
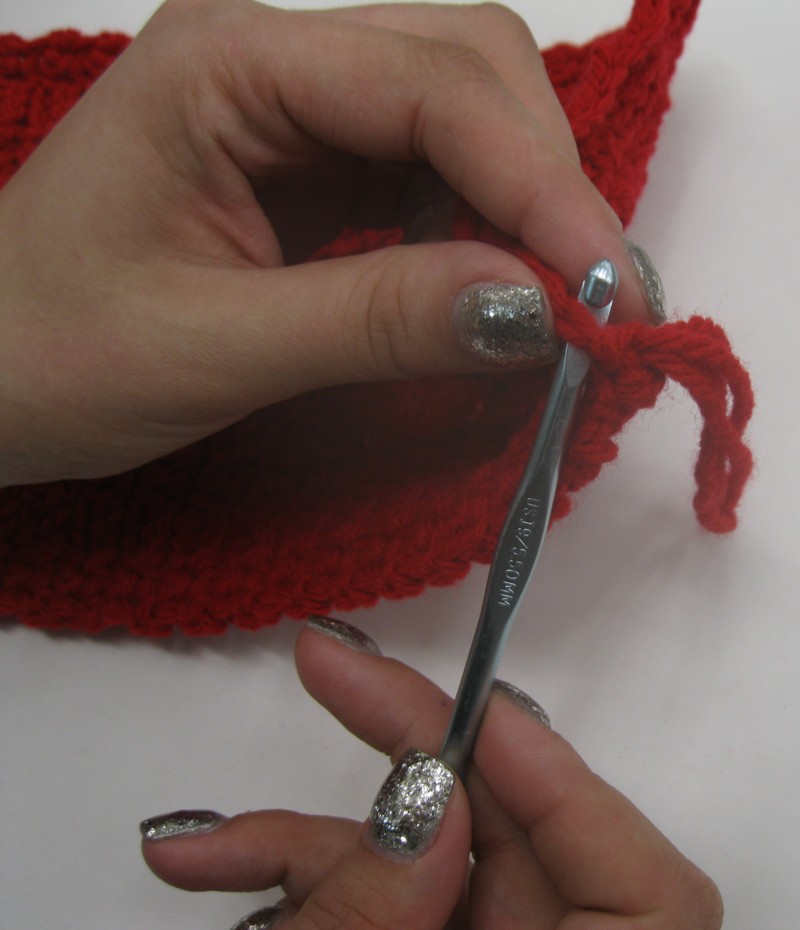
Join with a slip stitch in the beginning chain and fasten off. Weave in ends, if necessary, and trim yarn ends.
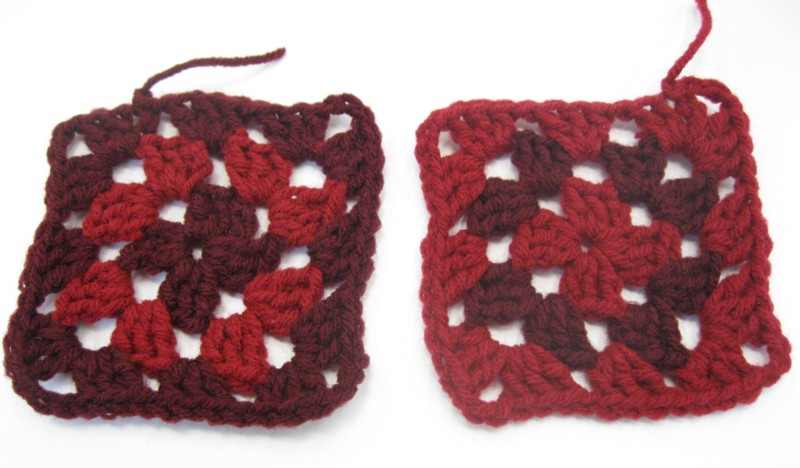
For the sample scarf, make thirteen squares – 7 squares made with Claret in the last row, and 6 squares with Cardinal in the last row.
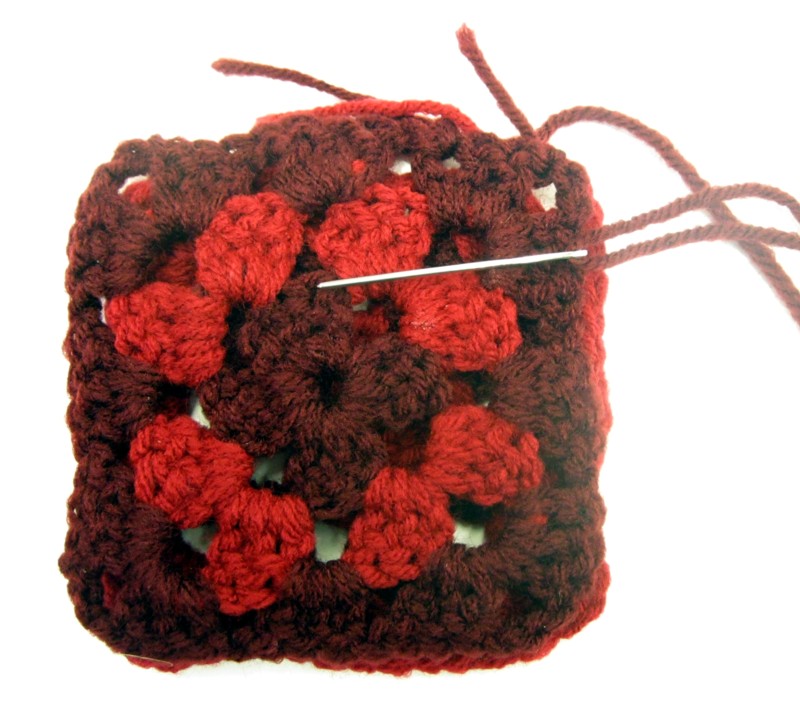
Thread a yarn needle with a length of Claret. With right sides together, join the yarn and whipstitch together. As before, if you work over your loose ends, you won’t have to weave them in later.
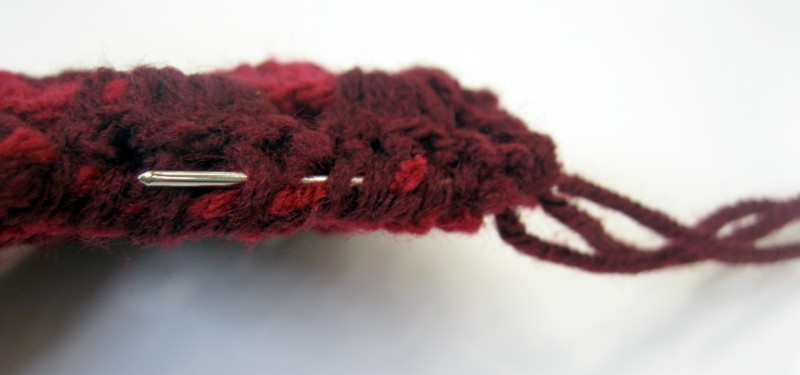
At the end of the square, weave the yarn needle back through the seam.

Pull the needle out of the seam and trim the yarn.

Join all thirteen squares – the squares with Claret in the last round will be on both ends.


Use Cardinal to make fringe. Step-by step directions on fringing are in last week’s tutorial.


Use two strands of yarn in each group. Attach fringe in the first chain, and then one group in each double crochet all the way across the end.
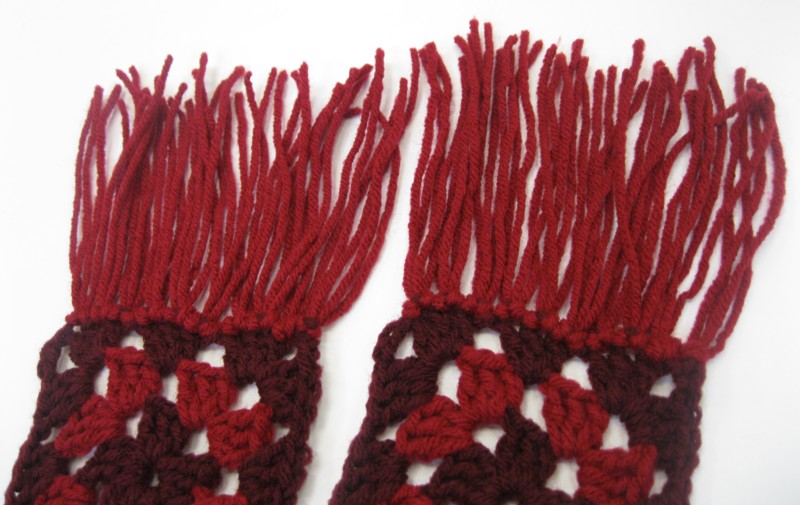
Fringe both ends and trim to make it even.

Finished!

Variation – Make the squares all in one color. Sample scarf uses 12 squares and is made in Bernat Super Value in Berry.
Don’t miss a single riveting tutorial! Bookmark our tutorial page and check back on Tuesdays for new ones.
Is there a tutorial you want to see? Leave a comment!
This week, we’ve gotten a restock on some of your favorite rubber band bracelet products, and have gotten some new items in.
Restock:
The FunLoom Basic kit contains a loom, a hook, instructions, an ‘I ♥ Fun Loom’ sticker, approximately 300 assorted-color silicone bands, and approximately 15 Super C-Clips.
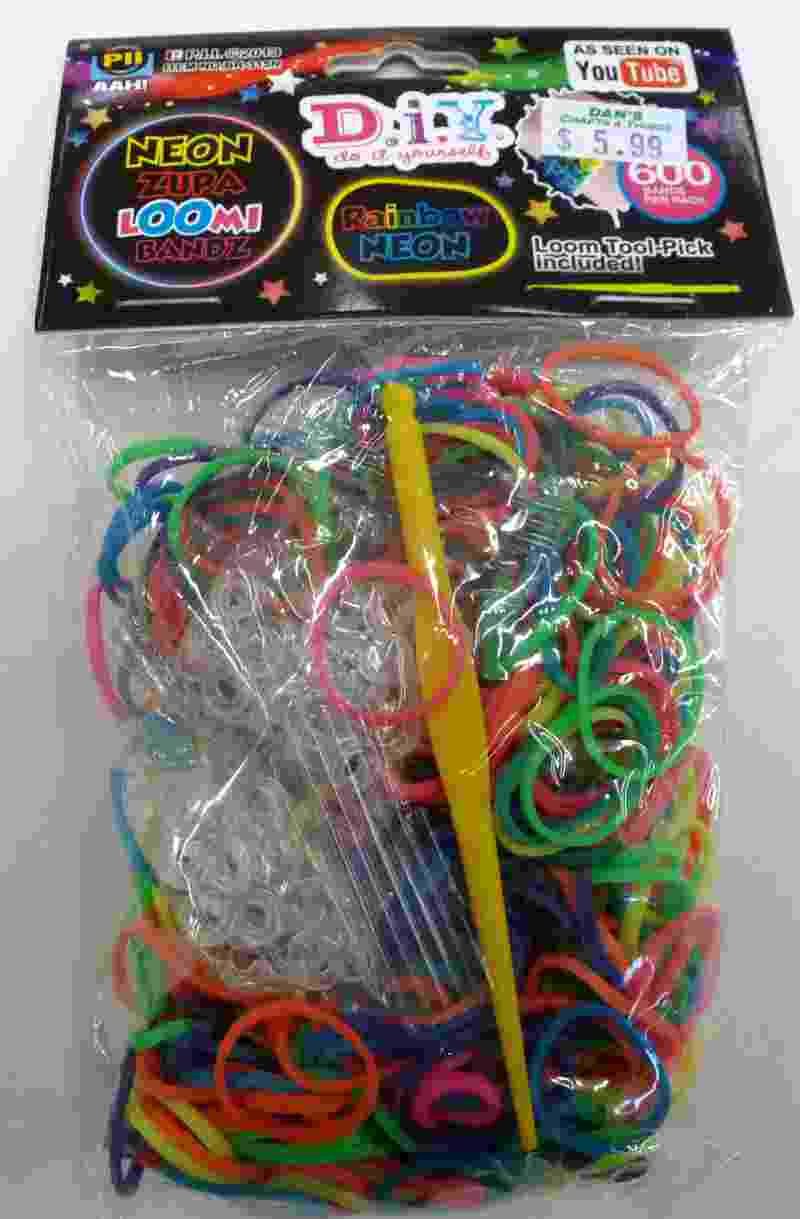
The neon assorted bag contains 600 neon-colored rubber bands, s-clips, instructions and a hook.
New Items:

The Deluxe FunLoom kit contains two FunLooms, two hooks, two sets of directions, two ‘I ♥ FunLoom’ stickers, approximately 600 assorted-color silicone bands, approximately 30 Super C-Clips, and a plastic organizer box with movable dividers. The organizer box snaps closed securely to prevent spillage.
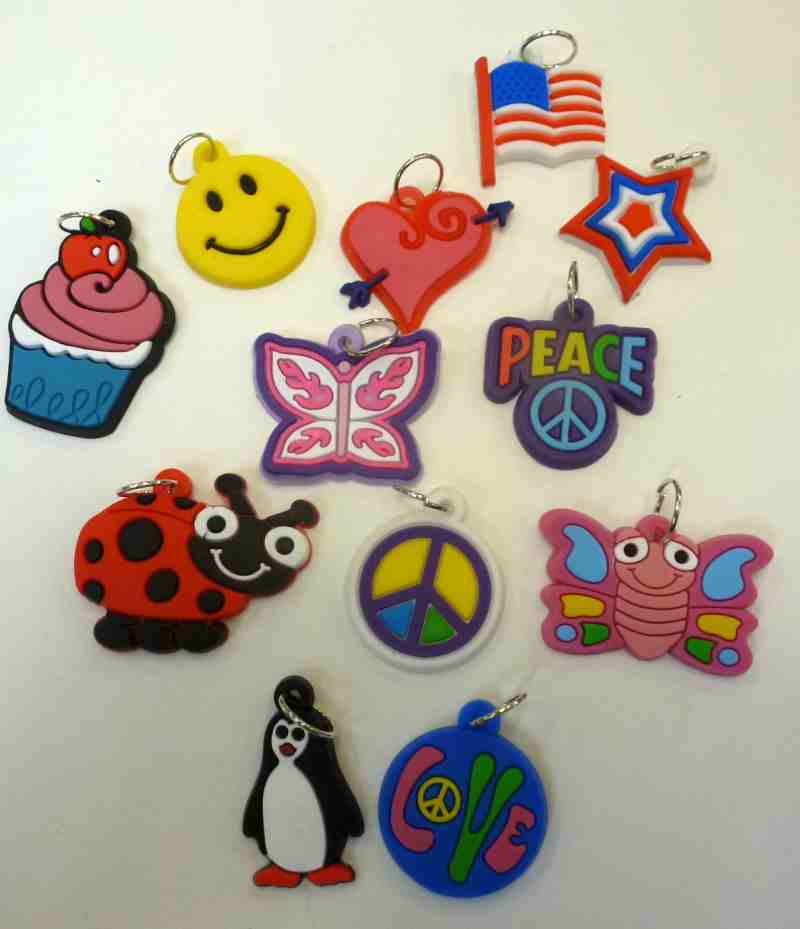
The charm set contains the 12 flexible rubber charms pictured. Each charm has one metal jump ring attached.
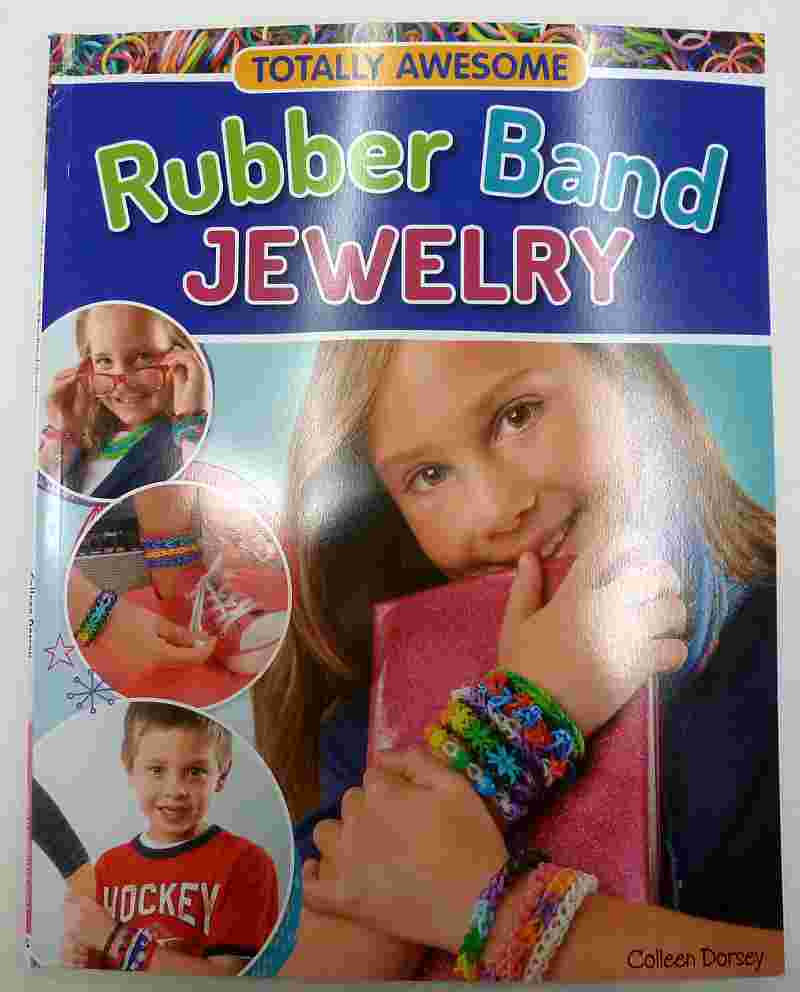
Totally Awesome Rubber Band Jewelery has more than 12 projects for all popular rubber band looms. Each project has clearly illustrated diagrams. The book also contains rubber band loom basics, variations on each project, and handy tips for using your rubber band loom.
Check out our website for all of the rubber band loom products we carry, and keep an eye on our Facebook page for announcements of new products as we get them in.
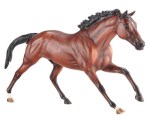
After several years of absence, we’ve brought Breyer Horses back to Dan’s Crafts & Things! Stop in today to see our new assortment of horses and accessories!


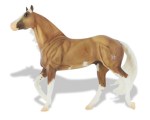


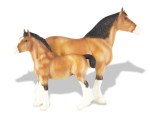

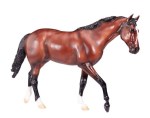


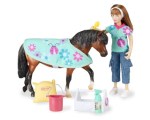


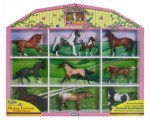


#Breyer #Horse #DansCraftsAndThings #Collectible #New
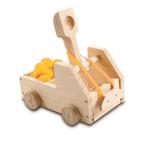
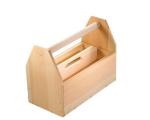
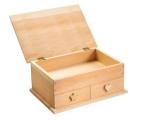
These cool new wood kits are designed to help children successfully complete a cool project. The wooden parts are high quality and require real tools to assemble. The finished item can actually be used and is something the child can be proud of building. This is a great way to introduce someone to building and following directions. #DansCraftsAndThings #RedToolBox #WoodKit #Construction #Success #Quality


Welcome to this week’s Tutorial Tuesday! I’m changing things up a little this week; I’m giving you a crochet pattern. Don’t worry, it’s easy. You only need to know how to chain (abbreviated ch in many patterns) and single crochet (abbreviated sc). Here’s a handy guide if you’re a bit rusty.
Why are we making red scarves? Every year, Trillium Health (formerly AIDS Care Rochester) collects handmade red scarves to sell on World AIDS Day. Funds from the sale of these scarves help fund Trillium Health’s AIDS/HIV programs. Dan’s Crafts & Things is proud to support Trillium Health’s Red Scarf Project by being a collection site for red scarves.
How can you help? Make a red scarf (any shade of red, not just bright red); any craft is welcome – knitting, loom knitting, crocheting, sewing, weaving, etc. Bring your handmade red scarf to Dan’s Crafts & Things for collection by Thursday, November 14th.
Materials:
- 1 Skein of Bernat Super Value yarn – 7 ounces/426 yards (I used Berry; Burgundy, True Red and Cherry Red are also great reds in this line)
- A size I-9 crochet hook
- Scissors
- Yarn needle
- A long piece of cardboard to make fringe (The one I used was 5″ wide)
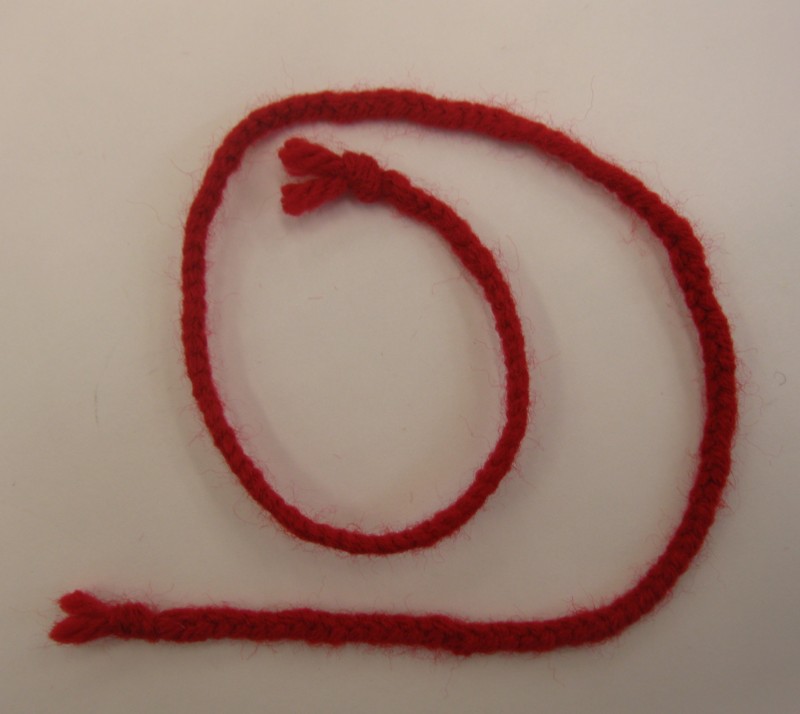
Chain 27
Row 1: Single crochet in the second chain from the hook. Single crochet in the next chain. *Chain 3. Skip 3 chains. Single crochet in each of next two stitches. Repeat from * across the row. You should have six groups of two single crochets and five groups of chains. Chain one and turn.
Row 2: Single crochet in each of the next 2 single crochets. Chain 3. Repeat these steps across the row. Single crochet in each of the last two single crochets. Chain one and turn.
Repeat row 2 until the scarf is the desired length. Omit the last chain on the last row. Cut yarn, leaving a 6″ – 8″ tail. Pull the tail through the last loop on the hook to fasten off. Weave in ends using the yarn needle.
Adding fringe:

Wrap yarn around the cardboard.
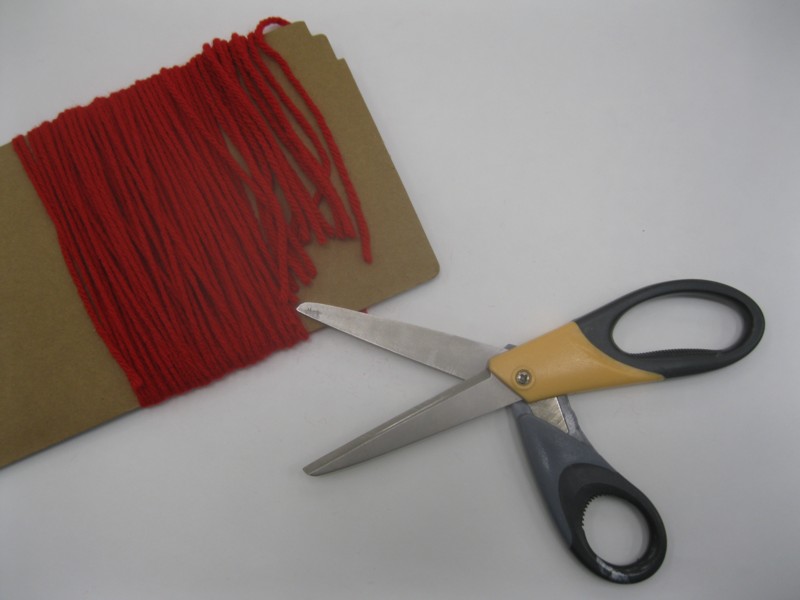
Cut yarn along one side of the cardboard.
Insert crochet hook into a stitch on the end of the scarf.
Take two pieces of yarn and fold in half.
Grab middle of yarn with hook.
Pull yarn part way through.
Insert fingers into loop and pull the tail through.
Pull tight.
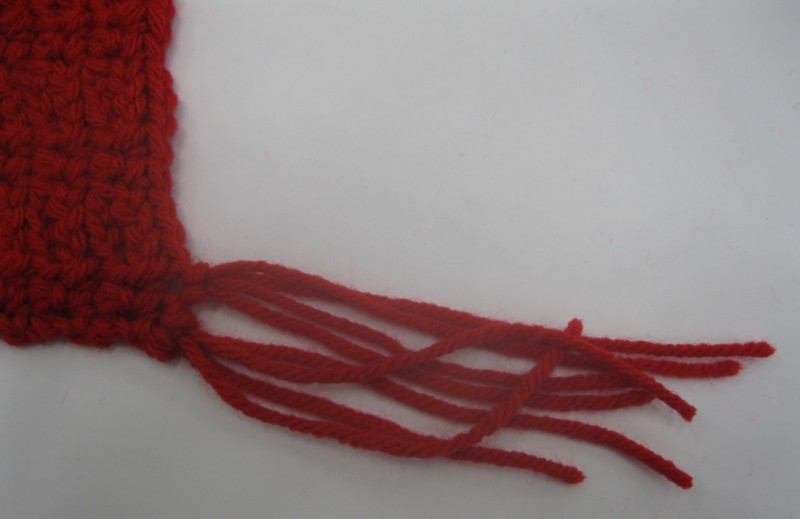
Put one group of fringe in each single crochet, and one group in the middle chain of each 3 chain group. Fringe across both ends.
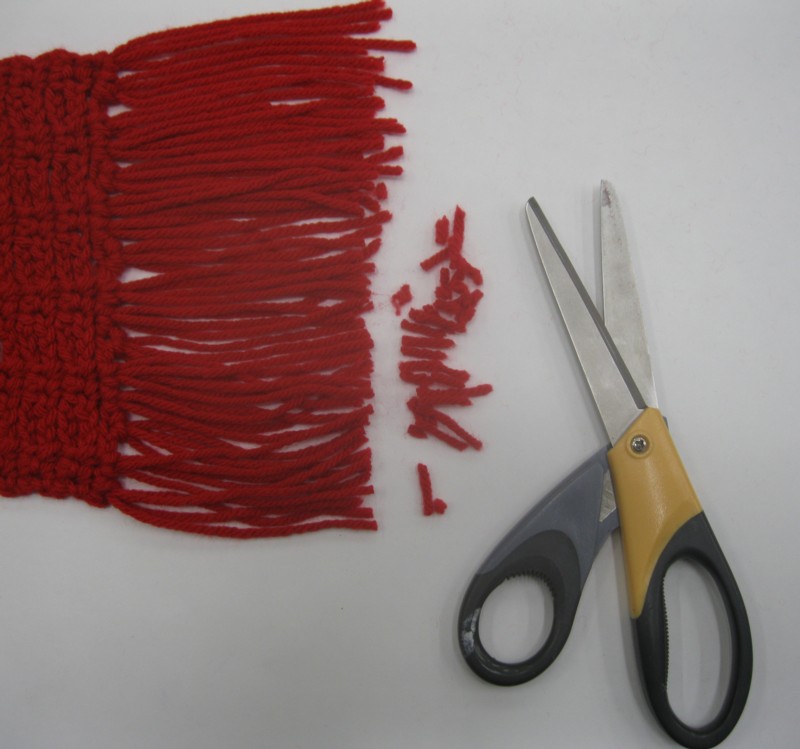
Using your scissors, trim the fringe so it’s all even.
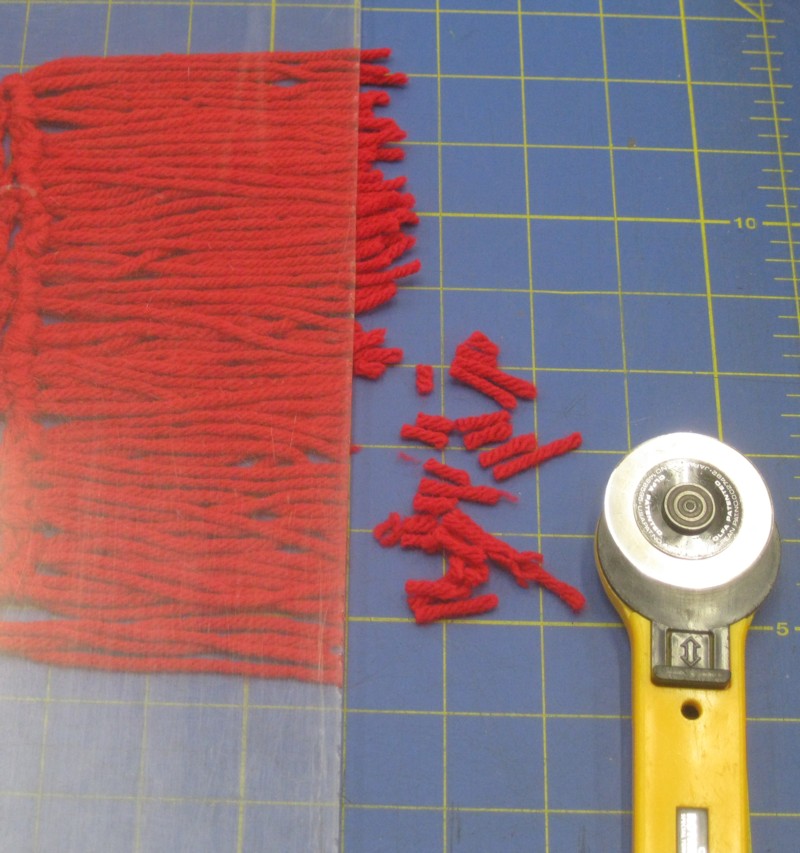
Alternately, if you have a rotary cutter, you can use it to trim the fringe very quickly.
 Finished!
Thanks to Rebecca for being my awesome hand model this week.
Don’t miss a single riveting tutorial! Bookmark our tutorial page and check back on Tuesdays for new ones.
Is there a tutorial you want to see? Leave a comment!
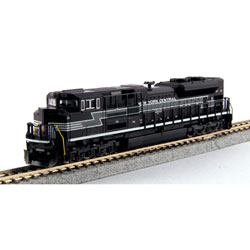
Here are the latest additions to our “N” Scale #Locomotive selection at #DansCraftsAndThings #Atlas #Kato #Fun #Railroad #Modeling