Tutorial Tuesday – Granny square scarf
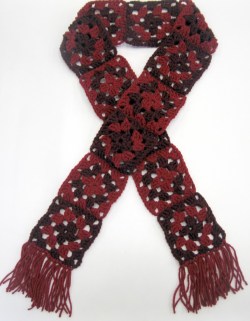
Happy Tuesday! I’ve got a fun tutorial for you today! Last week, I mentioned that Dan’s is a collection site for Trillium Health’s Red Scarf Project. I figured I’d give you guys one more easy crochet pattern before the scarf pick-up – The last day to drop off scarves at Dan’s Crafts & Things is November 14th.
This week, we’re making a granny square scarf in two shades of red. If you’re a bit rusty on your chains and double crochets, brush up here.
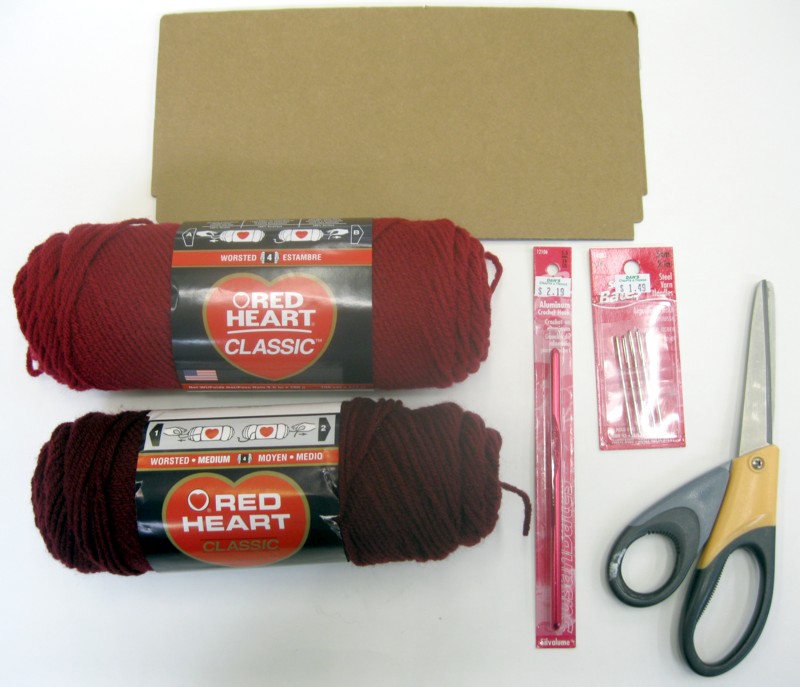
Materials:
- Red Heart Classic (3.5oz / 190 yards) – 1 skein each in Cardinal and Claret
- A size I-9 crochet hook
- A yarn needle
- Scissors
- A long piece of cardboard for making fringe (the one pictured is 5″ wide)
First, we’ll start with how to make a granny square:

Chain 4.
I’m starting with Cardinal, but you can start with either color. The scarf requires squares of both colors.

Slip stitch in the fourth chain from hook to join.

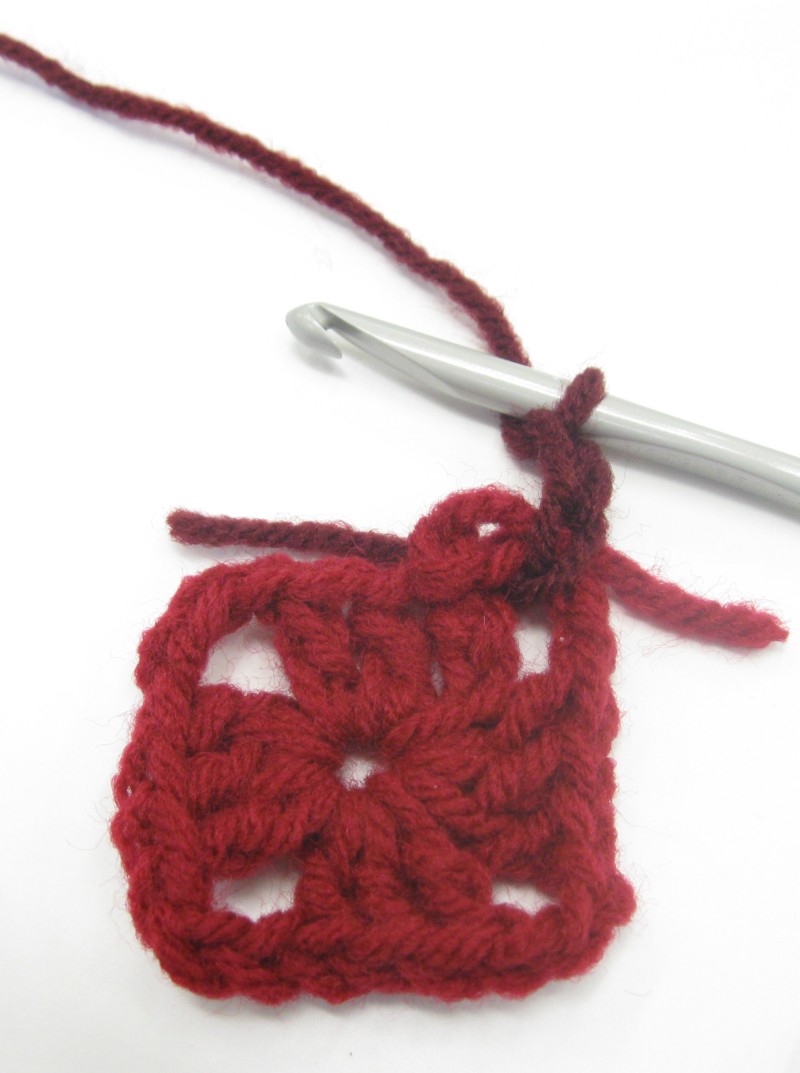
Round 1: Chain 3.

Make 2 double crochets into the middle of the circle, then chain 3.
Note – If you crochet over your yarn ends whenever you start or join a new color, you will eliminate the need to weave ends in later.
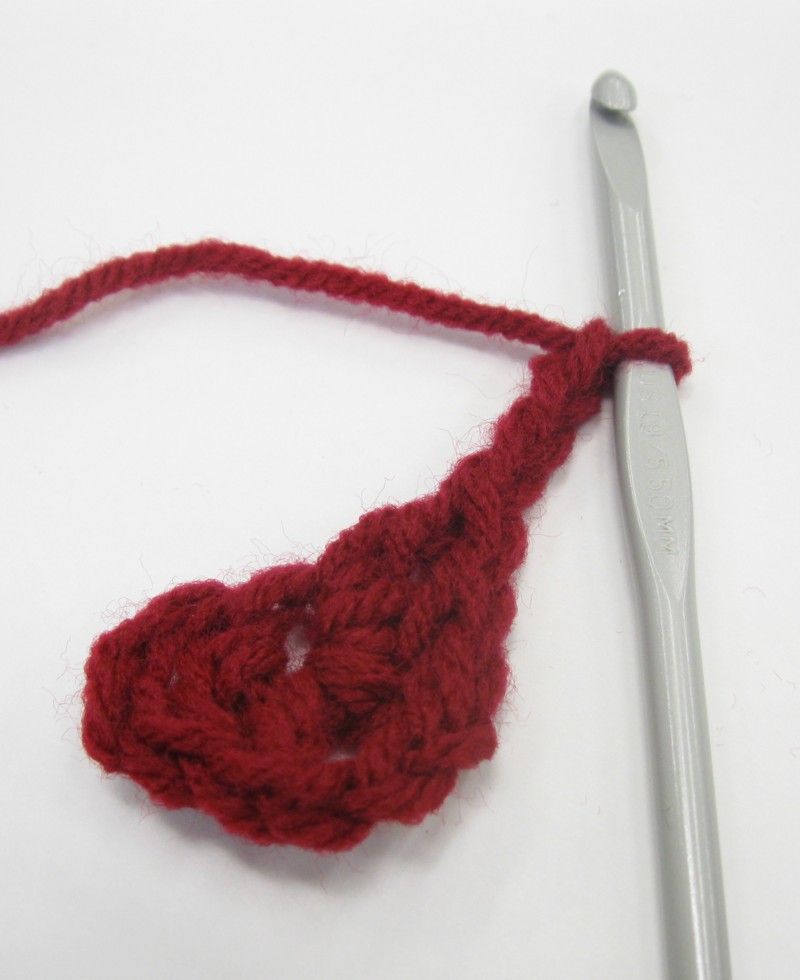
Make 3 double crochets into the center of the circle and chain 3.
Repeat the last step two more times. Slip stitch into the top of the chain at the beginning of the round. Cut the yarn and pull through the loop to end off.
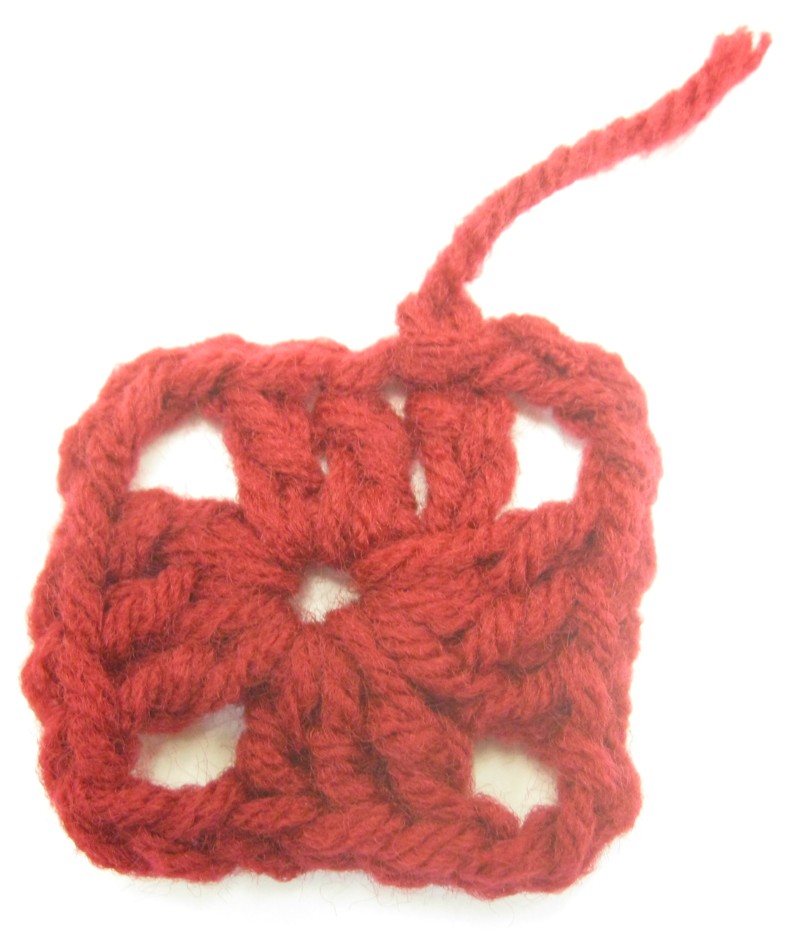
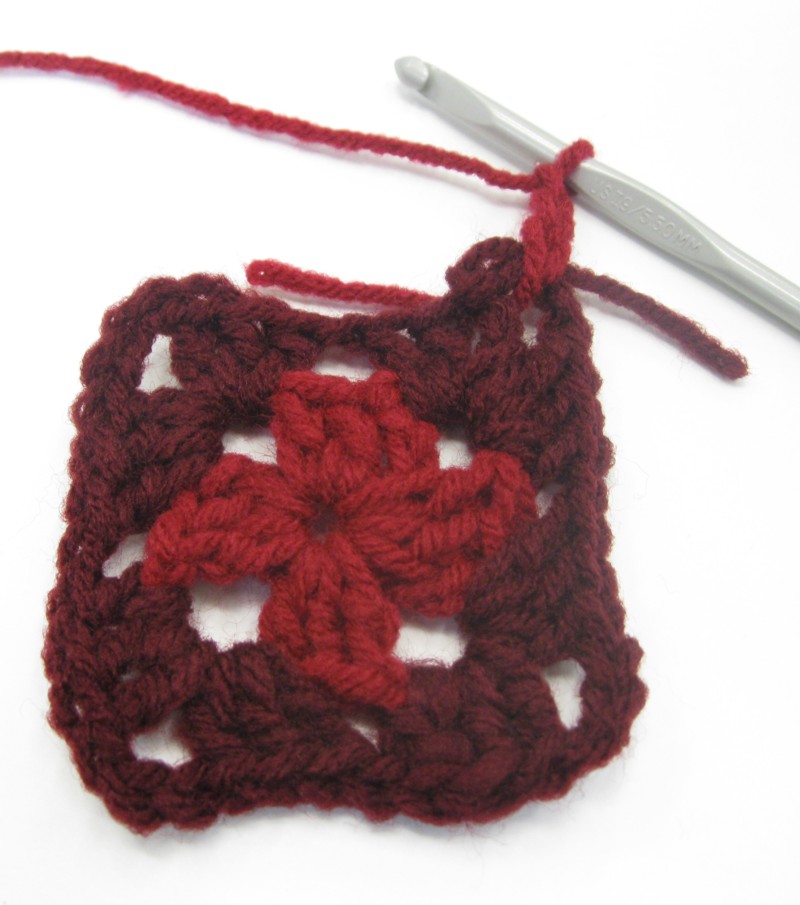
Round 2: Join with your second color in the corner and chain 3.

Make two double crochets in the corner, to the left of the chain, and then chain 1.

In the next corner, make three double crochets, chain three, and make three more double crochets. Chain one.

Repeat the last step in each of the next two corners.

Make three double crochets in the first corner and chain 3.

Slip stitch in the top of the first chain and finish off.
Round 3: Take your first color again and join in the corner. Chain 3.

Make two double crochets to the left of the chain, and chain 1.

Make 3 double crochets in the next space and chain 1.
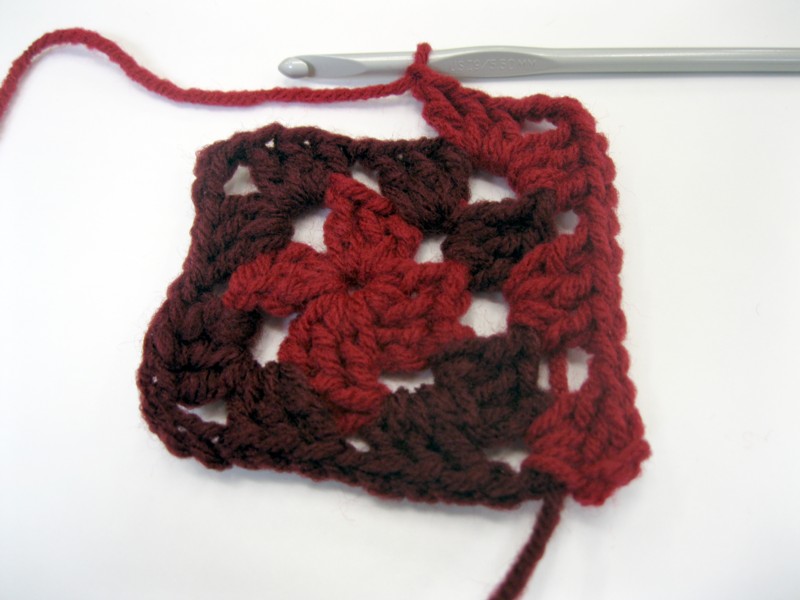
In the next corner, make three double crochets, chain three, and make three more double crochets. Chain one.

Repeat these last two steps on the next two sides and corners. In the last space, make three double crochets and chain one.

In the first corner, make three double crochets and chain 3.
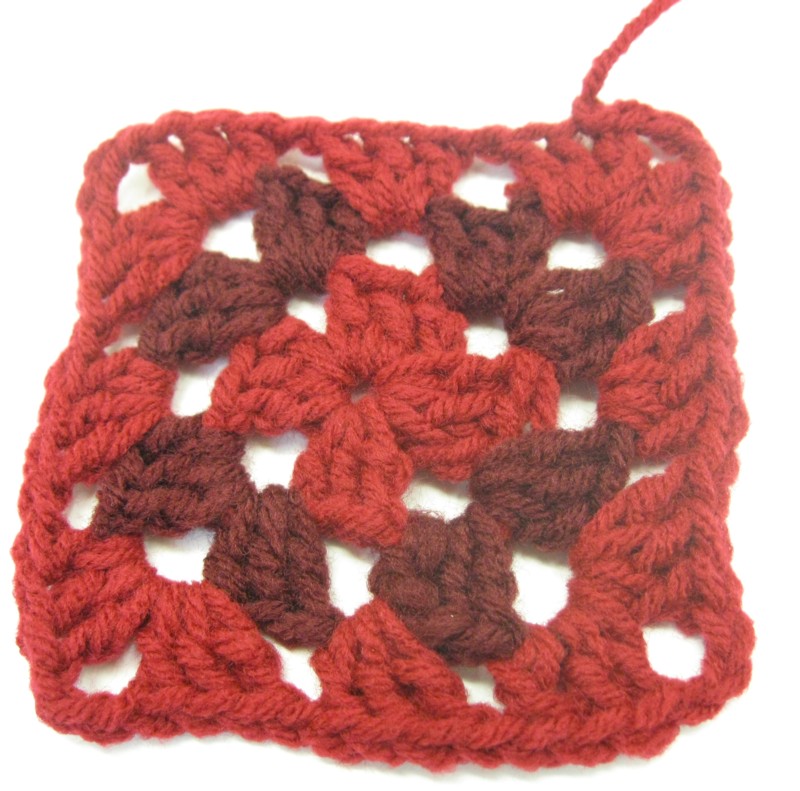
Join with a slip stitch in the beginning chain and fasten off. Weave in ends, if necessary, and trim yarn ends.
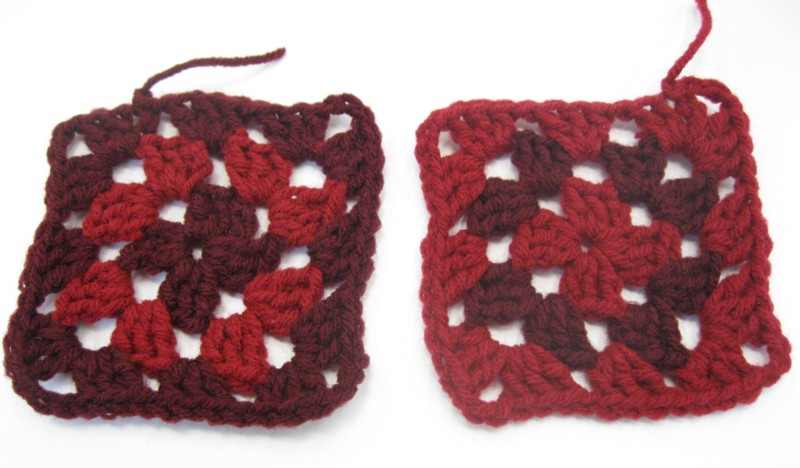
For the sample scarf, make thirteen squares – 7 squares made with Claret in the last row, and 6 squares with Cardinal in the last row.
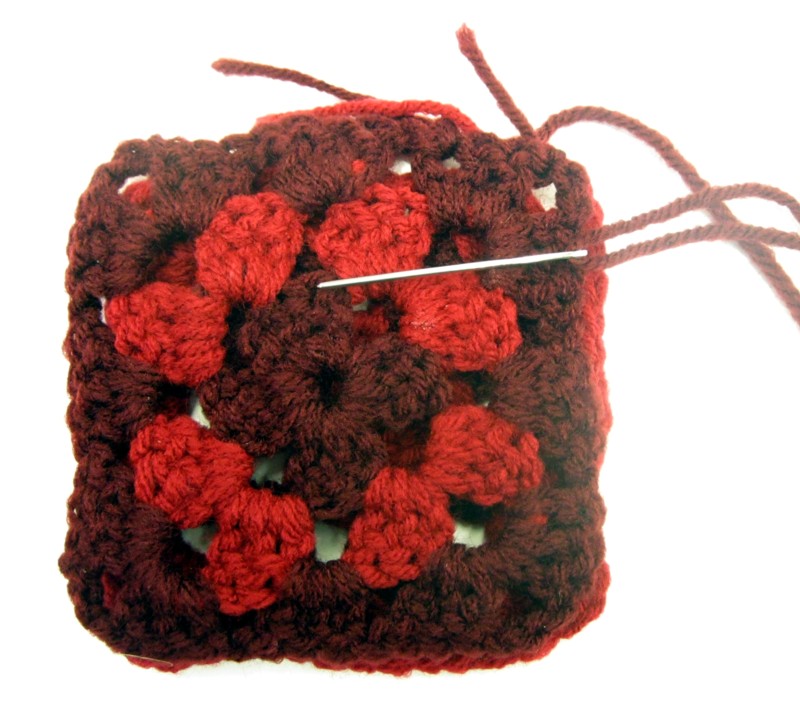
Thread a yarn needle with a length of Claret. With right sides together, join the yarn and whipstitch together. As before, if you work over your loose ends, you won’t have to weave them in later.
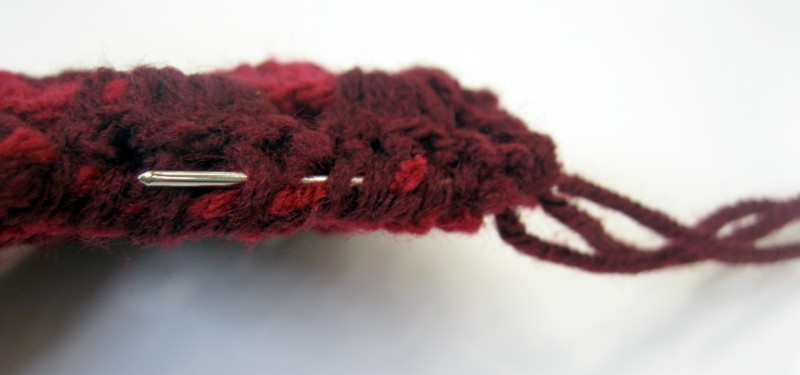
At the end of the square, weave the yarn needle back through the seam.

Pull the needle out of the seam and trim the yarn.

Join all thirteen squares – the squares with Claret in the last round will be on both ends.


Use Cardinal to make fringe. Step-by step directions on fringing are in last week’s tutorial.


Use two strands of yarn in each group. Attach fringe in the first chain, and then one group in each double crochet all the way across the end.
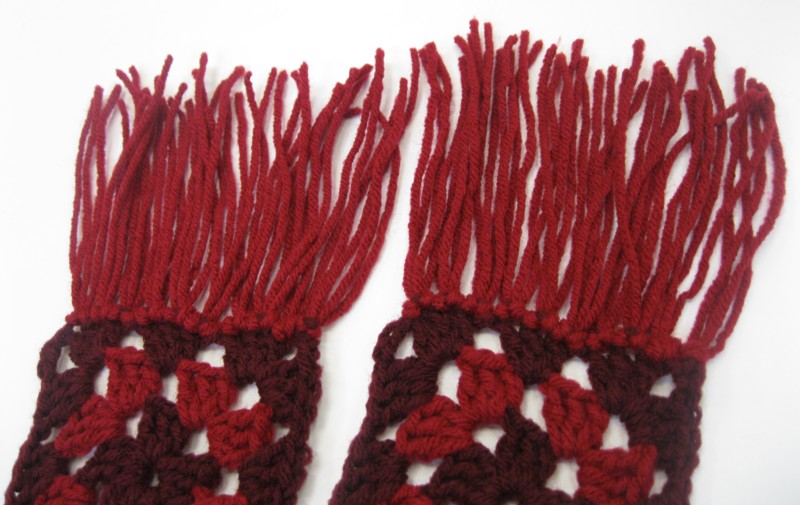
Fringe both ends and trim to make it even.

Finished!

Variation – Make the squares all in one color. Sample scarf uses 12 squares and is made in Bernat Super Value in Berry.
Don’t miss a single riveting tutorial! Bookmark our tutorial page and check back on Tuesdays for new ones.
Is there a tutorial you want to see? Leave a comment!
