
Welcome to another Tutorial Tuesday! Today, we’re making another wonderful crochet scarf for the Red Scarf Project! Other Red Scarf Project patterns can be found here.
Why are we making red scarves? Every year, Trillium Health (formerly AIDS Care Rochester) collects handmade red scarves to sell on World AIDS Day. Funds from the sale of these scarves help fund Trillium Health’s AIDS/HIV programs. Dan’s Crafts & Things is proud to support Trillium Health’s Red Scarf Project by being a collection site for red scarves.
How can you help? Make a red scarf (any shade of red, not just bright red); any craft is welcome – knitting, loom knitting, crocheting, sewing, weaving, etc. Bring your handmade red scarf to Dan’s Crafts & Things for collection by Monday, November 24th.
Squishy Ribbed Scarf
Finished size: 70” x 4”
Gauge: Gauge does not matter for this project

You need:
- Bernat Super Value, 1 skein (7 oz/426 yds) – Berry
- I9 (5.5mm) crochet hook
- Scissors
- Yarn needle

Foundation Single Crochet (fsc) – Ch 2, sc in first ch.

*Insert hook through bottom loop of sc.

Yo, pull up loop, yo, pull through both loops on hook. Repeat from *
To start scarf, fsc 250, or until desired length. Ch 1, turn.


Single Crochet in Back Loop Only (sc blo) – Insert hook through back loop of sc. Yo, pull up loop, yo, pull through both loops on hook.
Sc blo across. Ch 1, turn.

After a few rows, the thick, squishy rib pattern becomes apparent. Repeat the pattern row for 16 rows or until scarf is desired width.
Finish off and weave in ends.

Finished!
Thanks to Rebecca for being my awesome hand model this week.
Don’t miss a single riveting tutorial! Bookmark our tutorial page and check back on Tuesdays for new ones.
Is there a tutorial you want to see? Leave a comment!
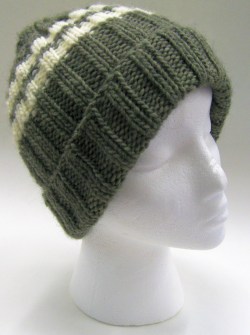
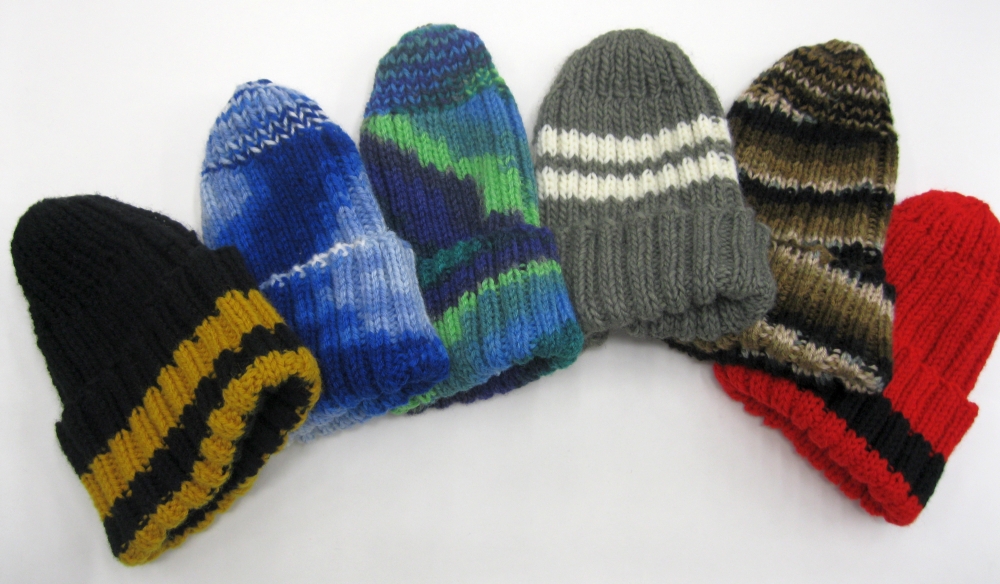
Happy Tutorial Tuesday! This weekend, we did a circular knitting demonstration at the store. We handed out this pattern for a basic ribbed hat. It’s never too early to think about knitting warm woolies – Knit faster, Winter’s coming!
Materials:
Size 8 circular needles, 16” long
Size 8 double pointed needles
1 skein of worsted weight yarn
Stitch marker
Instructions:
Cast on 80 stitches and join, being careful not to twist. Place marker at beginning of round.
Knit in K2 P2 ribbing until piece measures 11”.
Shape top – Change to double-pointed needles when the hat becomes too small to continue on circular needle.
Round 1: K2tog, P2tog to end of round.
Round 2 – 6: Knit in K1 P1 rib.
Round 7: K2tog to end of round.
Round 8: Knit.
Round 9: K2tog to end of round.
Break yarn, leaving a long end. Draw end through remaining stitches and fasten securely.
Don’t miss a single riveting tutorial! Bookmark our tutorial page and check back on Tuesdays for new ones.
Is there a tutorial you want to see? Leave a comment!
Rochester offers a multitude of fun summer activities and this weekend is no exception. Here are some of our favorite fun options:
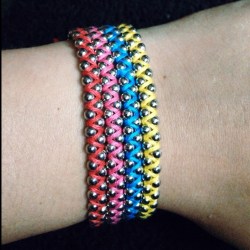
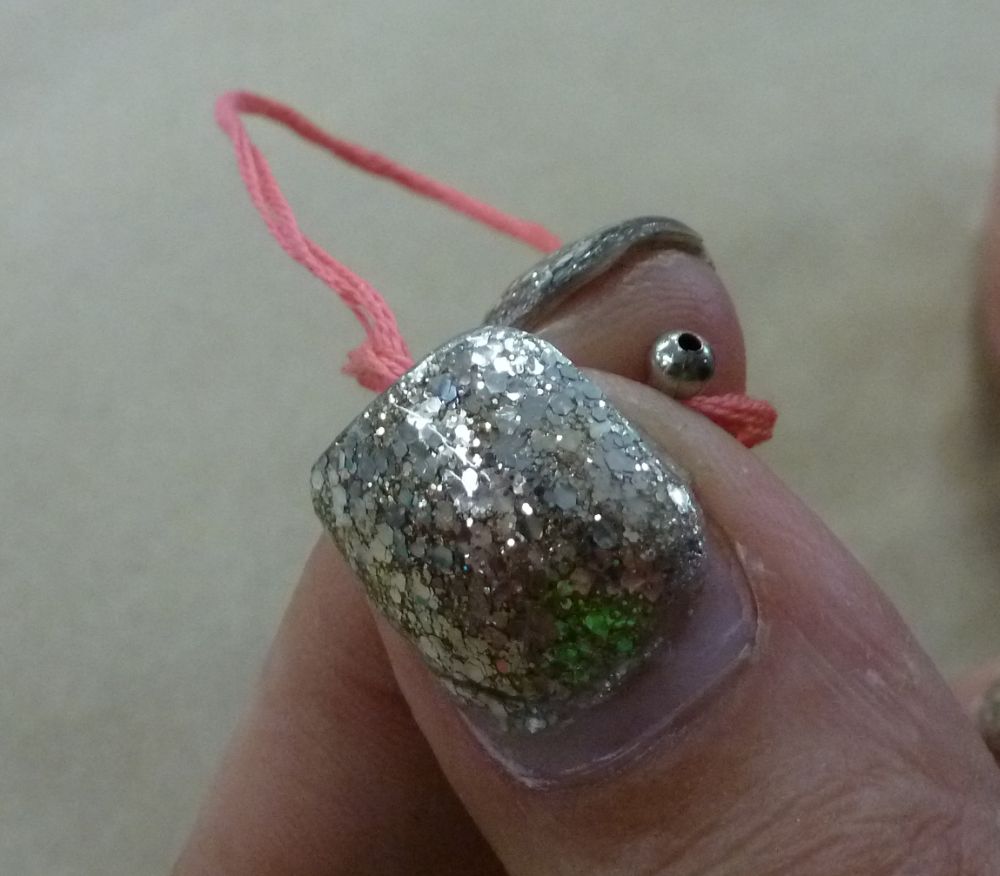
Happy Tutorial Tuesday! how’s your summer going? I hope it’s full of fun craft activities! Today’s tutorial is a fun bracelet made with embroidery floss and ball chain!

You Need:
- 12″ of ball chain
- DMC embroidery floss
- Scissors
- Ruler
- Wire cutters
- Glue (optional)
1. Cut your ball chain into two 6″ lengths. Cut two 32″ pieces and one 24″ piece of embroidery floss.

2. Leaving a 10″ tail, tie one of the 32″ pieces of floss under the first ball of both chains.

3. Wrap floss around chain downward and diagonally in one direction.
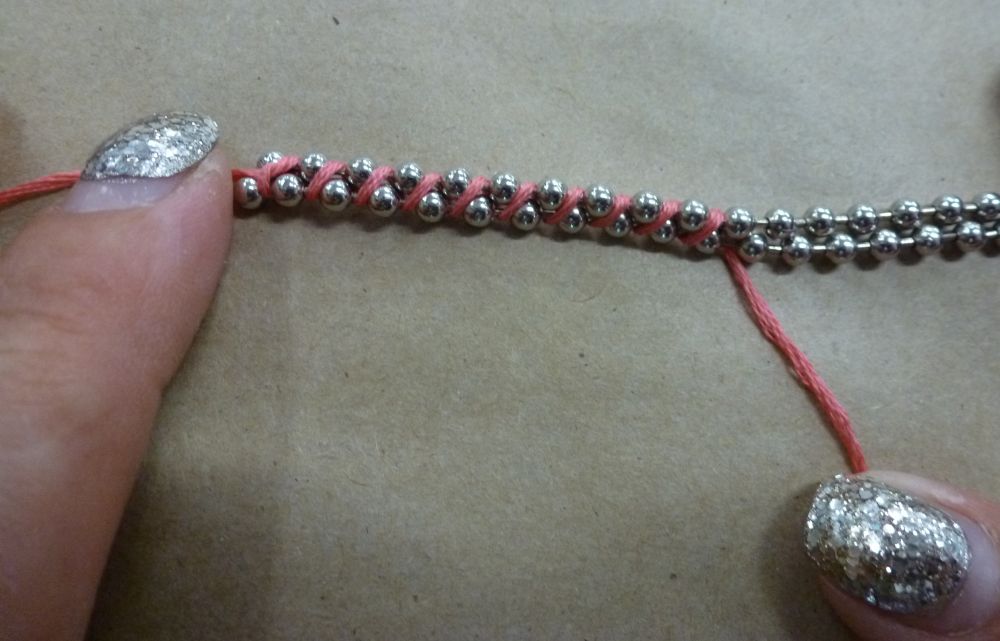
4. Continue all the way to the bottom and knot the floss above the last ball of both chains. Your chain will end up a little twisty after this step. Never fear – this will be remedied soon!

5. Starting at the opposite end from where you started in step 2, tie the second 32″ piece of floss (again leaving a 10″ tail) around both chains under the first ball. Wrap around both chains in the opposite direction from step 3.

When you’ve wrapped all the way down the chain, you’ll see that it’s flattened out from the previous step.

6. When you’ve finished, take both tails from each side and cross them.

7. Take your 24″ piece of floss and fold it in half. lay this under the crossed tails of your bracelet.

Tie a knot around the bracelet tails.

8. This next step will be familiar to those of you who have made hemp bracelets before.
Cross the left strand over the tails and under the right strand.

Cross the right strand under the tails and bring it up through the loop created by the left strand. Pull tight.
Now, reverse the process – Cross the right strand over the tails and under the left strand. Cross the left strand under the tails and up through the loop created by the right strand. Pull tight.

Repeat these two knots five times each, so you have ten knots.

9. Tie the ends together and trim. Optional: Put a dot of glue on the knot to keep it from unraveling.

10. Cut excess tails to the desired length so it can fit over your wrist. Tie knots in the ends of the tails and trim.

Finished!
Variations:


You can use either big ball chain or little ball chain for this project. You can also try making this bracelet with thin hemp or Chinese knotting cord for a different look!
Thanks to Rebecca for once again being a wonderful hand model, and to Victoria for taking the pictures. Don’t miss a single riveting tutorial! Bookmark our tutorial page and check back on Tuesdays for new ones.
Is there a tutorial you want to see? Leave a comment!

My daughter wanted a flower pot to be used as a card box for her recent wedding. Her theme was sunflowers and the wedding was to be held outdoors so I told her I would come up with something appropriate.
First I found a large plastic flower pot that would hold several cards plus leave room for the necessary hardware.

I cut a circle out of 1/4″ plywood, just large enough to cover the hole in the top of the pot.
Then I built a wooden framework inside the pot to support the top as well a hold a plastic pipe for the flower stems.

I made every effort to leave lots of room for the cards, so I kept the framework toward the back rather than in the center of the pot.
Concerned about the tippyness of the finished pot with flowers, I searched for something to weigh it down. Some old dumbbell weight plates were just right.

I attached the plastic pipe to my framework using a couple screws as well as some plastic zip ties. The top of the pipe would sick up just above the top of the plywood top when done. First I needed to make a hole in the plywood top. I used some carbon paper to mark where the hole needed to be and drilled it.

I also cut a slot for the cards to be inserted and I glued some magnets to the underside of the top to act as latches.
Some washers were screwed to the framework for the magnets to latch on to so the top wouldn’t move around.

A sheet of moss completed the top but I was afraid nobody could tell it was a card box. I added some molding on either side of the card slot and painted it yellow to go with the sunflowers.

All that was left was to cut the sunflower stems to a proper length and I was done.
I think the finished box turned out pretty well and it fit perfectly with the wedding theme.


We have just received three new activity kits for kids ages five and over: Paint Your Own Russian Doll Trinket Boxes, 3D Art and Sock Puppet Monsters.


First up, Paint Your Own Russian Doll Trinket Boxes. This kit makes six Russian-nesting-doll-style trinket boxes with lids. The smallest is just under an inch; the largest is over three inches. This kit contains six ready-to-paint boxes, six paints, paint brush and instructions.


Create patterns with the 3D Art spiral drawing tool, then look at your designs with the included 3D Glasses to see them pop up from the page. The kit contains a spiral tool set (one rectangular and five circular plates), a pair of 3D glasses, a felt-tip pen, a 16-page book of special 3d drawing paper, a 3D poster and instructions.


And last (but surely not least) is the Sock Puppet Monsters kit. Everything’s better with monsters, and now you can make your own monster sock puppets with this kit. There are enough pieces in this kit to make two sock puppets – two fuzzy socks, four googly eyes, a plastic yarn needle, four colors of yarn, a cardstock sheet of monster parts, double-sided tape and instructions. Also included are a cardboard scene and script for your first puppet show!

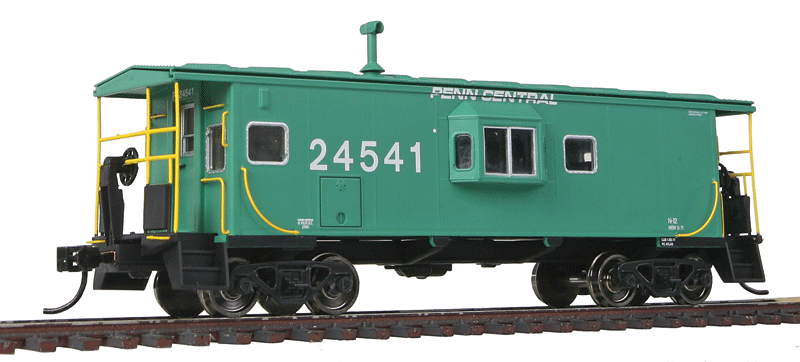
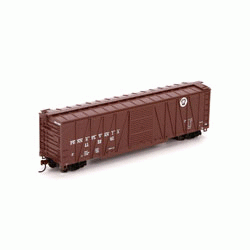
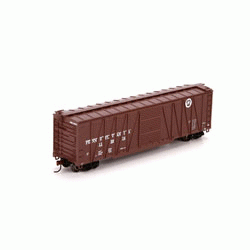
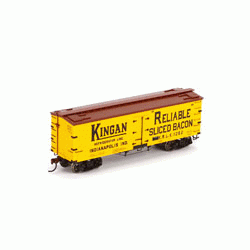
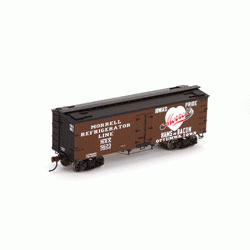
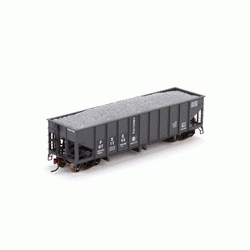
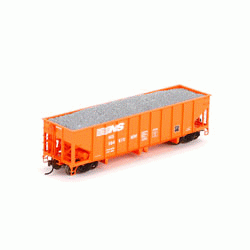
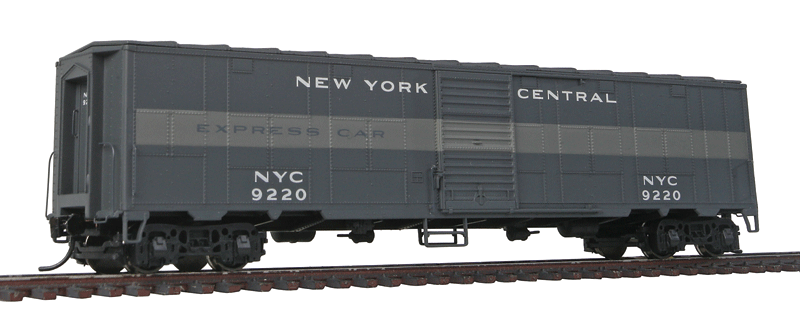
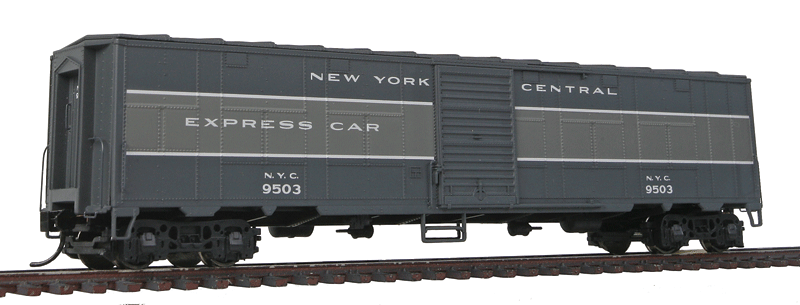
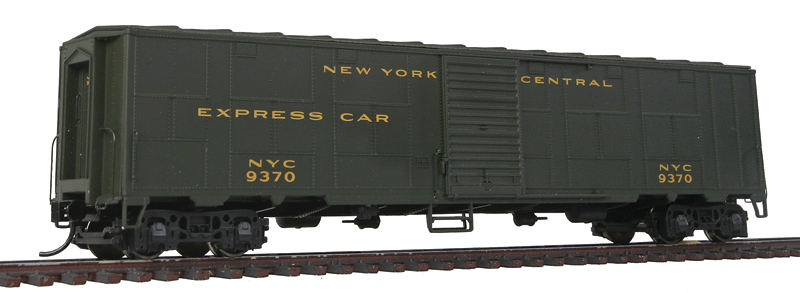
Every month we continue to receive shipments of new rolling stock for our expanded Model Railroad Department. Here are some of the recent HO scale additions:
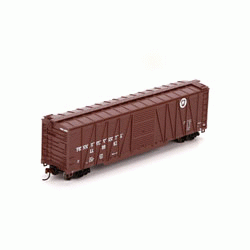
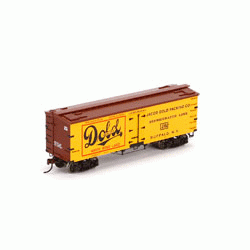
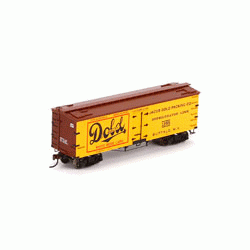
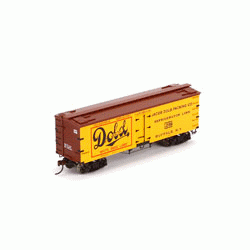


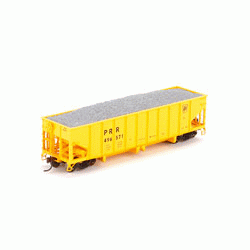
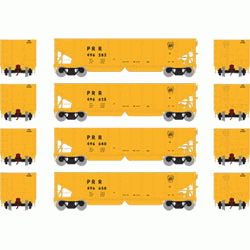
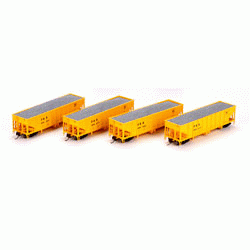
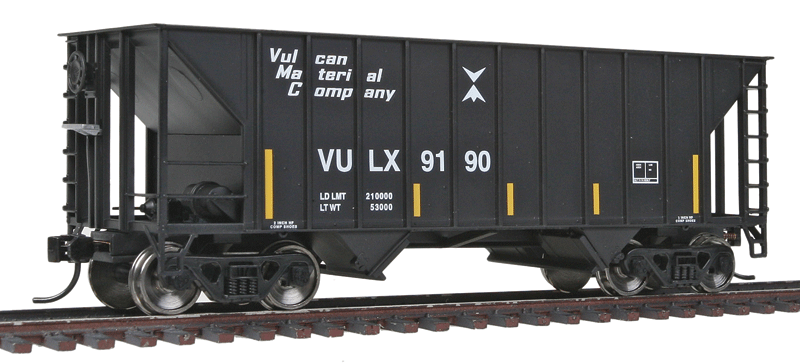

These are the latest additions to our HO Scale Train Buildings:


Stop in today to see our complete selection @DansCrafts
#Dan’sCraftsAndThings #Trains

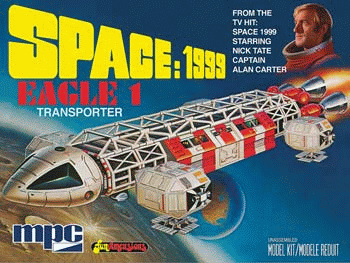
Here are a few of the new plastic model kits we’ve received lately:


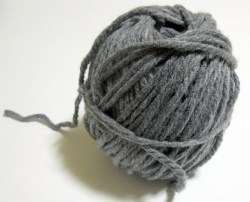
Happy Tuesday and happy Christmas Eve! By now, you’re probably done with making your Christmas presents (or hurriedly finishing up!). But what do do with all those half-full balls of yarn you have when you’re done? Today, I’ll show you how to wind a center-pull ball of yarn without tools!

Start with a half-used ball of yarn left over from your last project. This is Bernat Softee Chunky left over from one of my Christmas projects.

Leave a 6″-8″ yarn tail, tucking it under your thumb.
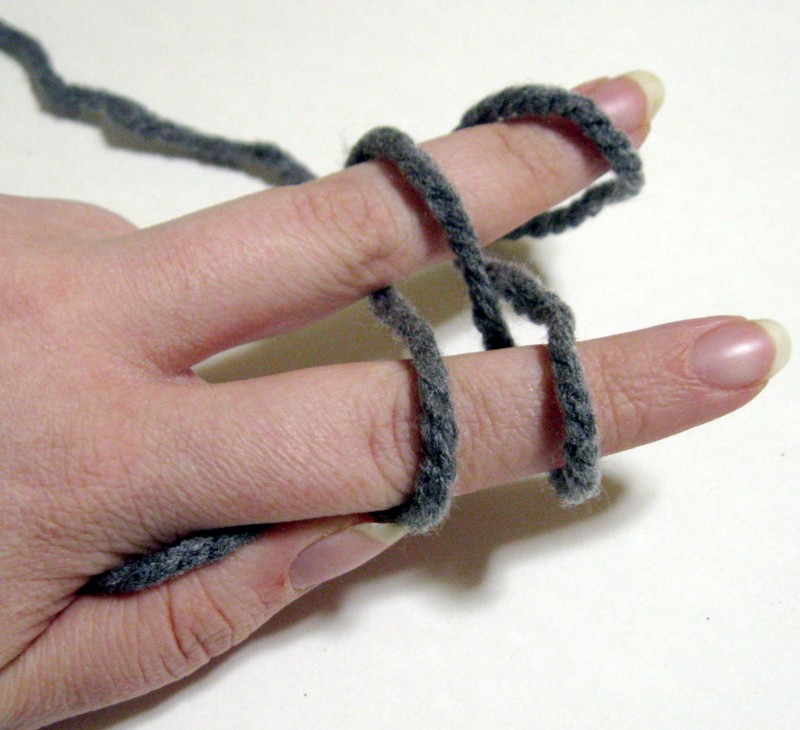

Wind the yarn around your middle and index fingers in a figure-eight.


Pinch the yarn between your thumb and index finger. Fold in half, and hold the folded yarn with your thumb, index and middle fingers.
Wrap the yarn around all three fingers, over the whole length of the folded yarn.

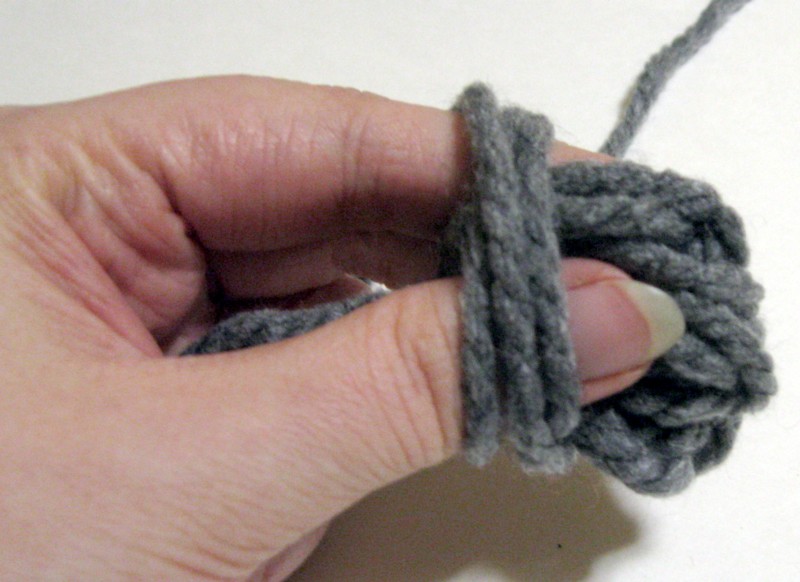
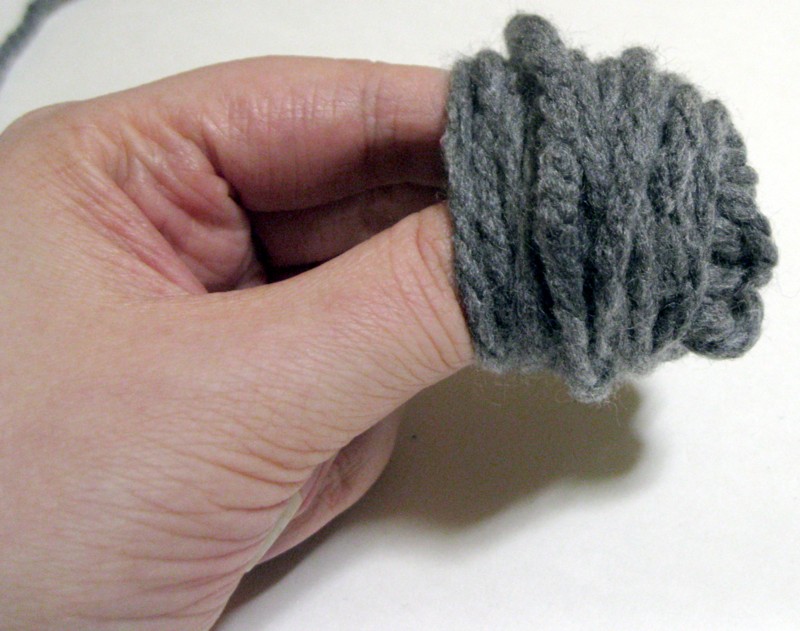
Take the yarn off of your fingers and put your thumb inside.


Wrap the yarn diagonally around the ball on your thumb. Don’t wrap the yarn too tightly. Occasionally, remove your thumb from the ball and pull the yarn tail out.

When you only have a little yarn left, wrap it around the middle of the ball, tuck the end under and pull tight.
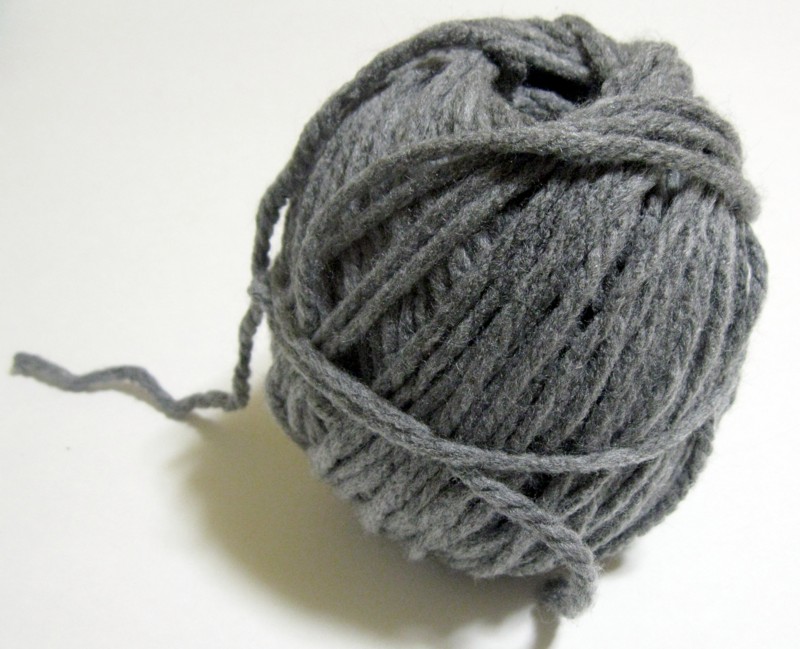
Finished!
Don’t miss a single riveting tutorial! Bookmark our tutorial page and check back on Tuesdays for new ones.
Is there a tutorial you want to see? Leave a comment!
